Rustic Bridal Shower Brunch

I can't believe my baby sister is getting hitched in just a few short weeks, y'all! She's tying the knot in the cutest little barn up in the north Georgia mountains, so of course it was only fitting to throw her a rustic bridal brunch full of sweet southern charm.

Remember my window panes from this post?

I just keep finding ways to use them!

And of course, me (left) with the bride (right)..

The final countdown is on...here's to a lifetime of love!


Game Night Cupcakes

Call me crazy, but I love....I mean loove themed parties!

Just the thought of dreaming up decor, food and activities around a fun theme is enough to keep my brain swirling for hours. So when our Just Married's Small Group decided to do a Board Game Night for our first social, I was all over that junk like white on rice. I couldn't help myself!

My focal point for the snack bar wound up being cupcakes. If you've know me for more than five minutes, this is not a surprise to you. In fact, I'm seriously contemplating petitioning to have cupcakes become an official food group.

That way at least i'll feel better about myself when i'm eating them for breakfast.

Anywho, I digress...let me tell you about the easiest theme-related dessert you'll ever make: dice cupcakes!

I originally saw the idea on Pinterest where someone had made some adorable fondant dice for cupcake toppers. So cute, but let's be honest...ain't nobody got time for that.

So I figured out a faster, cheaper option...sugar cubes!

I enlisted my awesome hubbs to help me make the dots on the die with edible ink while I made and frosted the cupcakes. Here's how you do it:

1. Bake and frost your favorite cupcakes...any flavor, any frosting - the possibilities are endless!  (Note: I would recommend piping the frosting on though, just to give it a stylish look, and create a "platform" to sink the dice down into.)

2. Buy these cheap and easy sugar cubes at any local grocery store.

3. Find an edible ink pen for the numbers on the dice (I found mine at Michael's Arts & Crafts). I used these Wilton Edible Ink Pens, they worked great!

4. Display them in a fun way...because let's be honest, it's all about the presentation.

5. Game on. Eat as many as you can without them going straight to your hips.

Life is always sweeter when there are cupcakes involved. Enjoy!


DIY Mason Jar Wedding Favor Treats

I have an entire drawer full of all the cutest wedding favors I've ever received...

...said no one ever.

Let's be honest - most wedding favors don't even make it out of the car on the way home. They either get left at the reception, or they're in the next round of things you toss in the garbage can when you're bored at the gas pump and decide to start cleaning out the trash in your car. I am well aware of this rule.

Even so, at our wedding I wanted to do a simple an inexpensive favor that made each place setting feel a little more personalized (and tied to our theme). A sweet treat they could actually enjoy at the reception (if they wanted to) and not feel like I wasted a ton of time when they were tossed later. And bonus: lots of people use mason jars at home, so these bad boys are reusable...they make a great traveling jewelry jar for the nightstand! 

Here's how I made them:

Step 1: Do a little research. 

You can find Mason Jars everywhere...and I mean everywhere. They even have them by the case at Publix! We did tons of online research and found them really cheap on several websites...however the shipping wound up being almost three times the cost of the actual jars! Crazy. 

We landed on wanting the 4oz Ball Mason Jars, and we found a great deal through Ace Hardware, of all places. They were $9.99 for a case of 12 online, and even better...they ship them FREE to a local Ace near you, all we had to do was swing by and pick them up!

ball-mason-jars-4oz

ball-mason-jars-4oz

Step 2: Printable Labels.

We found the perfect printable labels online as well, from a company called lablesbythesheet.com. They were super cheap (less than .75 per page) and they have a ton of online templates you can dowload directly into Microsoft Word to design and print...it was super easy!

For a 4oz jar, we needed the 2 inch diameter round labels. We chose ivory, but there are other colors available. You can find those labels here: 2in Round Labels.

See how nicely they fit?

Mason-jar-favor

Since the free template downloaded into Word, I just created the text from there. You don't have to be a super-pro designer to do this, either! There are all kinds of free pretty script fonts that you can download...two of my favorite font websites are dafont and Scrap Village.

Our name logo at the bottom I did design in Photoshop using some of the free fonts, however if you don't have Photoshop or don't know how to use it, you can still create something similar! Back in the day when I was just experimenting with designing things, I would actually create them in Power Point. You laugh, but it totally works.

Because the paper margins are square and the labels are round, I did have to print a few test sheets onto plain paper to make sure the text I inserted didn't get cut off of the label. Be sure to do this before you send all of your labels through the printer!

Step 4: Fill them with yummy goodness!

My two accent colors for the wedding were dark purple and green, so I knew I wanted to use those for a pop of color on the gray linens. I ordered Jelly Bellies in bulk...in just those two colors so that I didn't have to spend days upon days eating, I mean sorting candy. I ordered those here: Bulk eCandy

Step 5: The finishing Touch.

To finish them off, I took two pieces of the Dollar Store raffia and wrapped them around the lid, tied them in a double knot and cut off the excess. Volia! Finished product:

Photo: http://sugarsnapatl.comDon't they look cute on the tables? I think they give it that extra touch.
wedding-favors

That's it! What's the best favor you've ever received? Or maybe that actually made it home...


DIY Wedding Bouquets for under $350

Photo: www.sugarsnapatl.com

When it comes to weddings one of the most beautiful, yet most expensive budget line items always winds up being flowers. You wouldn't believe some of the quotes I got from florists, just for the bouquets alone, mind you (we're not even talking centerpieces, decor, etc). I literally could have funded our entire honeymoon with what some were asking. (hmm...sit on the beach and sip fruity drinks with my love, or have pretty flowers that will last about 3.2 days. Yep, that was a no brainer)

Photographer: Sugar Snap Photography

Photographer: Sugar Snap Photography

But the good news is, with a little elbow grease and some creativity, I made my own bouquets for about a third of the price, AND I got to sit on the beach without feeling guilt for the money I was throwing down the drain for flowers! Winning!

Here's what I made:

1 Bridal bouquet

9 (yes, NINE) Bridesmaids bouquets

2 Mothers mini-bouquets

4 Grandmothers mini-bouquets

2 Ceremony floral arrangements

Rose Petals for the flower girls

And do you know how much that all cost me (including supplies and ribbon)? A whopping $345.64! And guess what, they were just as beautiful as the bouquets I had picked out in the magazine...I couldn't have been happier!

Photo: Sugar Snap Photography

Photo: Sugar Snap Photography

Here's how I did it:

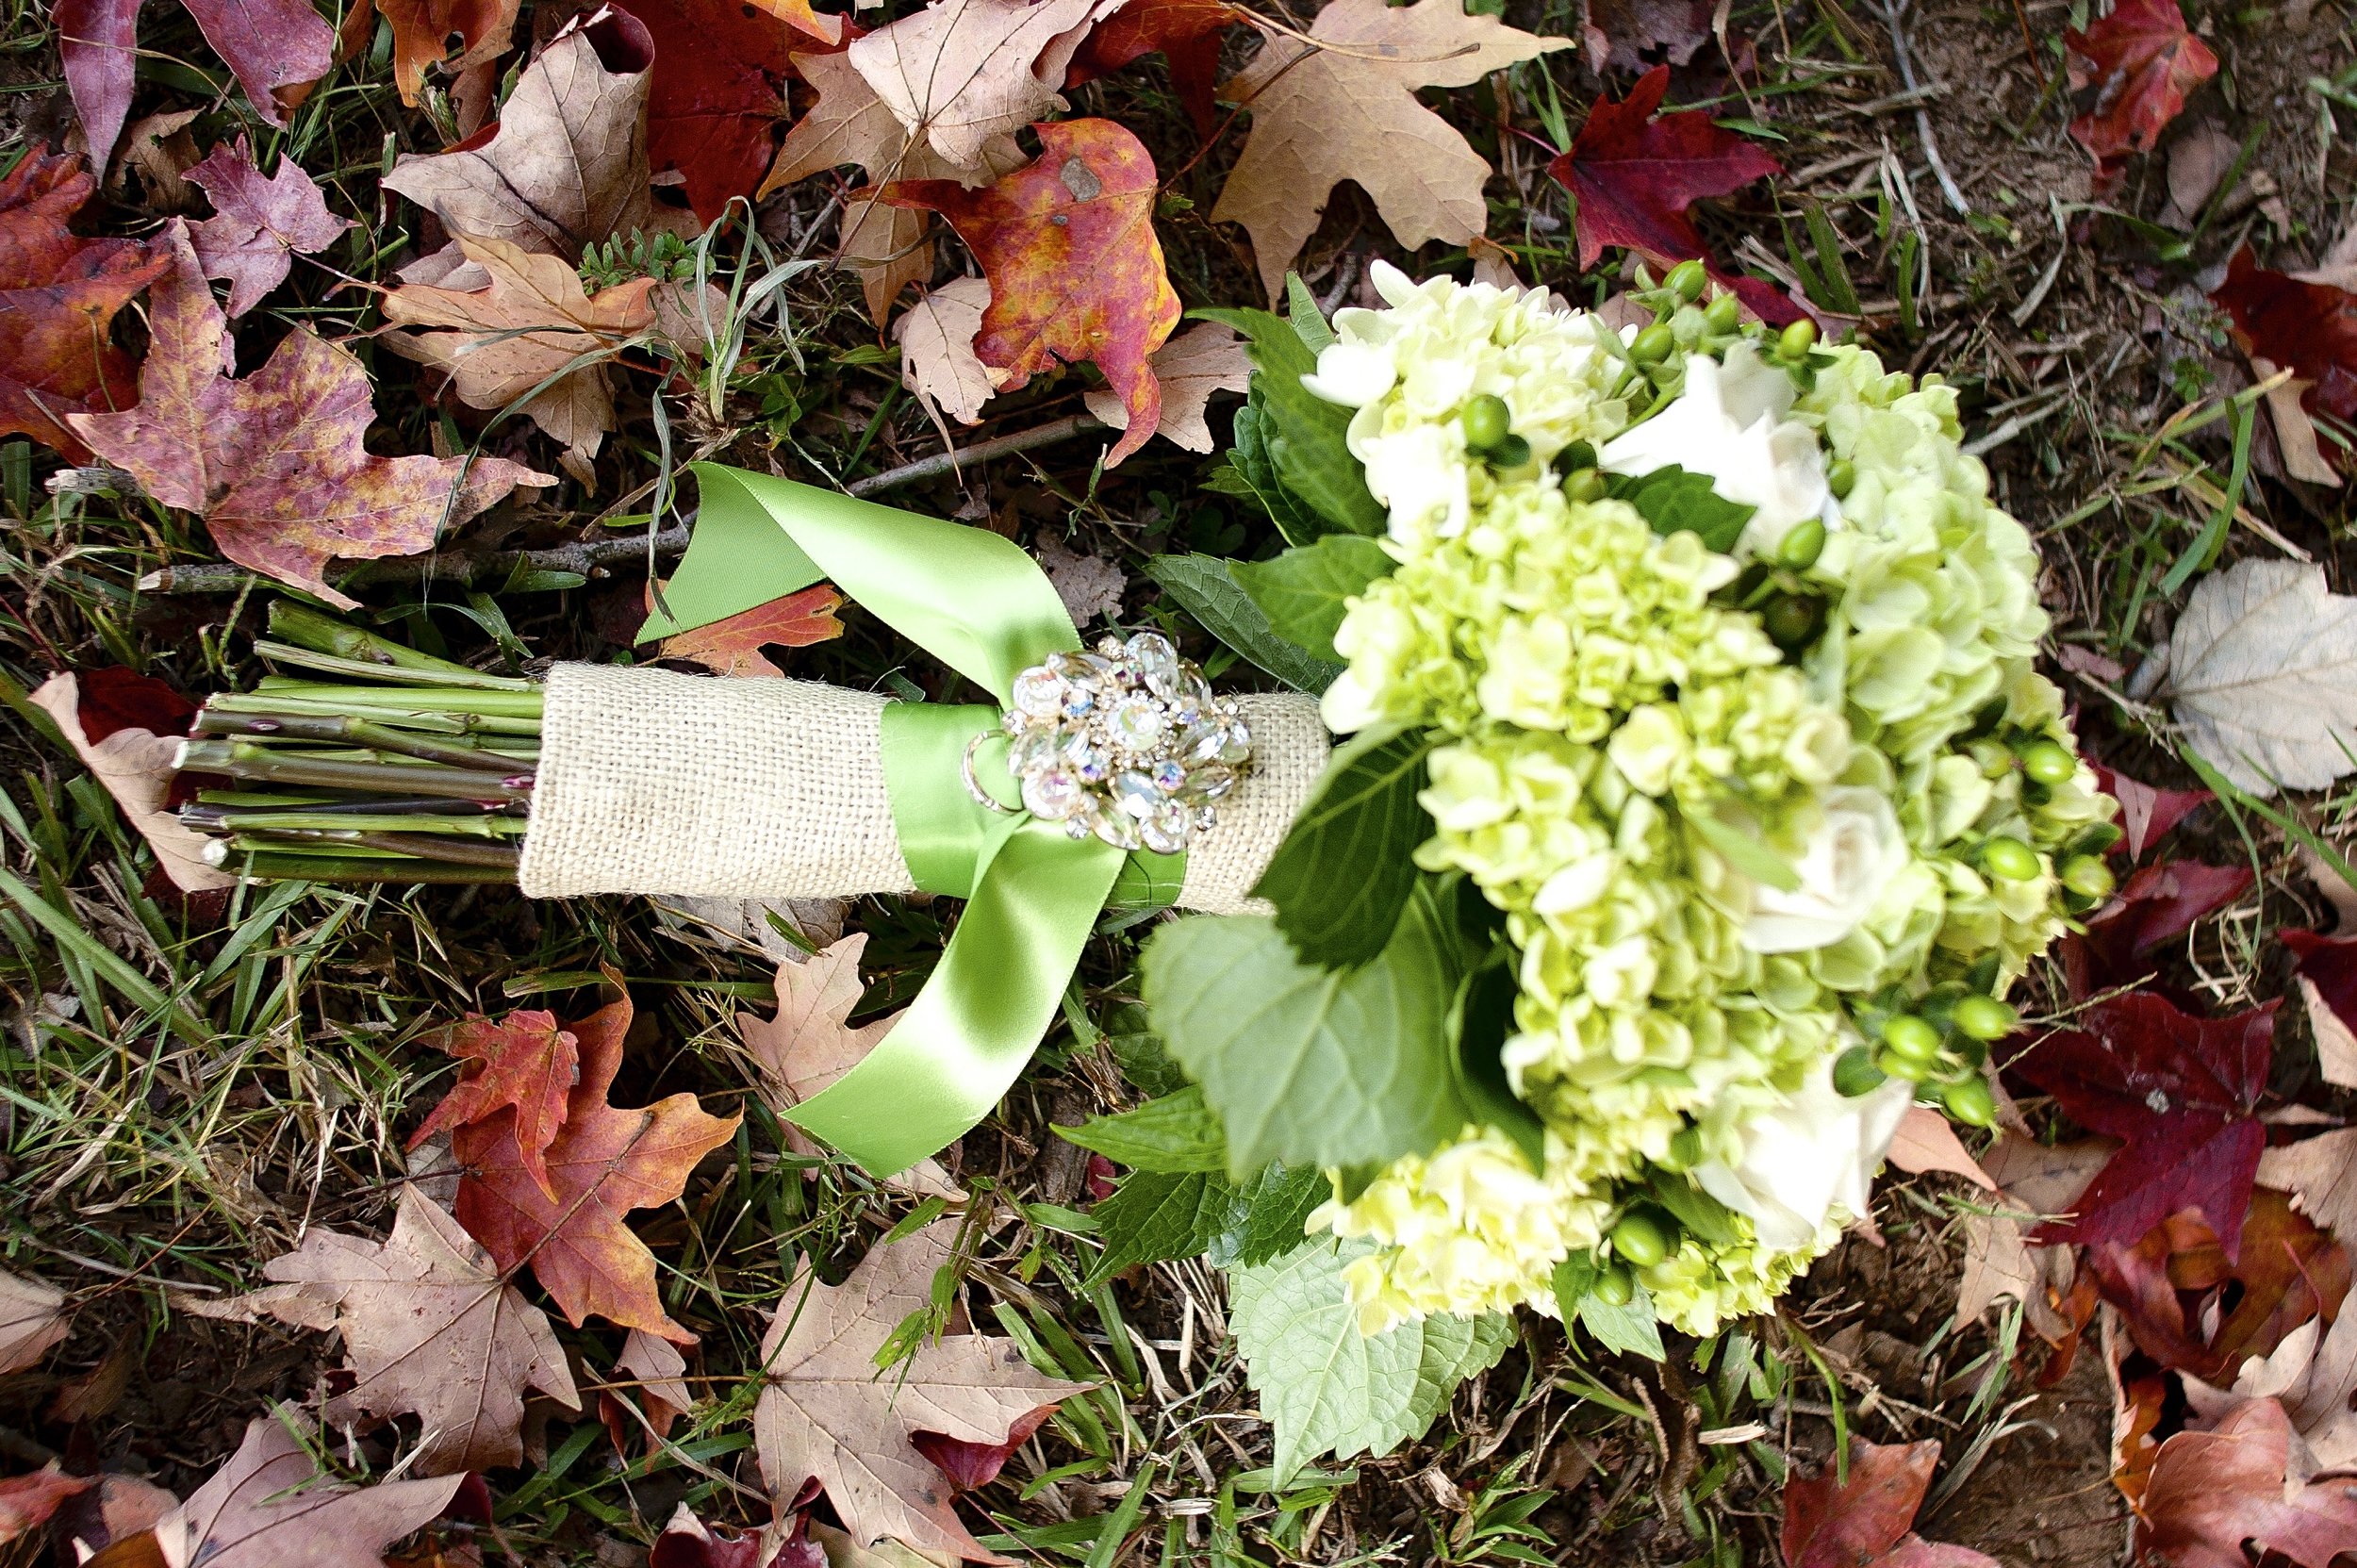
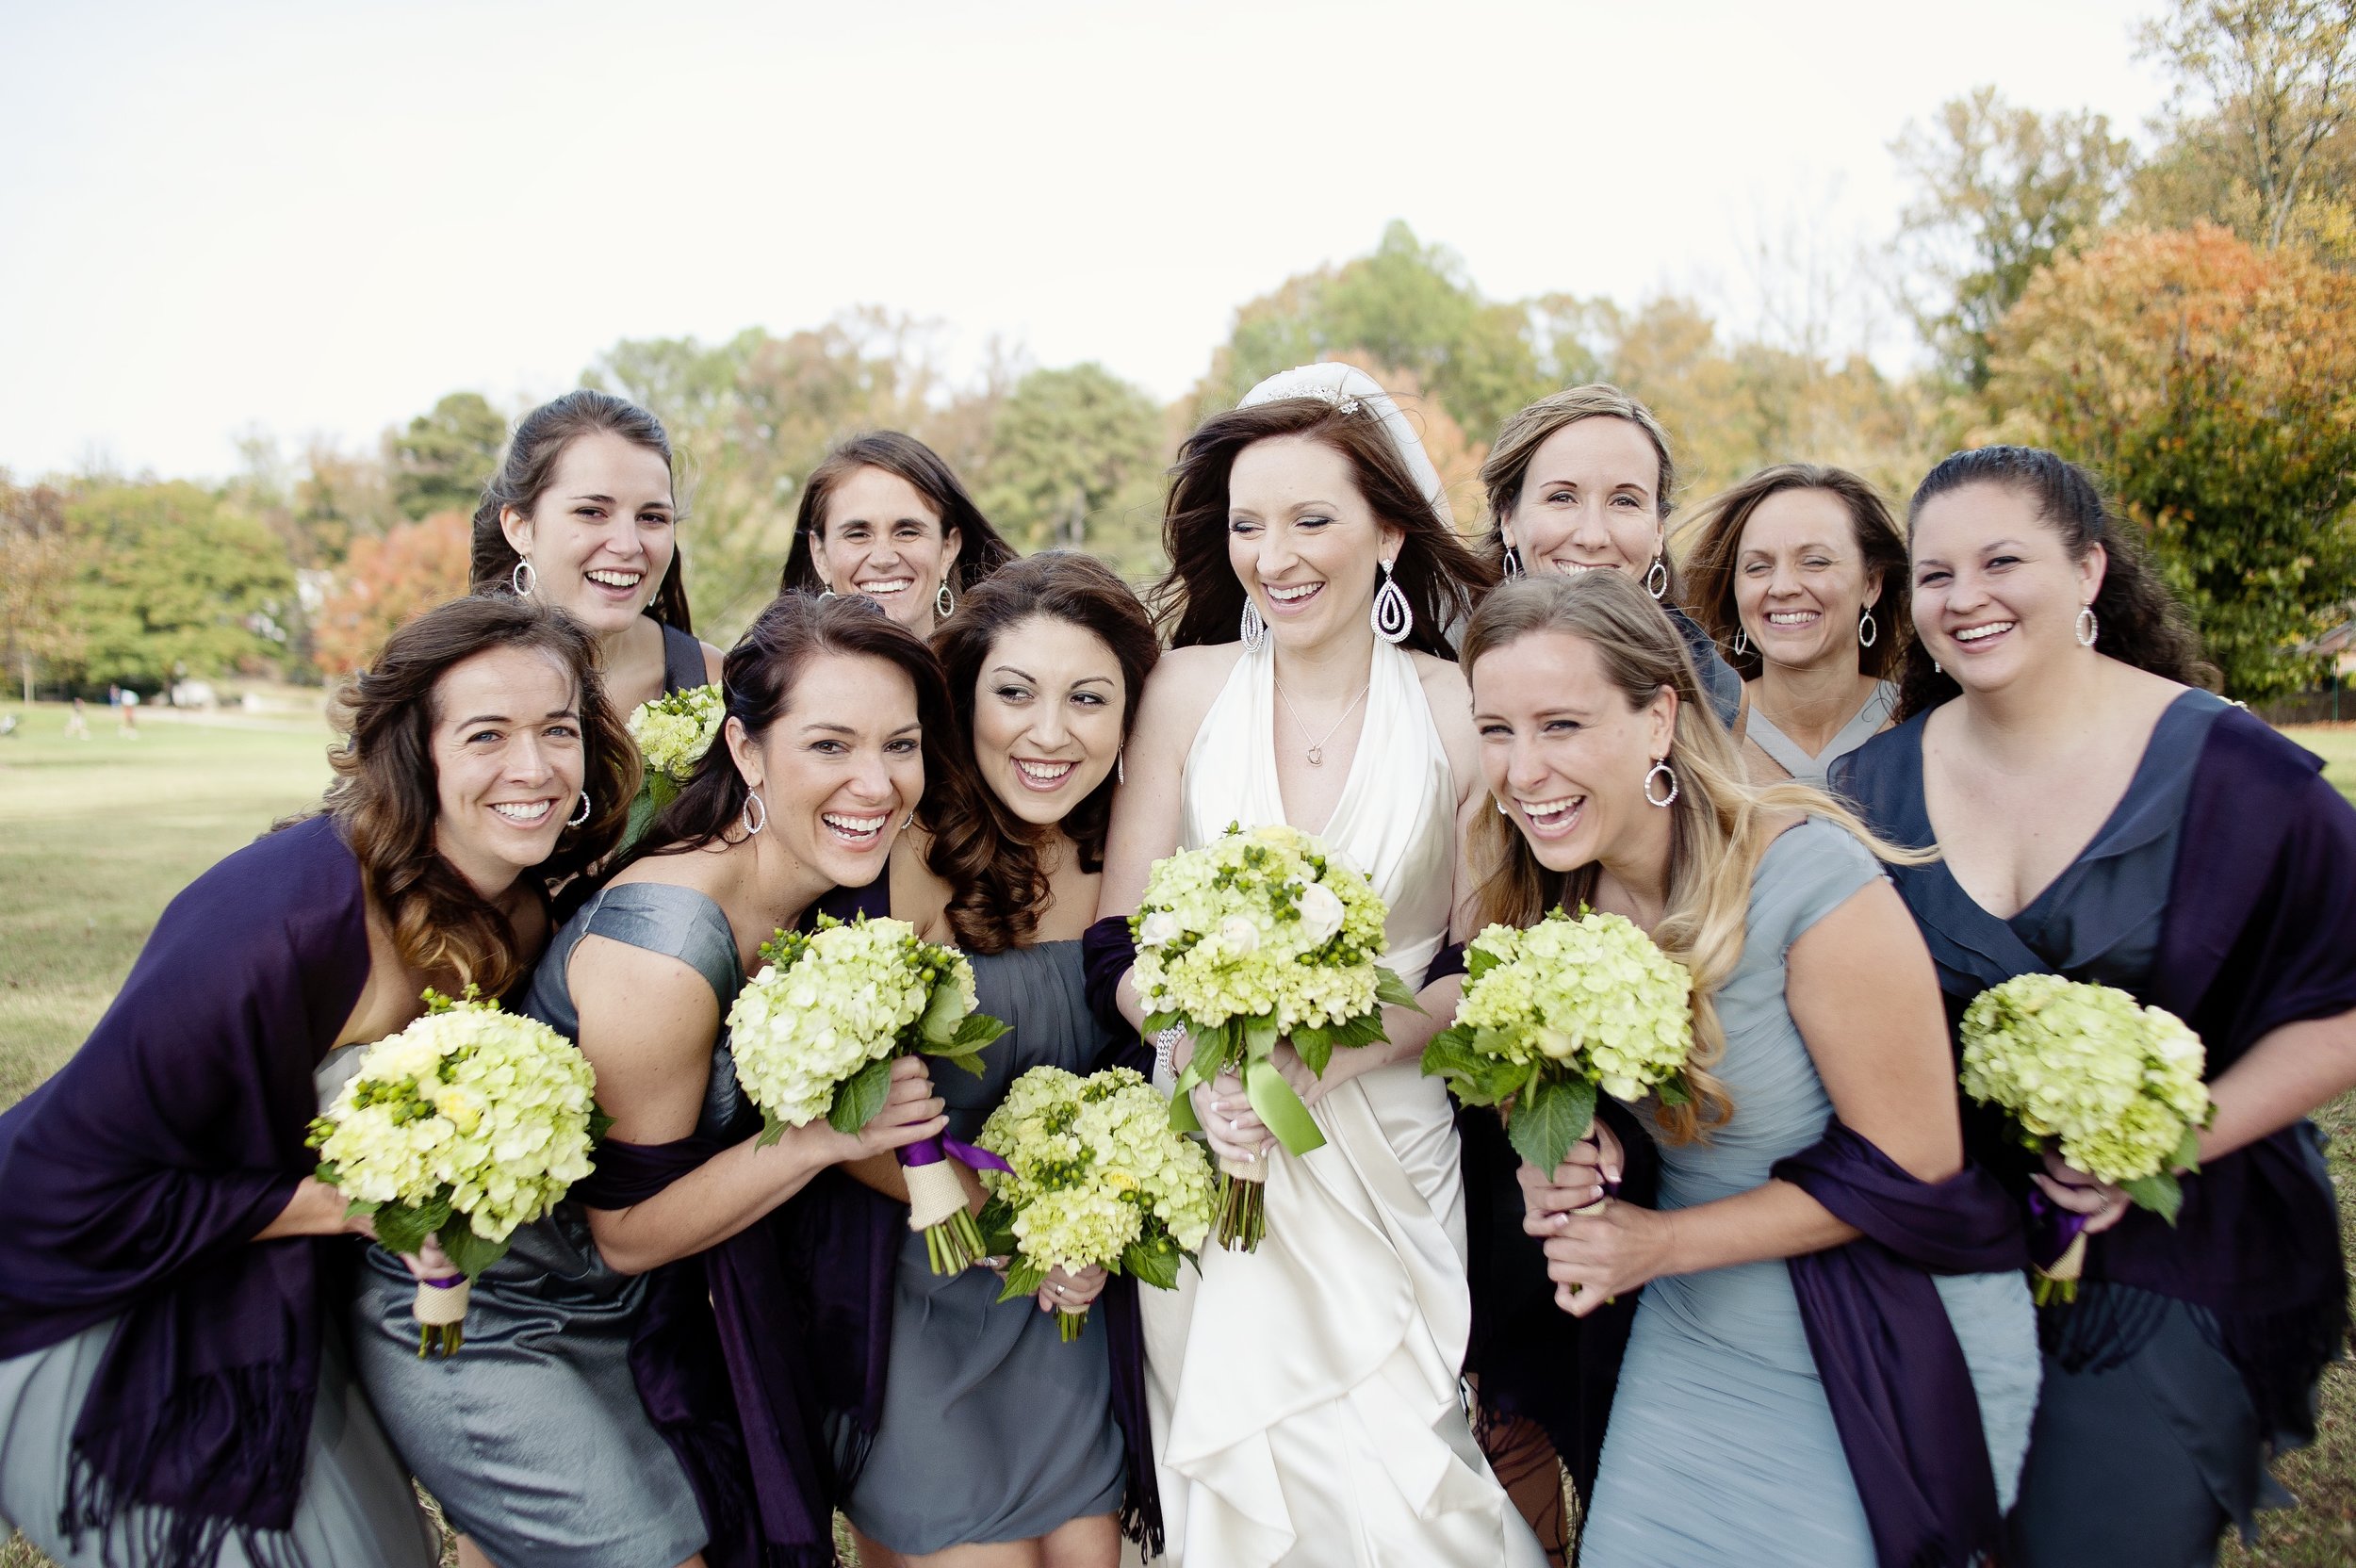
I first spent days looking online to get an idea of what type of flowers I wanted. I knew I wanted to include hydrangeas in my bouquet because not only are they beautiful, but they are very full...so a little goes a long way in making a bouquet look bigger with less flowers to purchase. I love roses, so I knew I wanted to include a few of those as well. And I knew I wanted my bouquets to be round and a pop of green (to match my shoes and my color scheme of gray with dark purple & green accents).

I went to the Sam's Club website and here is what I ordered:

Lime Green Hydrangeas (30 Stems)

Green Baby Hydrangeas (40 Stems)

Green & White Roses (125 Stems)

Green Hypericum Berries (100 Stems) Note: I loved the added depth these surprisingly gave the bouquets!

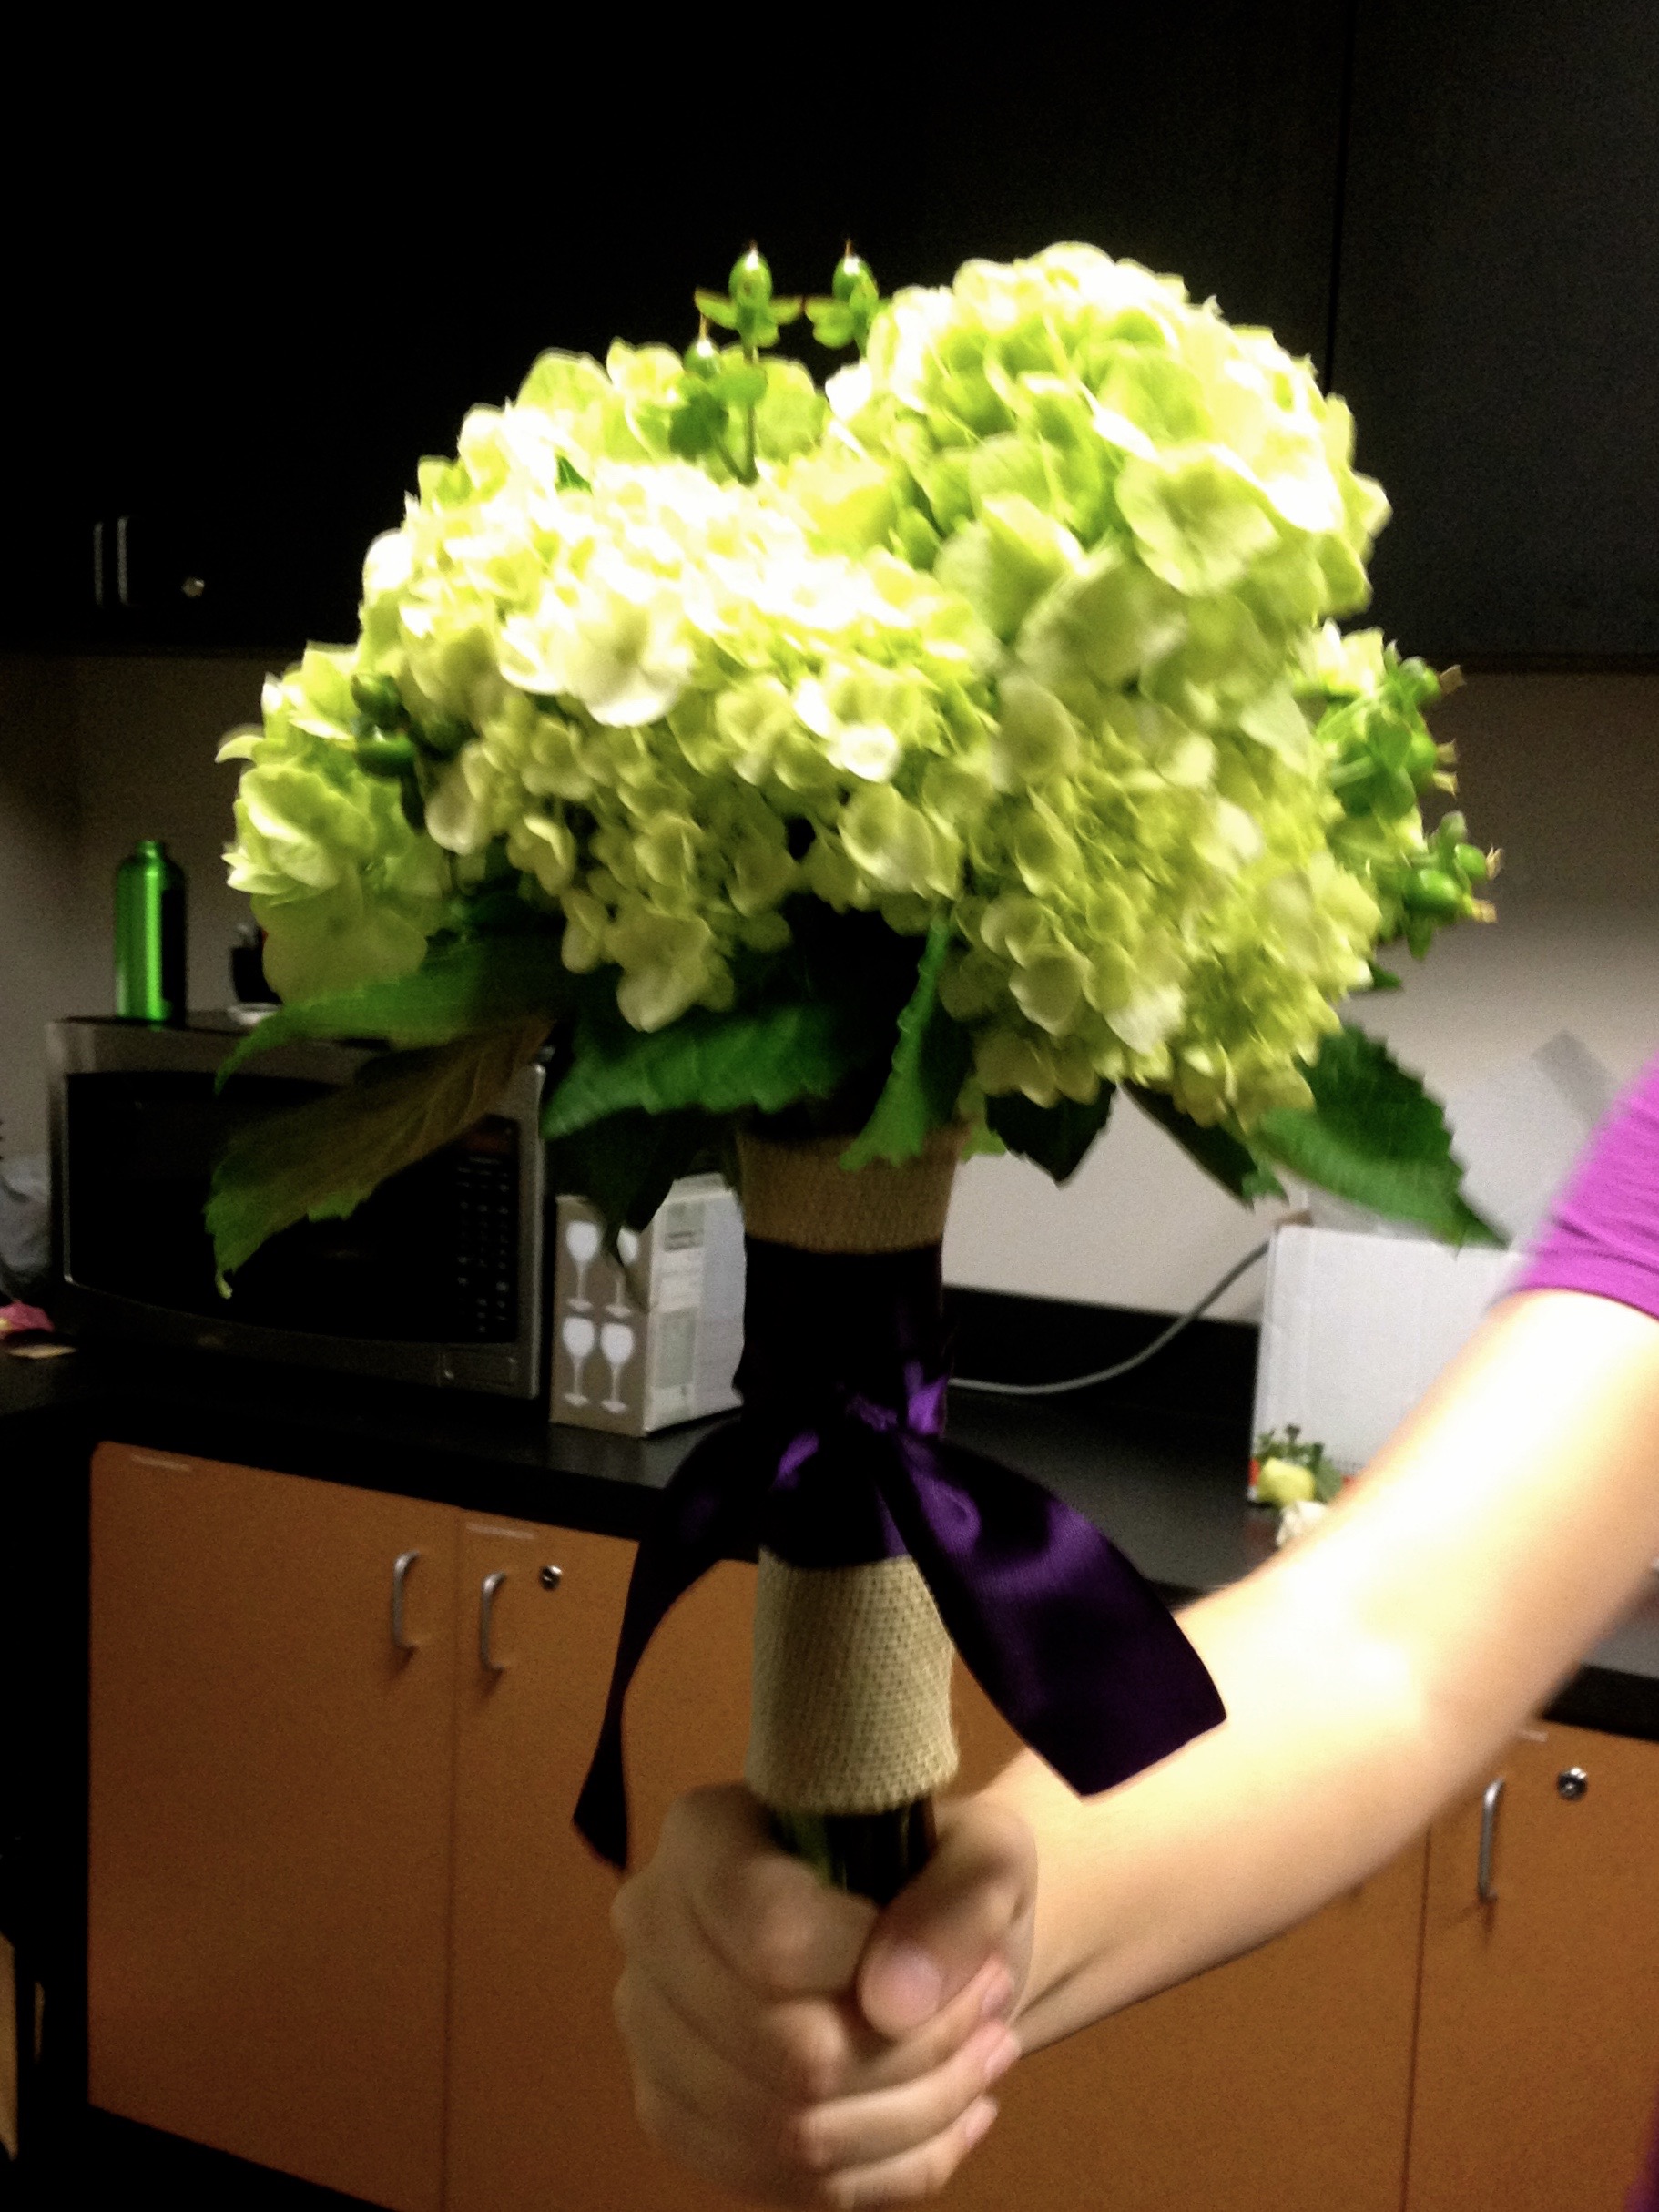
The total for all of the flowers came to about $326 (and BONUS: Sam's Club had FREE shipping!). Then I spent about $20 on green floral tape, burlap and ribbons. I would recommend ordering the flowers so that they arrive by Thursday for a Saturday wedding. That gives you a day to receive them, clip and put them in fresh water (as soon as they arrive...this is important) and still be able to make them Friday morning while having the rest of your day to enjoy the rehearsal, rehearsal dinner & wedding without having to feel rushed! This also gave us a buffer for shipping error...which happened to be a great thing, because my roses were delayed a day due to a hurricane! Yikes!

Once you receive your flowers, clip them, and let them drink some water over night (they travel a long way, those puppies are thirsty when they arrive!), here are the other supplies you'll need:

Green Floral Tape (I used about 2-3 rolls for 10 bouquets)

Burlap

Ribbon of your choice

Glue gun

Floral clippers

Clear plastic rubber bands (they help hold the bottom of the bouquet together where you want it while you wrap with floral tape)

An extra pair of hands to help hold the bouquets while you wrap is super helpful.

I started with the bridesmaids bouquets...I had 9 to make, so I knew they'd take the longest! Here are the flowers I used for each of these bouquets:

3 large hydrangea stems

2-3 mini-hydrangea stems

4 green roses

3-4 hypericum berries

I stripped the leaves off of all the flowers except the large hydrangeas...I used those as the "base" greenery around the bottom of the bouquet. Once you arrange the bouquet in your hand how you like it, place a clear plastic rubberband at the top of the stems (about where you want to start your tape...leave a small space at the top to see a little bit of the stem) and one at the bottom, where you will end your tape. Have someone else hold the bouquet while you wrap the stems tightly with floral tape and secure. (this tape is sticky, so it will stick to itself...no need to glue it down)

bridesmaids-bouquet-hydrangeas

Once your'e done with that, place the bouquet in water and set aside. Note: It was easier to do this process for all the bouquets first, then add the burlap and ribbon together as the last step, because the floral tape will leave your hands sticky!

Next I made the bridal bouquet:

5-6 large hydrangea stems

3-4 mini-hydrangea stems

8-9 white roses

5-6 hypericum berrie stems

I basically did the same procedure as the bridesmaids bouquets, I just made mine slightly larger, and used only the white roses (instead of green ones) to make it look a little different. I used green ribbon with my bouquet to match my green shoes, and on the bridesmaids bouquet I used dark purple ribbon to match their shoes.

bridal-bouquet-diy
Photo: Sugar Snap Photography

Photo: Sugar Snap Photography

The mother's & grandmother's mini-bouquets were basically smaller versions of the bridesmaids bouquets with 3 roses, 2-3 mini-hydrangea stems and 2-3 hypericum berries...sadly I couldn't find a picture of those - sorry!

Once you've got all of your bouquets assembled, it's time for the burlap and ribbon. We cut a piece of burlap just slightly larger than the width of the floral tape around the stems, and left room to fold down the top and bottom sides (so that the edges were smooth and not jagged).  Fold down the top and bottom edges of the burlap, wrap around the base of the bouquet and secure with one line of hot glue (be careful not to burn yourself!) you'll need an extra pair of hands for this process as well to get it tight and secure.

After the glue dries, tie the ribbon of your choice around the center, where the tie will face outward. I chose to tie mine in a knot, you can do a bow as well...it's totally whatever look you prefer!

bridesmaids-bouquet-purple

For an extra touch of glam, as well as my something old and borrowed, I added a beautiful brooch from one of my grandmothers, and underneath it, I tied my other grandmother's original wedding band. They looked beautiful and made my bouquet extra special...I felt like I was carrying them down the aisle with me!

Photo: Sugar Snap Photography

Photo: Sugar Snap Photography

Once you're done with your bouquets, be sure to store them in a vase with water and also in a cool place - hydrangeas are absolutely beautiful, but they do wilt easy...keep them cool!!

And that's it, beautiful bouquets for about a third of the price... I couldn't have been happier with the way they turned out and the money we saved!

Photogapher: Sugar Snap Photography

Photogapher: Sugar Snap Photography

Photographer: Sugar Snap Photography

Photographer: Sugar Snap Photography

Photo: Sugar Snap Photography

Photo: Sugar Snap Photography

Hope this helps for any brides who are toying with the idea of doing  your own bouquets...please feel free to comment below with any questions! Happy arranging!

Photos Courtesy of : Sugar Snap Photography


Disclaimer: Post contains some affiliate links.