


This cake looks almost good enough to eat!
(but I wouldn't recommend it)
Earlier this week I showed you our fabulous "Ready to Pop" themed baby shower (click HERE to download our FREE Ready to Pop party printables!), now I'll show you a simple tutorial on how to make the beautiful diaper cake we used as the centerpiece for our food display. Diaper cakes are a great way to dress up a practical gift, and if you decorate in the colors of the party, they can also become a beautiful focal point of the shower decor.
Some might say they pull double doody....er, I mean duty. Ahem.

Let's start out with the supplies you'll need:I made this whole diaper cake for less than $30, simply by shopping smart and utilizing some supplies that I had around the house. When you know you're going to be making one of these in the near future, start collecting empty toilet paper rolls (these can be used for other fun crafts as well) and an empty wrapping paper roll. I use the empty wrapping paper roll as the "base" of the cake, to help hold everything securely in place. It helps the cake transport easily without falling apart and keeps everything centered.
With the exception of the diapers, I found all of my supplies (cake plate, ribbons, flower, crinkle paper) all at Michael's...so it really was a one-stop-shop kind of project. PLUS I used my Michael's iPhone app for a coupon and saved some money!

STEP 1: Cut down your wrapping paper roll and glue it to the center of the 12" cake plate.To cut down the wrapping paper roll to the right size I took the three toilet paper rolls and laid them on the floor one on top of the other (to form a tower), then laid the wrapping paper roll beside it and marked it about 1/2 inch shorter than the length of the three rolls (so that it wouldn't stick out the top).


NOTE: You might ask why I didn't just use a paper tower roll since they're similar in height - the problem with paper towel rolls is that they are generally the same diameter as toilet paper rolls, making it hard to slide one onto the other. I have found that wrapping paper rolls are generally smaller in diameter and work perfectly. And bonus...they're long enough that you can cut it and get TWO cakes out of one roll!Jackpot! While the glue on the base is drying, you're ready to start assembling your layers. This is where you bust out the diapers and take a good whiff because they smell incredibly of fresh clean baby. (ahhh). I used Pampers Size 2 Swaddlers that I got from Buy Buy Baby at 2 packs (72 diapers) for around $22...not bad! I've found that this size diaper is the perfect size for the cake, and it allows the mommy to enjoy the cake on display in the nursery for a little bit after the little one arrives (if she chooses) without having to take it apart in the first week for the newborn size diapers she'll need.
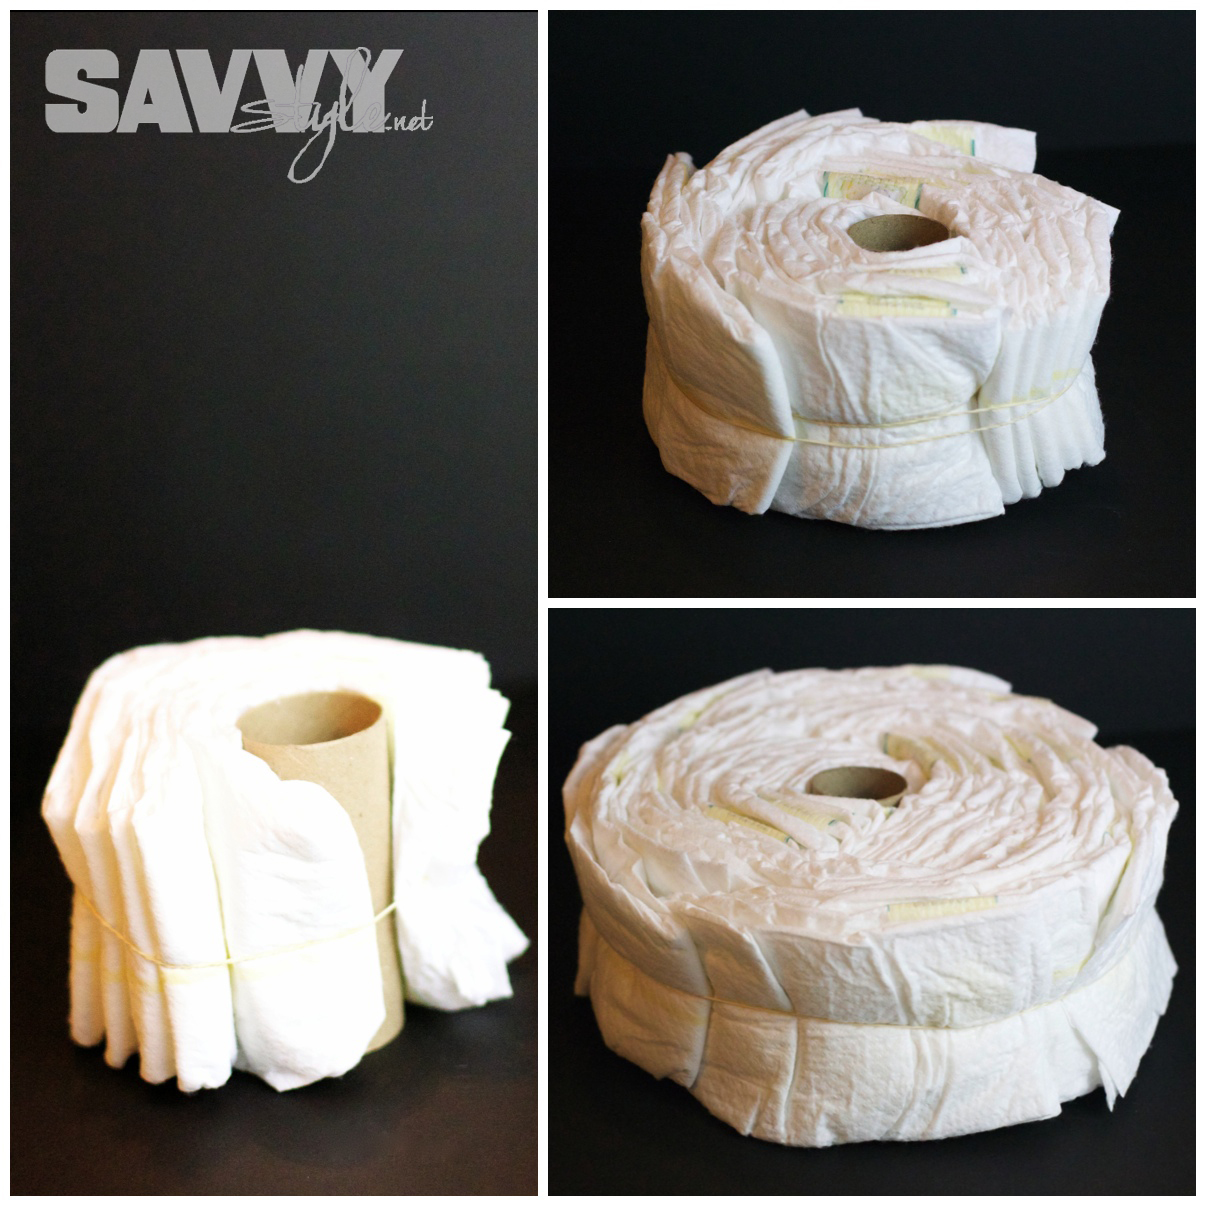
STEP 2: Attach diapers to the toilet paper roll with rubber bands.Make sure you turn all of the diapers with the patterned side facing inwards (so they all look solid like a vanilla frosted cake), and begin to wrap and rubber band them in stacks of five. As you add more and more diapers, you can begin to fan them out (instead of one thick stack) so that the outer rim looks smooth and symmetrical.
You might need an extra set of hands to do this for the base if you haven't done it before...but if you don't have help, just be patient, it may take you a couple of tries to get the diapers in the right place and rubber banded before they fall over! I promise you can do it - I did this one solo!
Repeat this step for the middle and top layers.
Here's the breakdown of the number of diapers I used for each layer:
BASE: 30-35 Diapers
MIDDLE: 20-25 Diapers
TOP: 10-15 Diapers
The best way to do this is just eyeball it. Start with your base, and as you make the next layer measure it on top of the layer below it to make sure it is slightly smaller in size. Once you get your three layers rubber banded, you're ready to assemble.

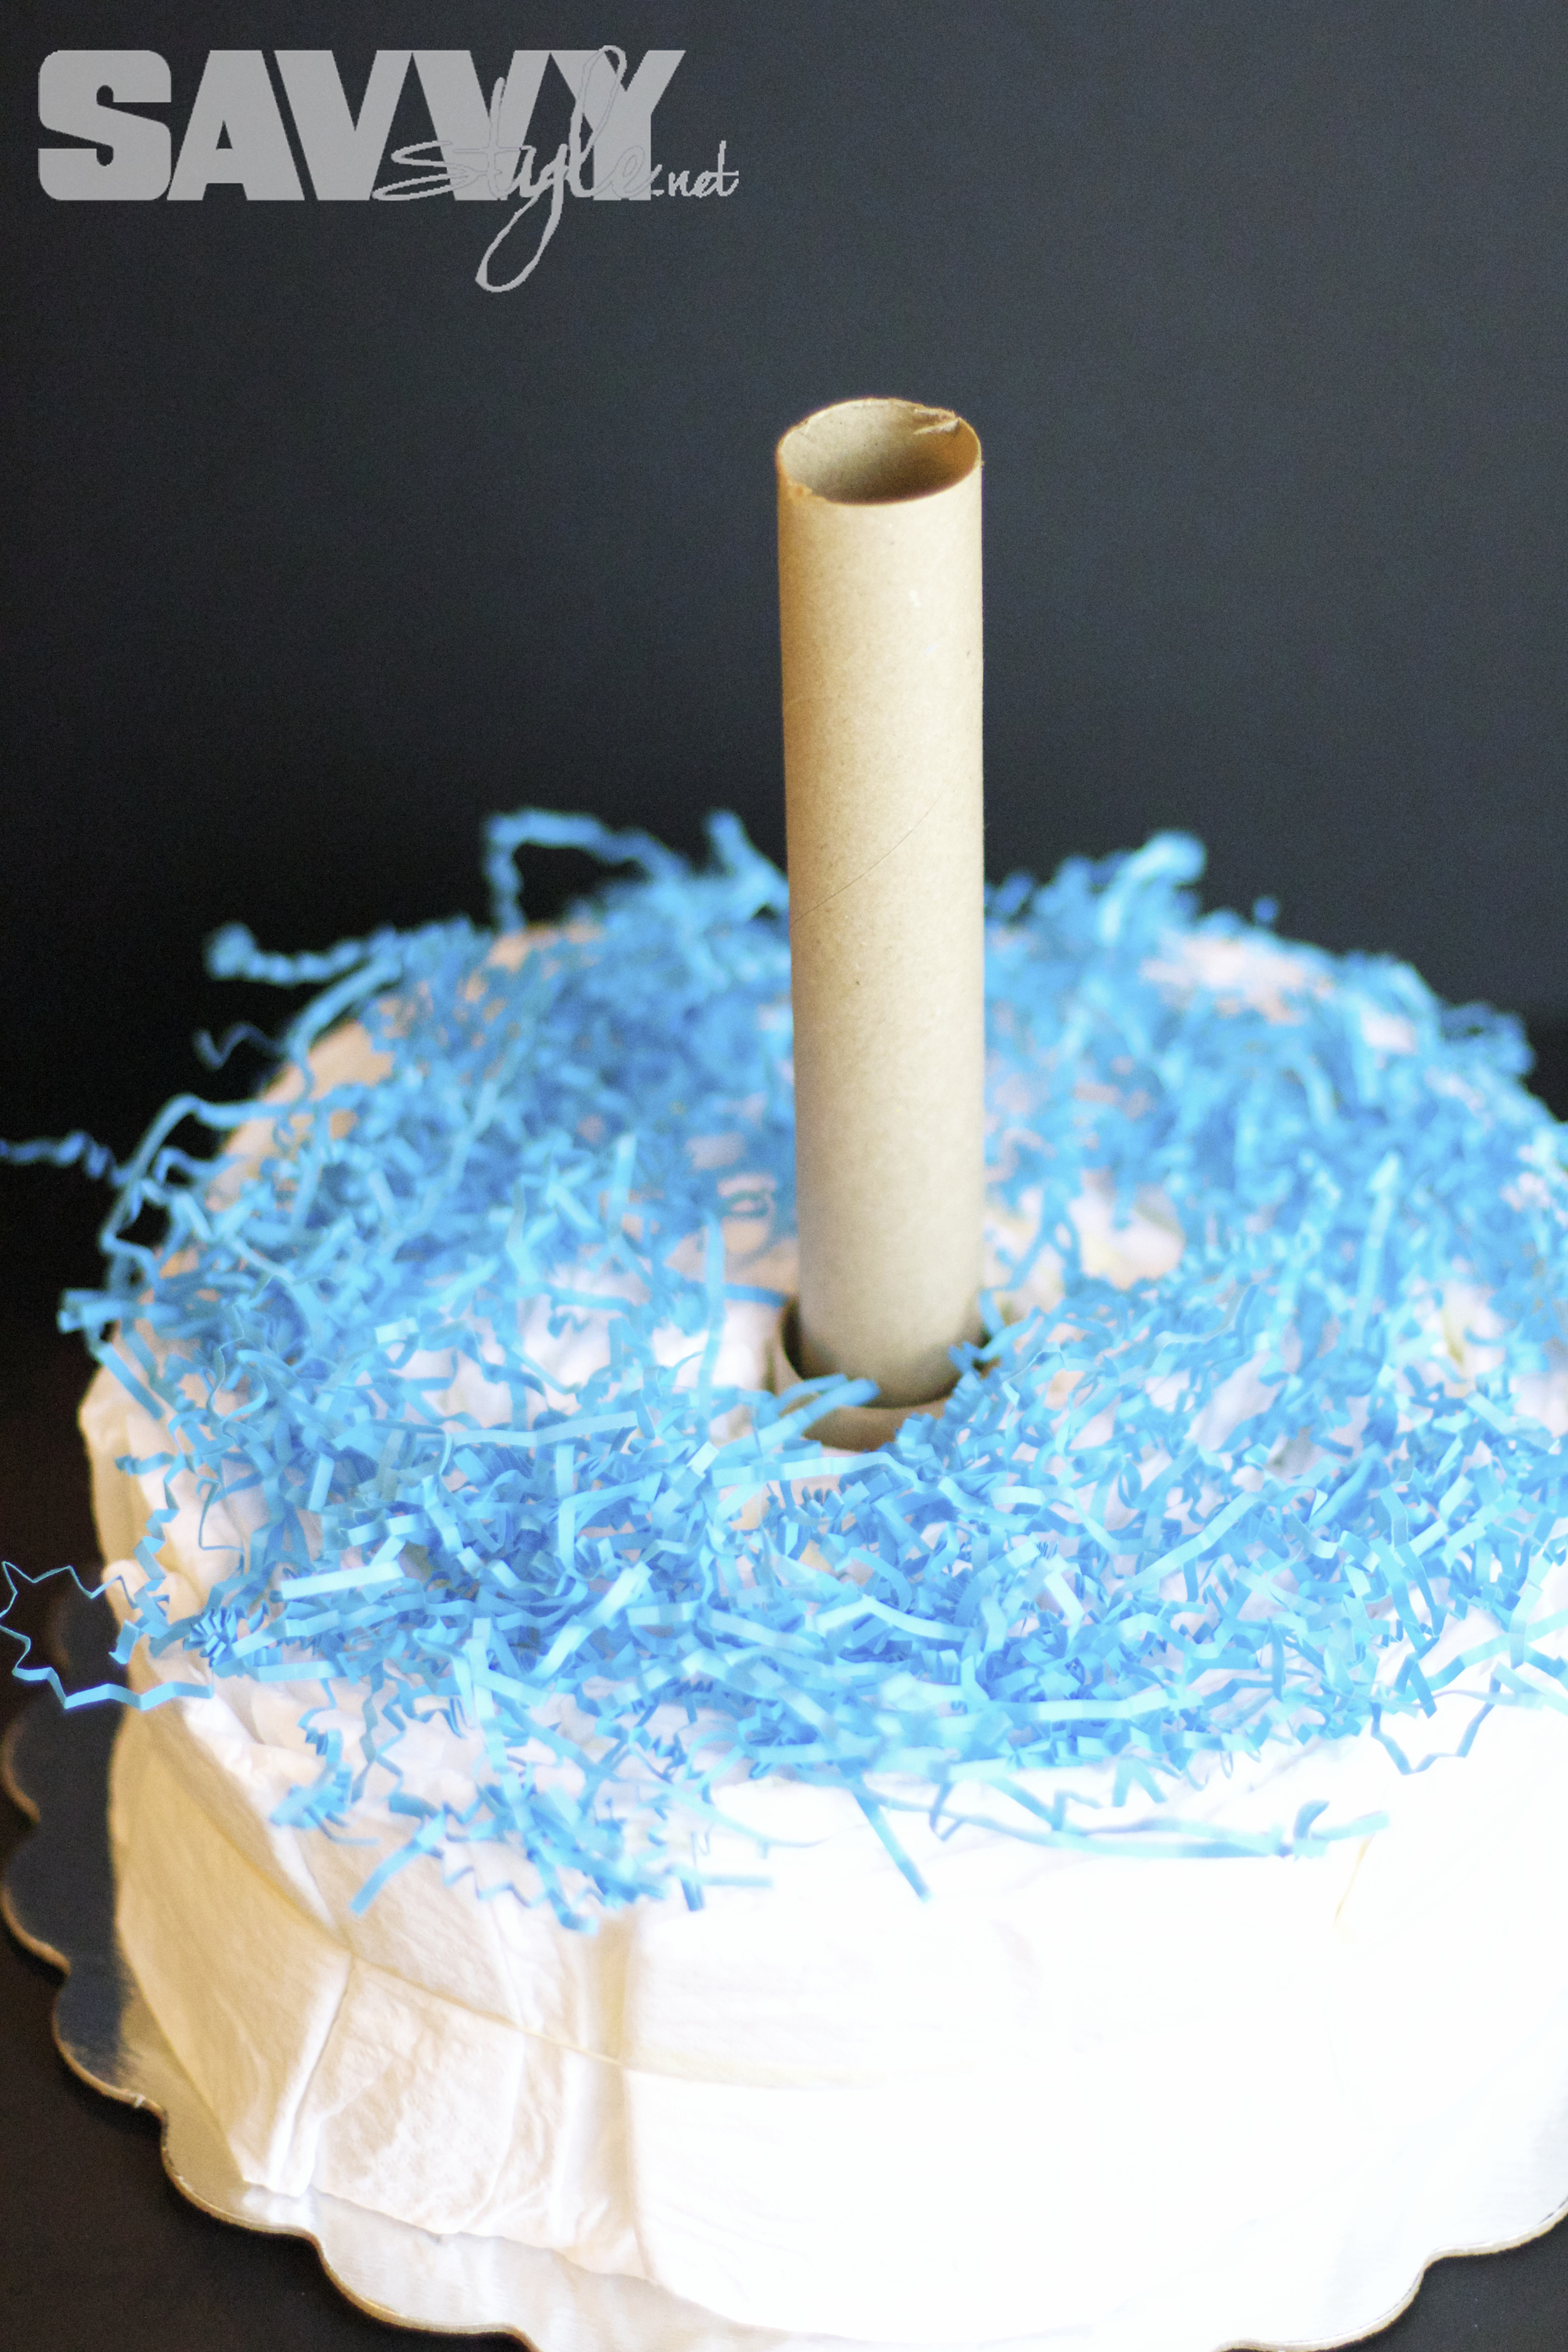
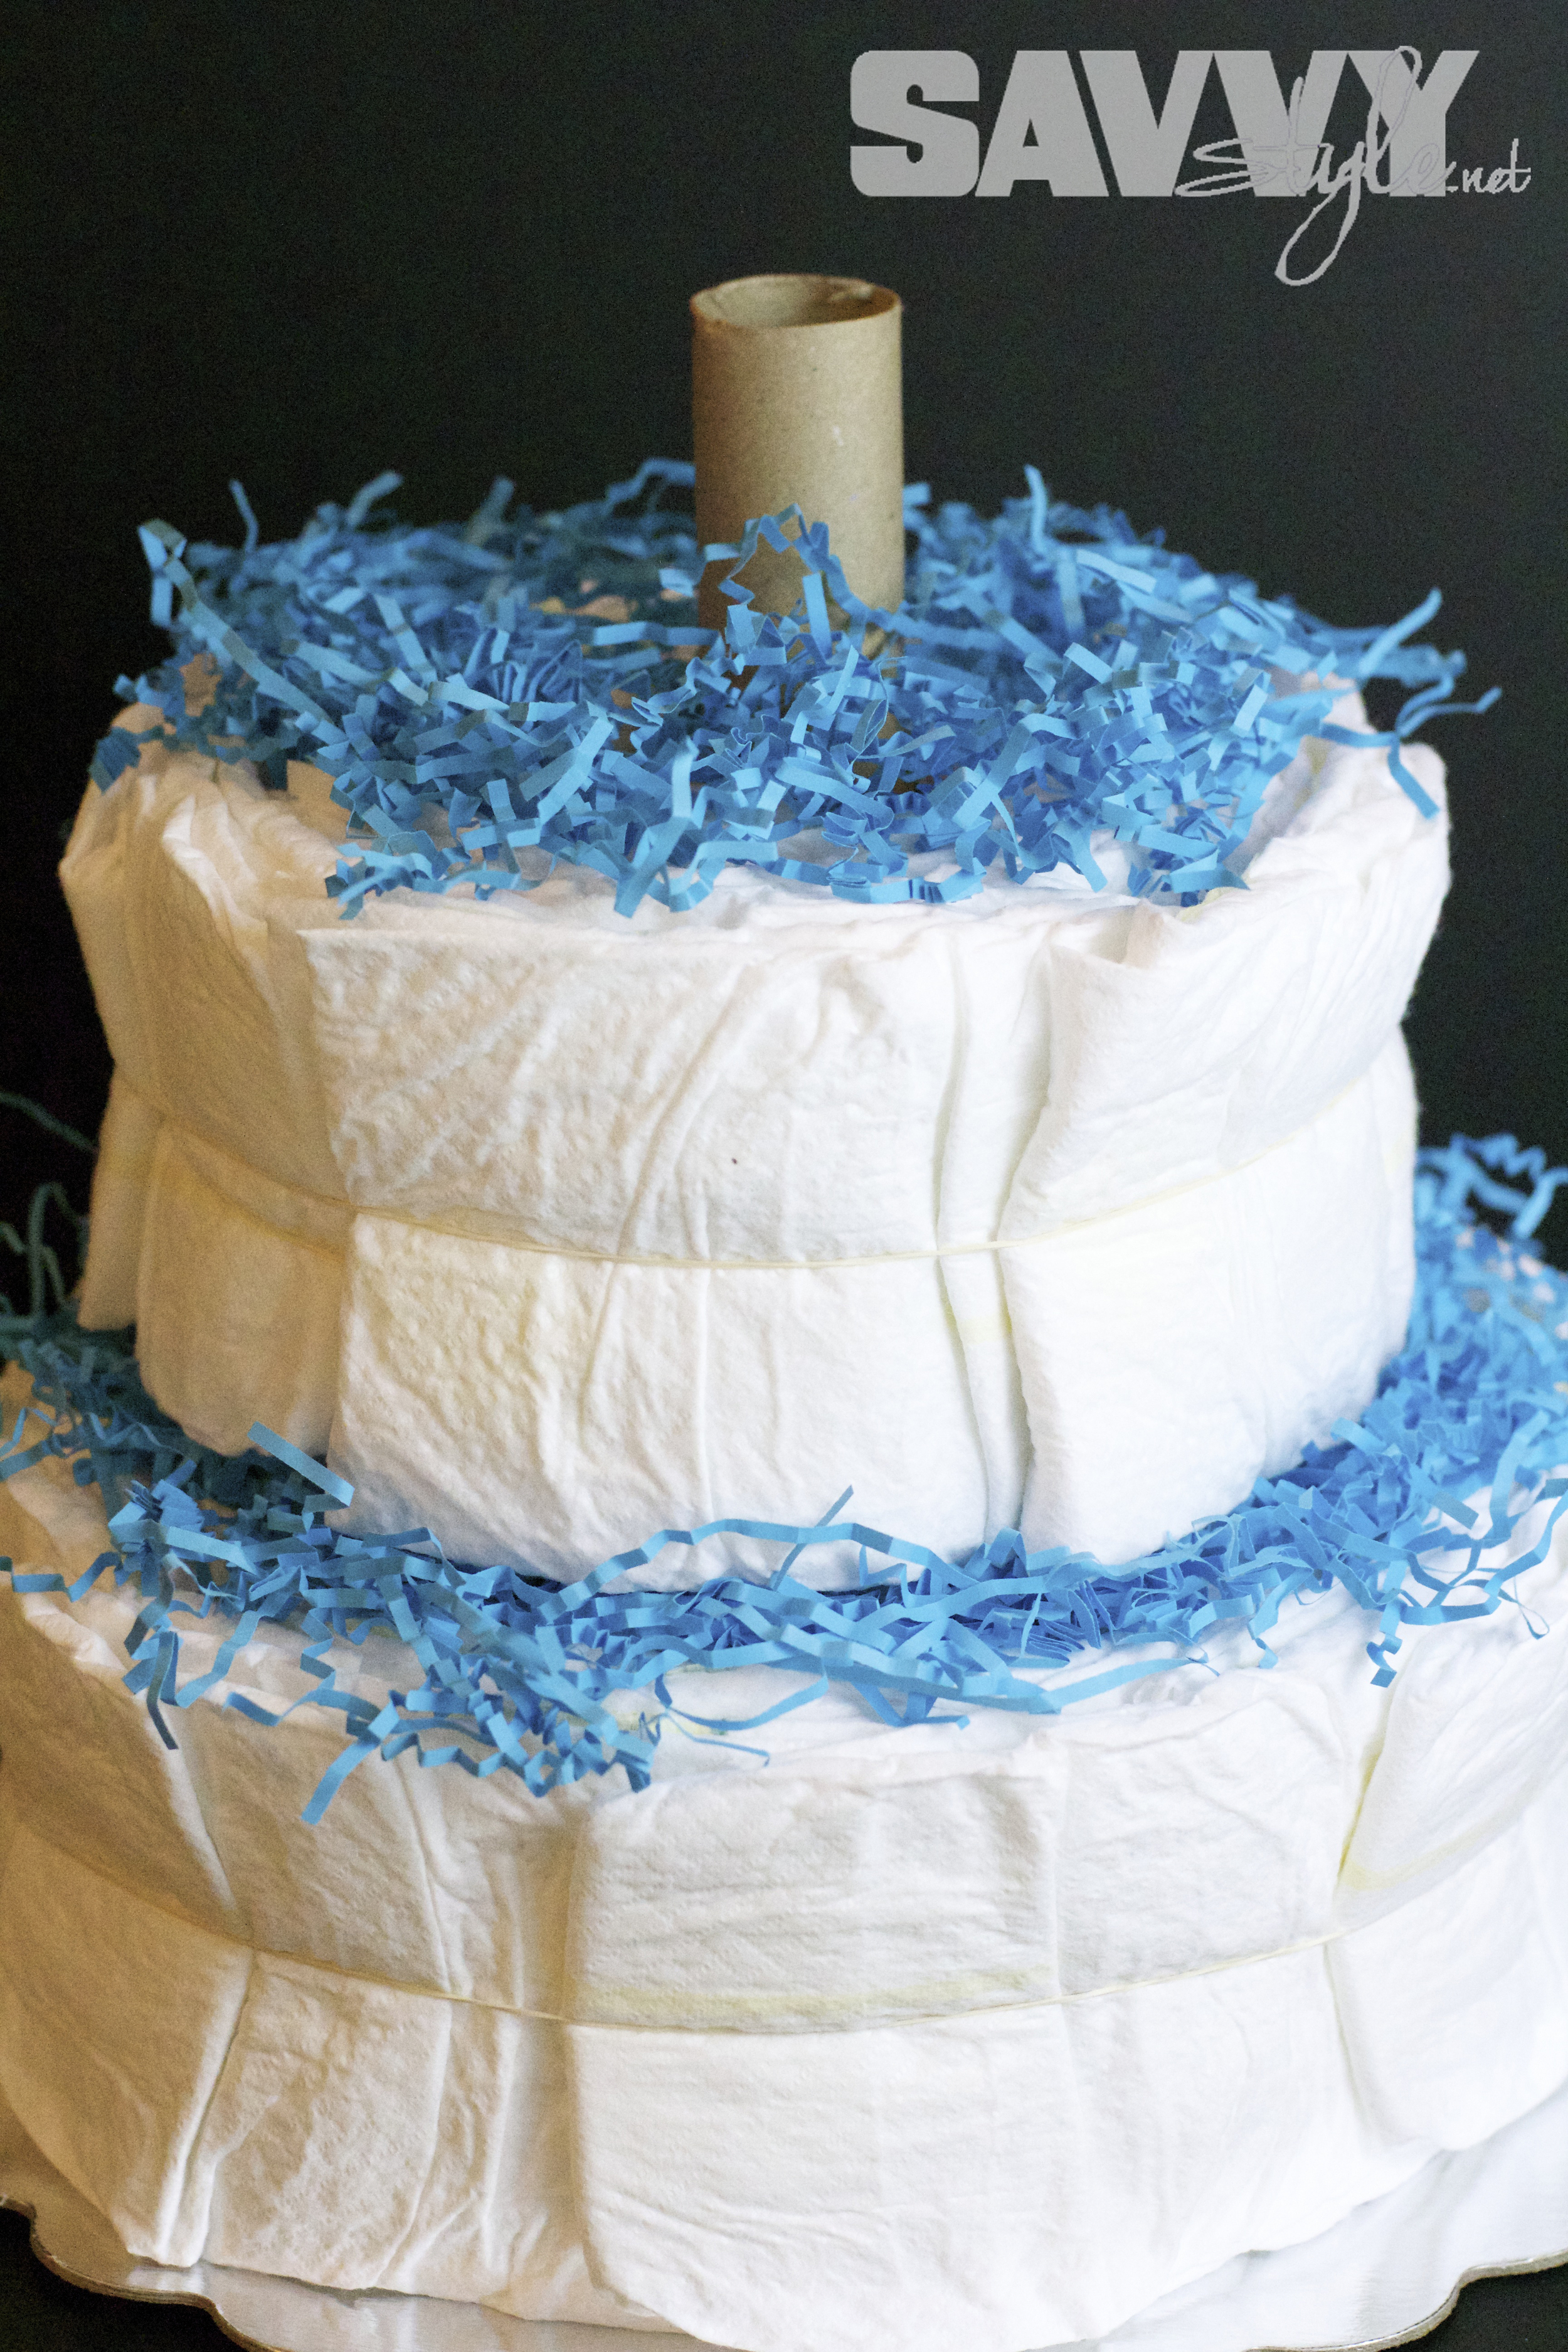
STEP 3: Slide layers onto base, placing crinkle paper in between each layer.Adding the crinkle paper isn't absolutely necessary, but I think it gives it a fun pop of color and distinguishes between the layers. (and it looks like frosting to me...we all know I LOVE frosting...just saying.) Note: I originally didn't put crinkle paper on the very bottom (between the base and the cake plate) but I went back later and added it in to give it a consistent look across the layers - you'll see it in the finished product at the bottom of this post)
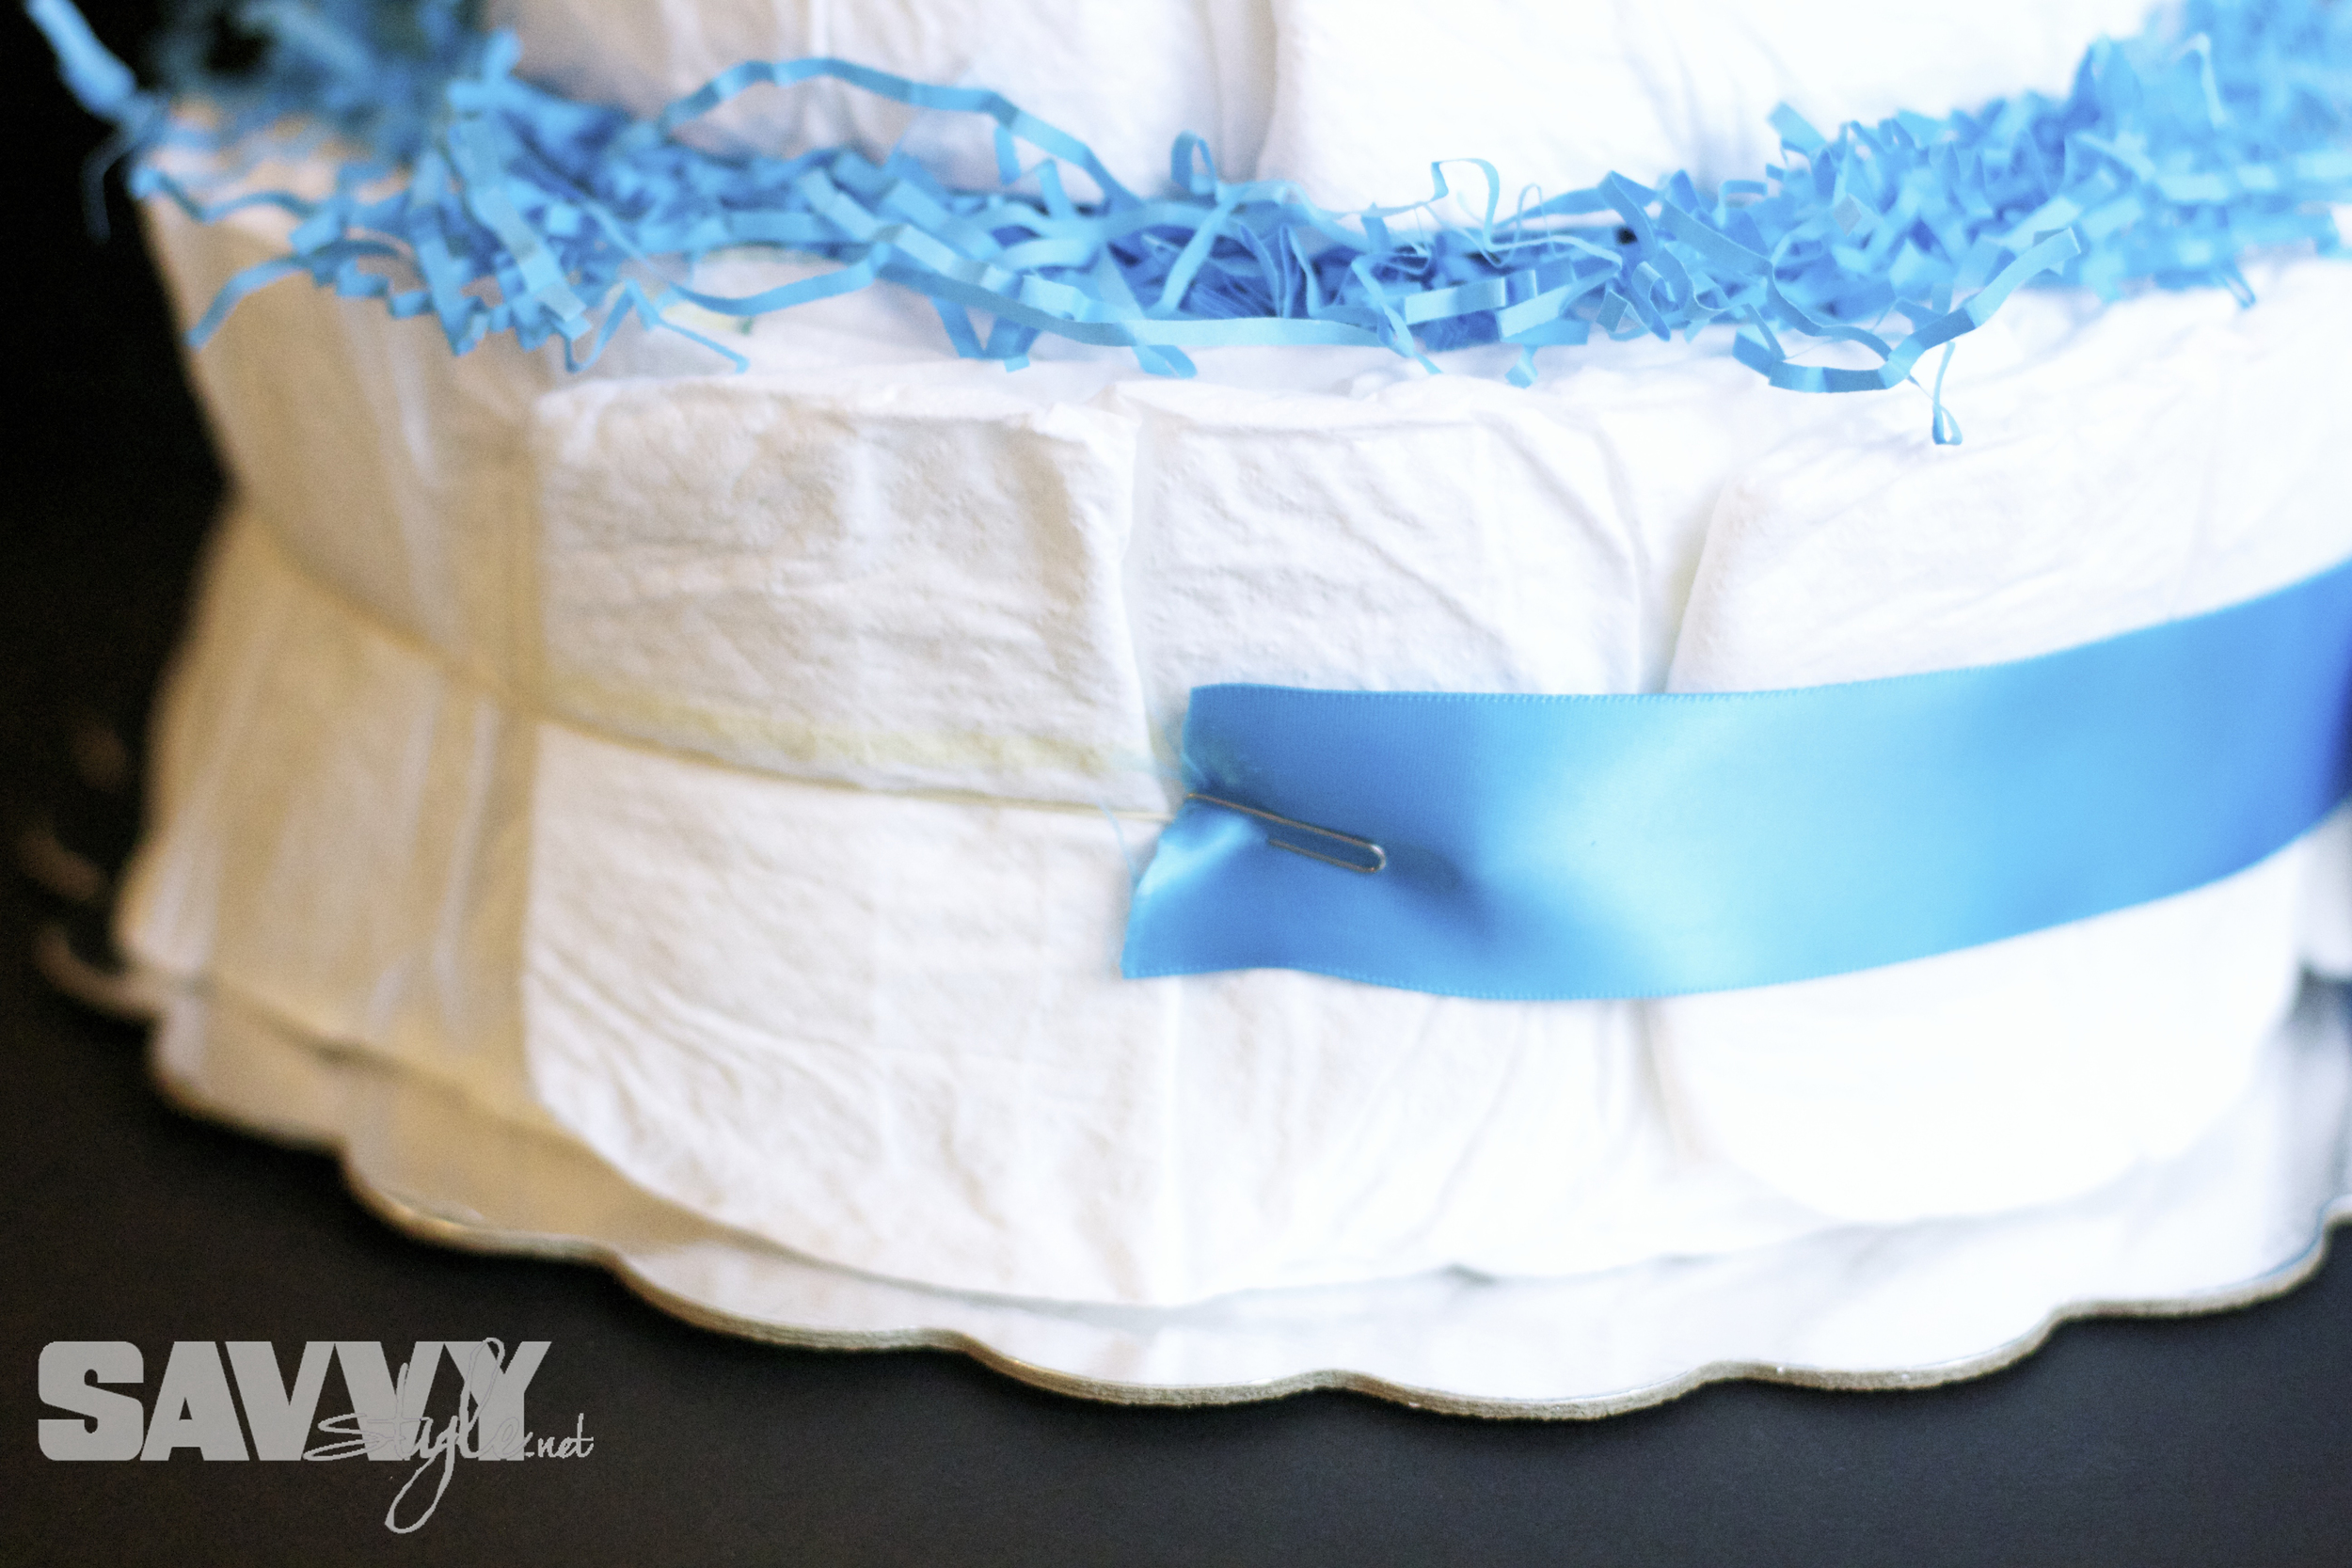
STEP 4: Attach your ribbon with paper clips and glue.You don't want to glue your ribbon directly to the diaper because it will ruin it for actual use, so what I did was use a paper clip to attach one side of the ribbon at the back. I then wrapped the ribbon all the way around, cut it just slightly longer (so it overlaps) and then used a little bit of hot glue to attach the ribbon to itself.
NOTE: Be sure to put something in between the diaper and the ribbon as you glue the ribbon together so that the glue doesn't seep through to the diaper.
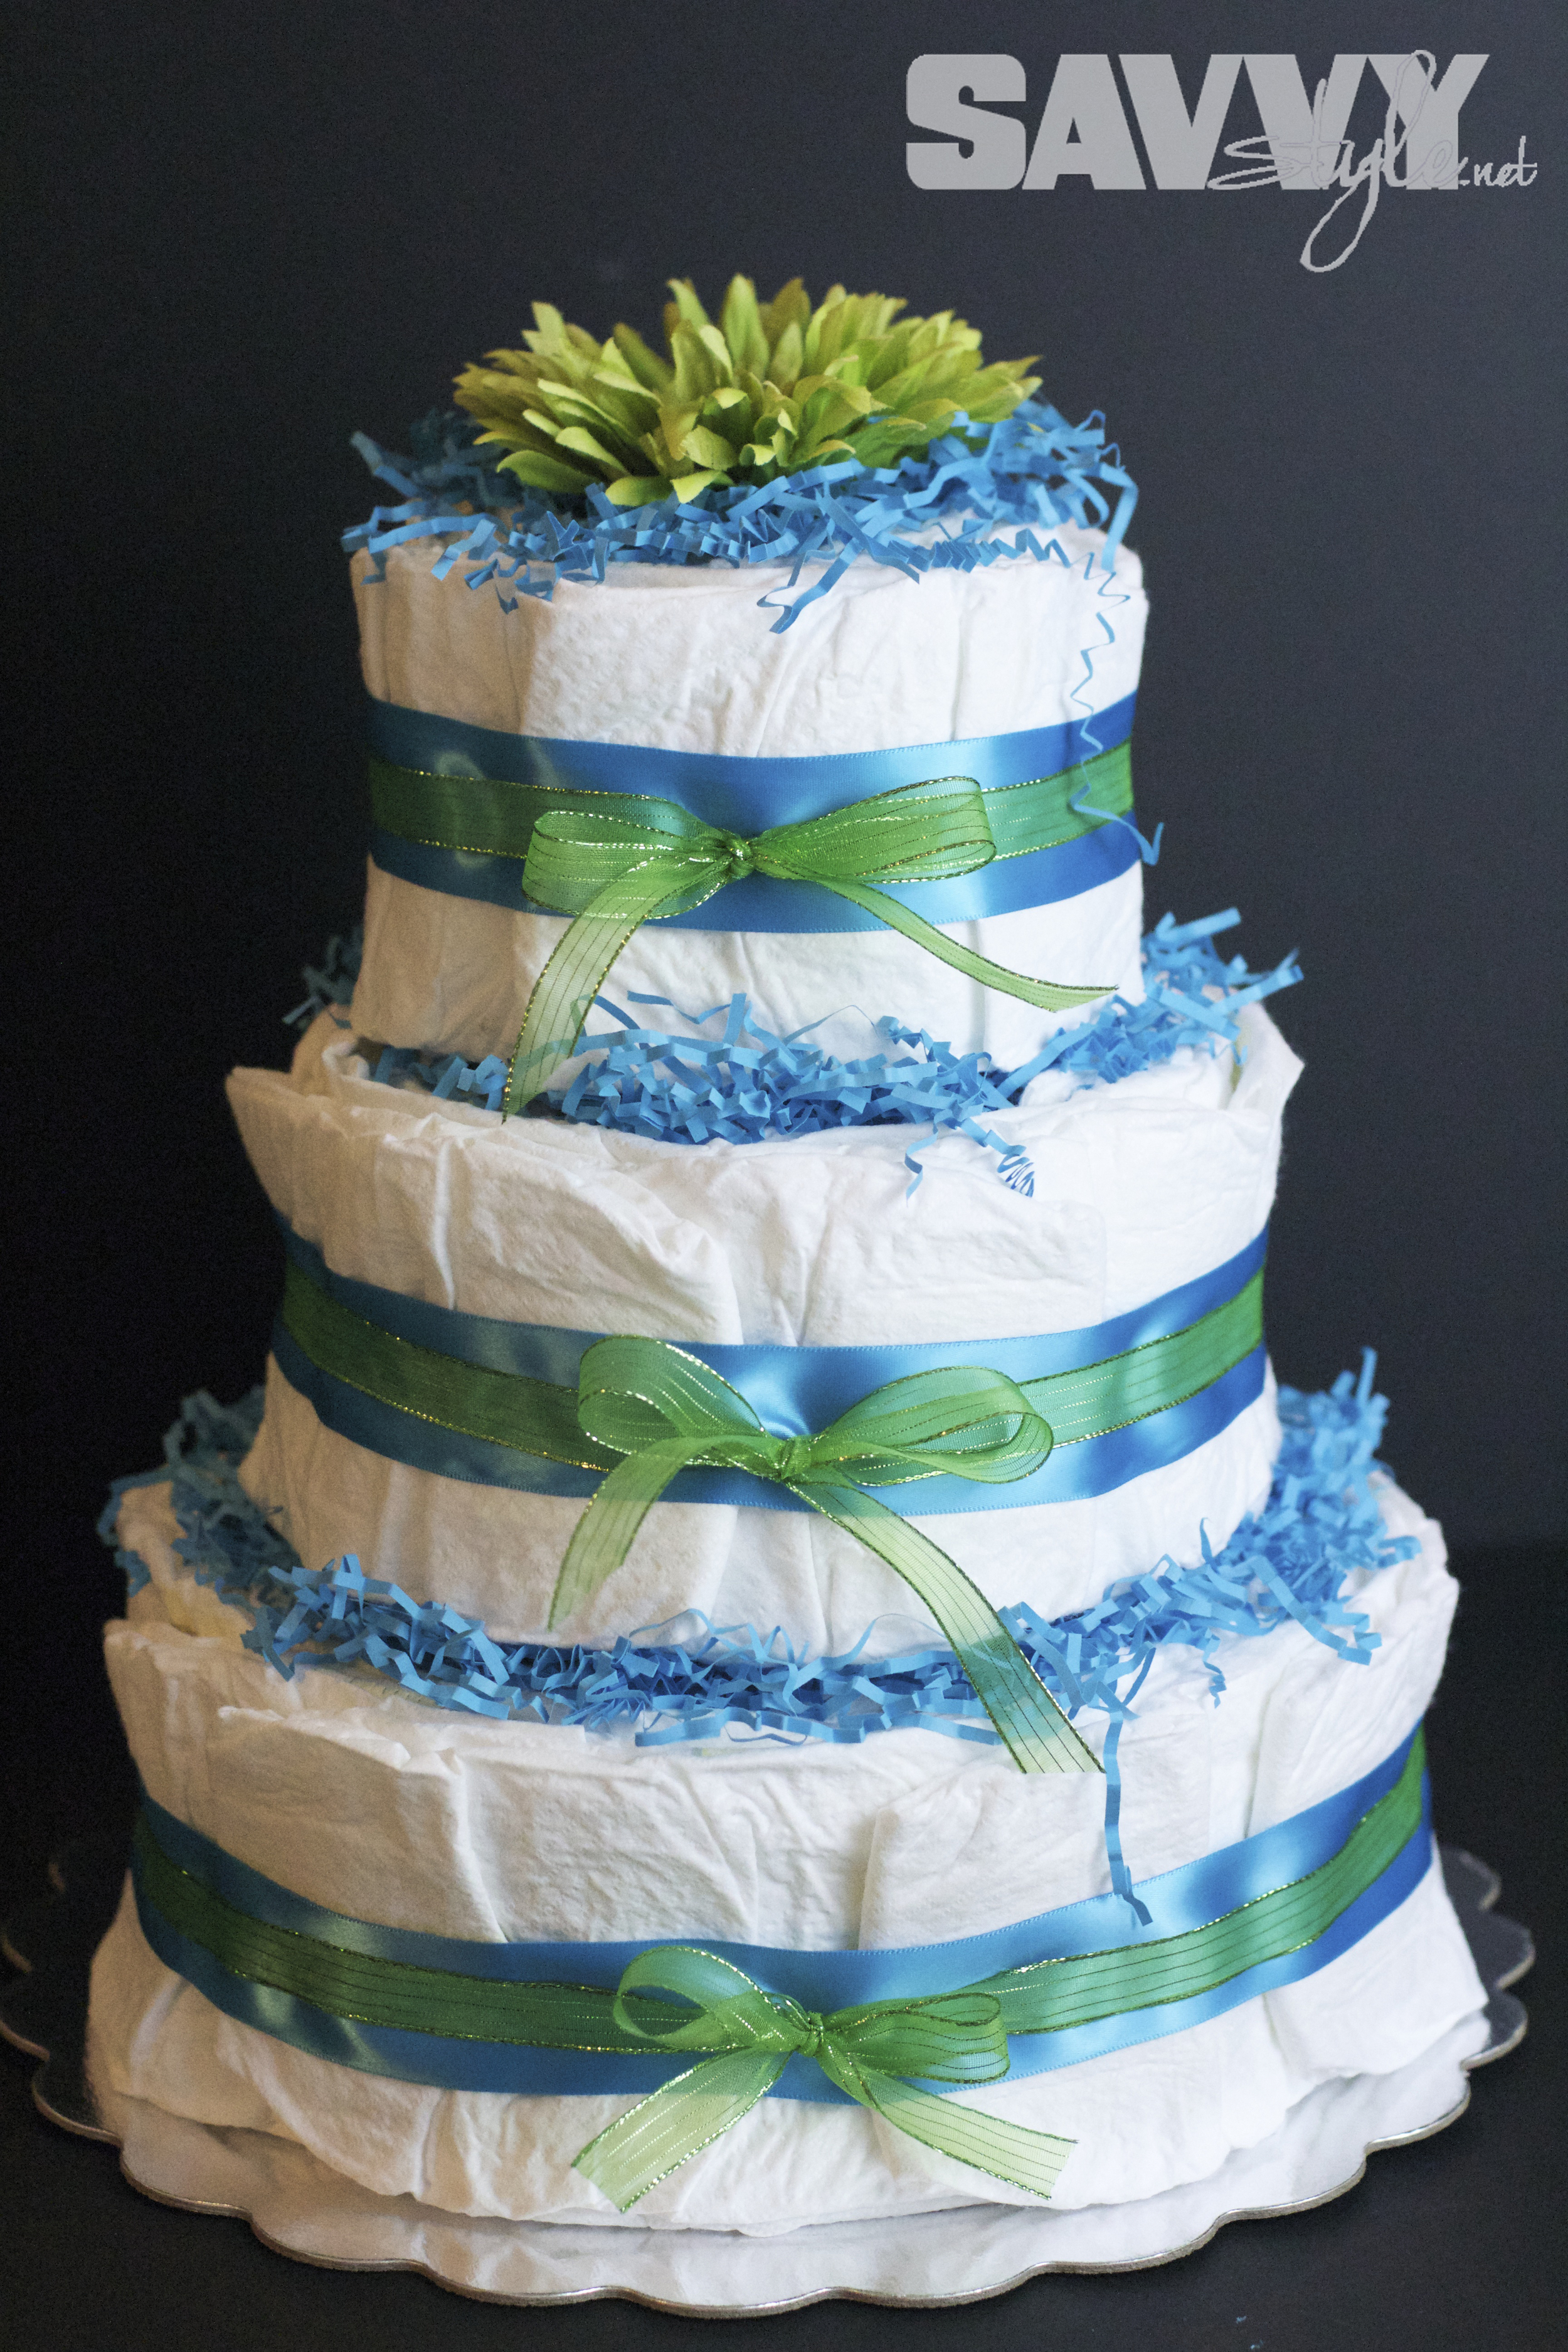
Repeat this for all three layers, making sure your seams are all in the same place at the back of the cake. Next, take your 1/2 inch ribbon and wrap it around to the front of the cake, tying a bow in the center of each layer.
STEP 5: Trim your decorative flower and place on top.The great thing about this is that I literally just had to cut the stem down to the height of the cake, and then it slid right down into the wrapping paper tube...no glue, no muss, no fuss. Easiest cake topper ever. (I used a silk gerber daisy from Michael's)
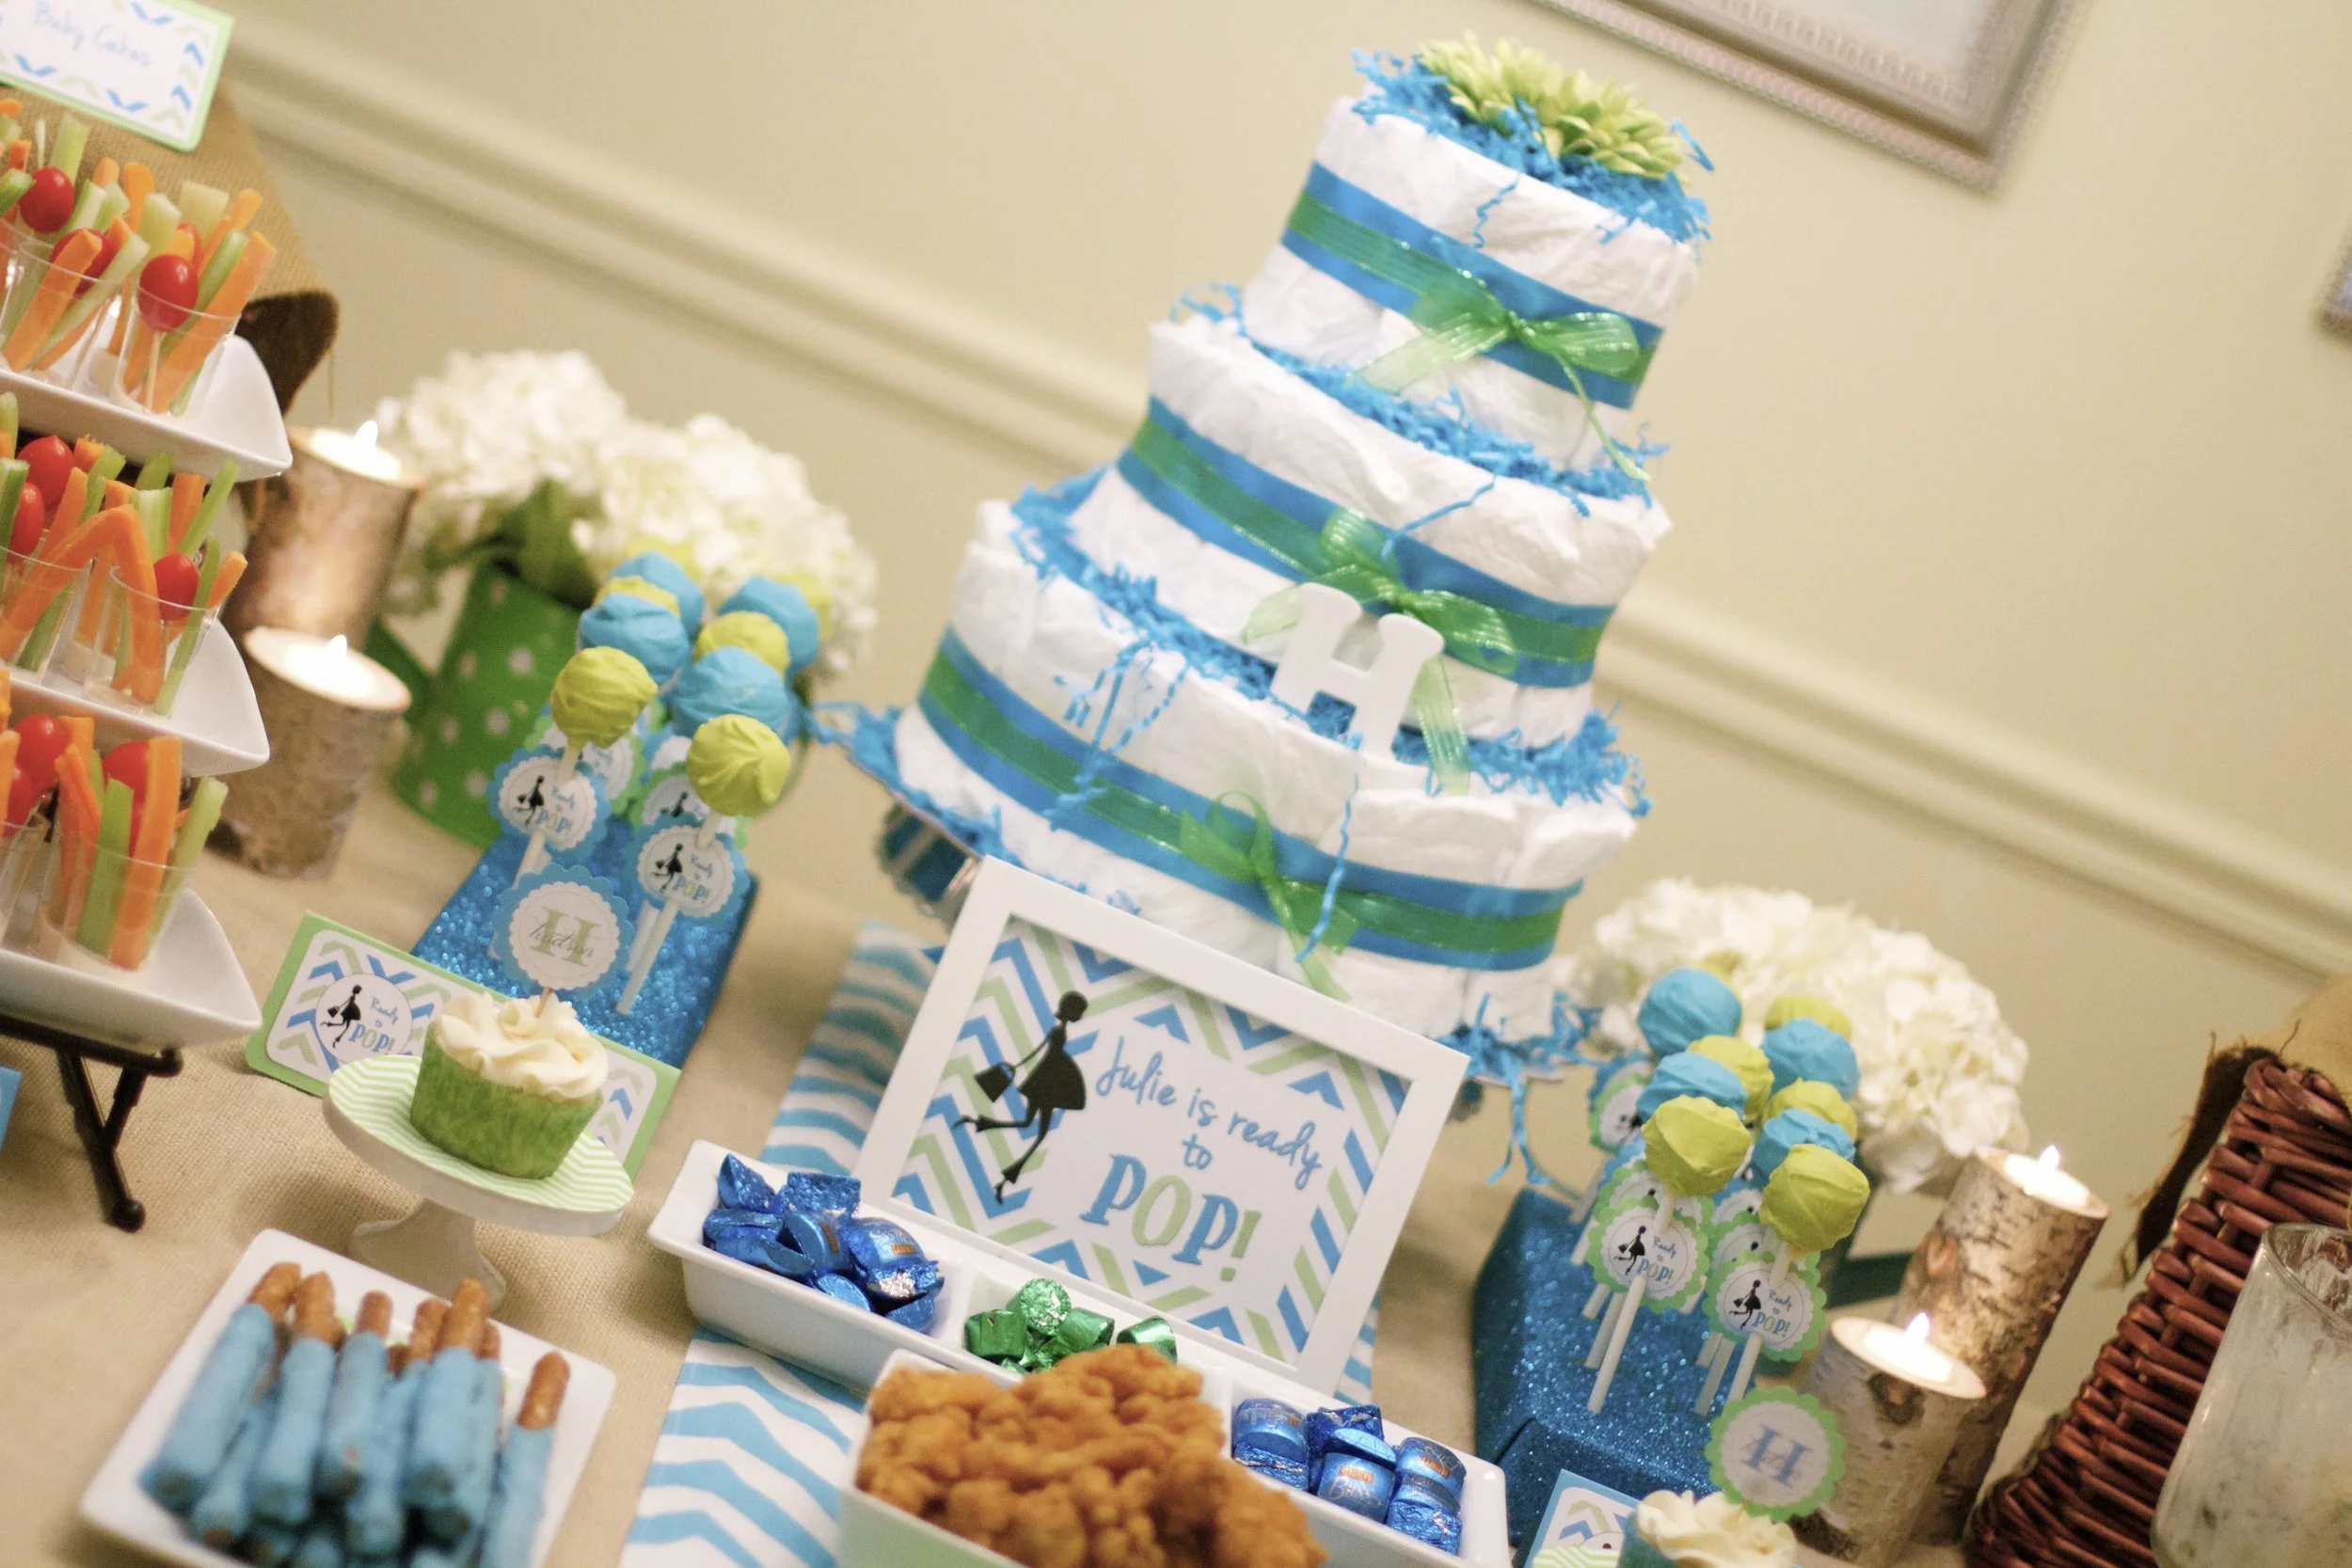
And voila...you have a beautiful gift and a beautiful centerpiece for your baby shower!
