

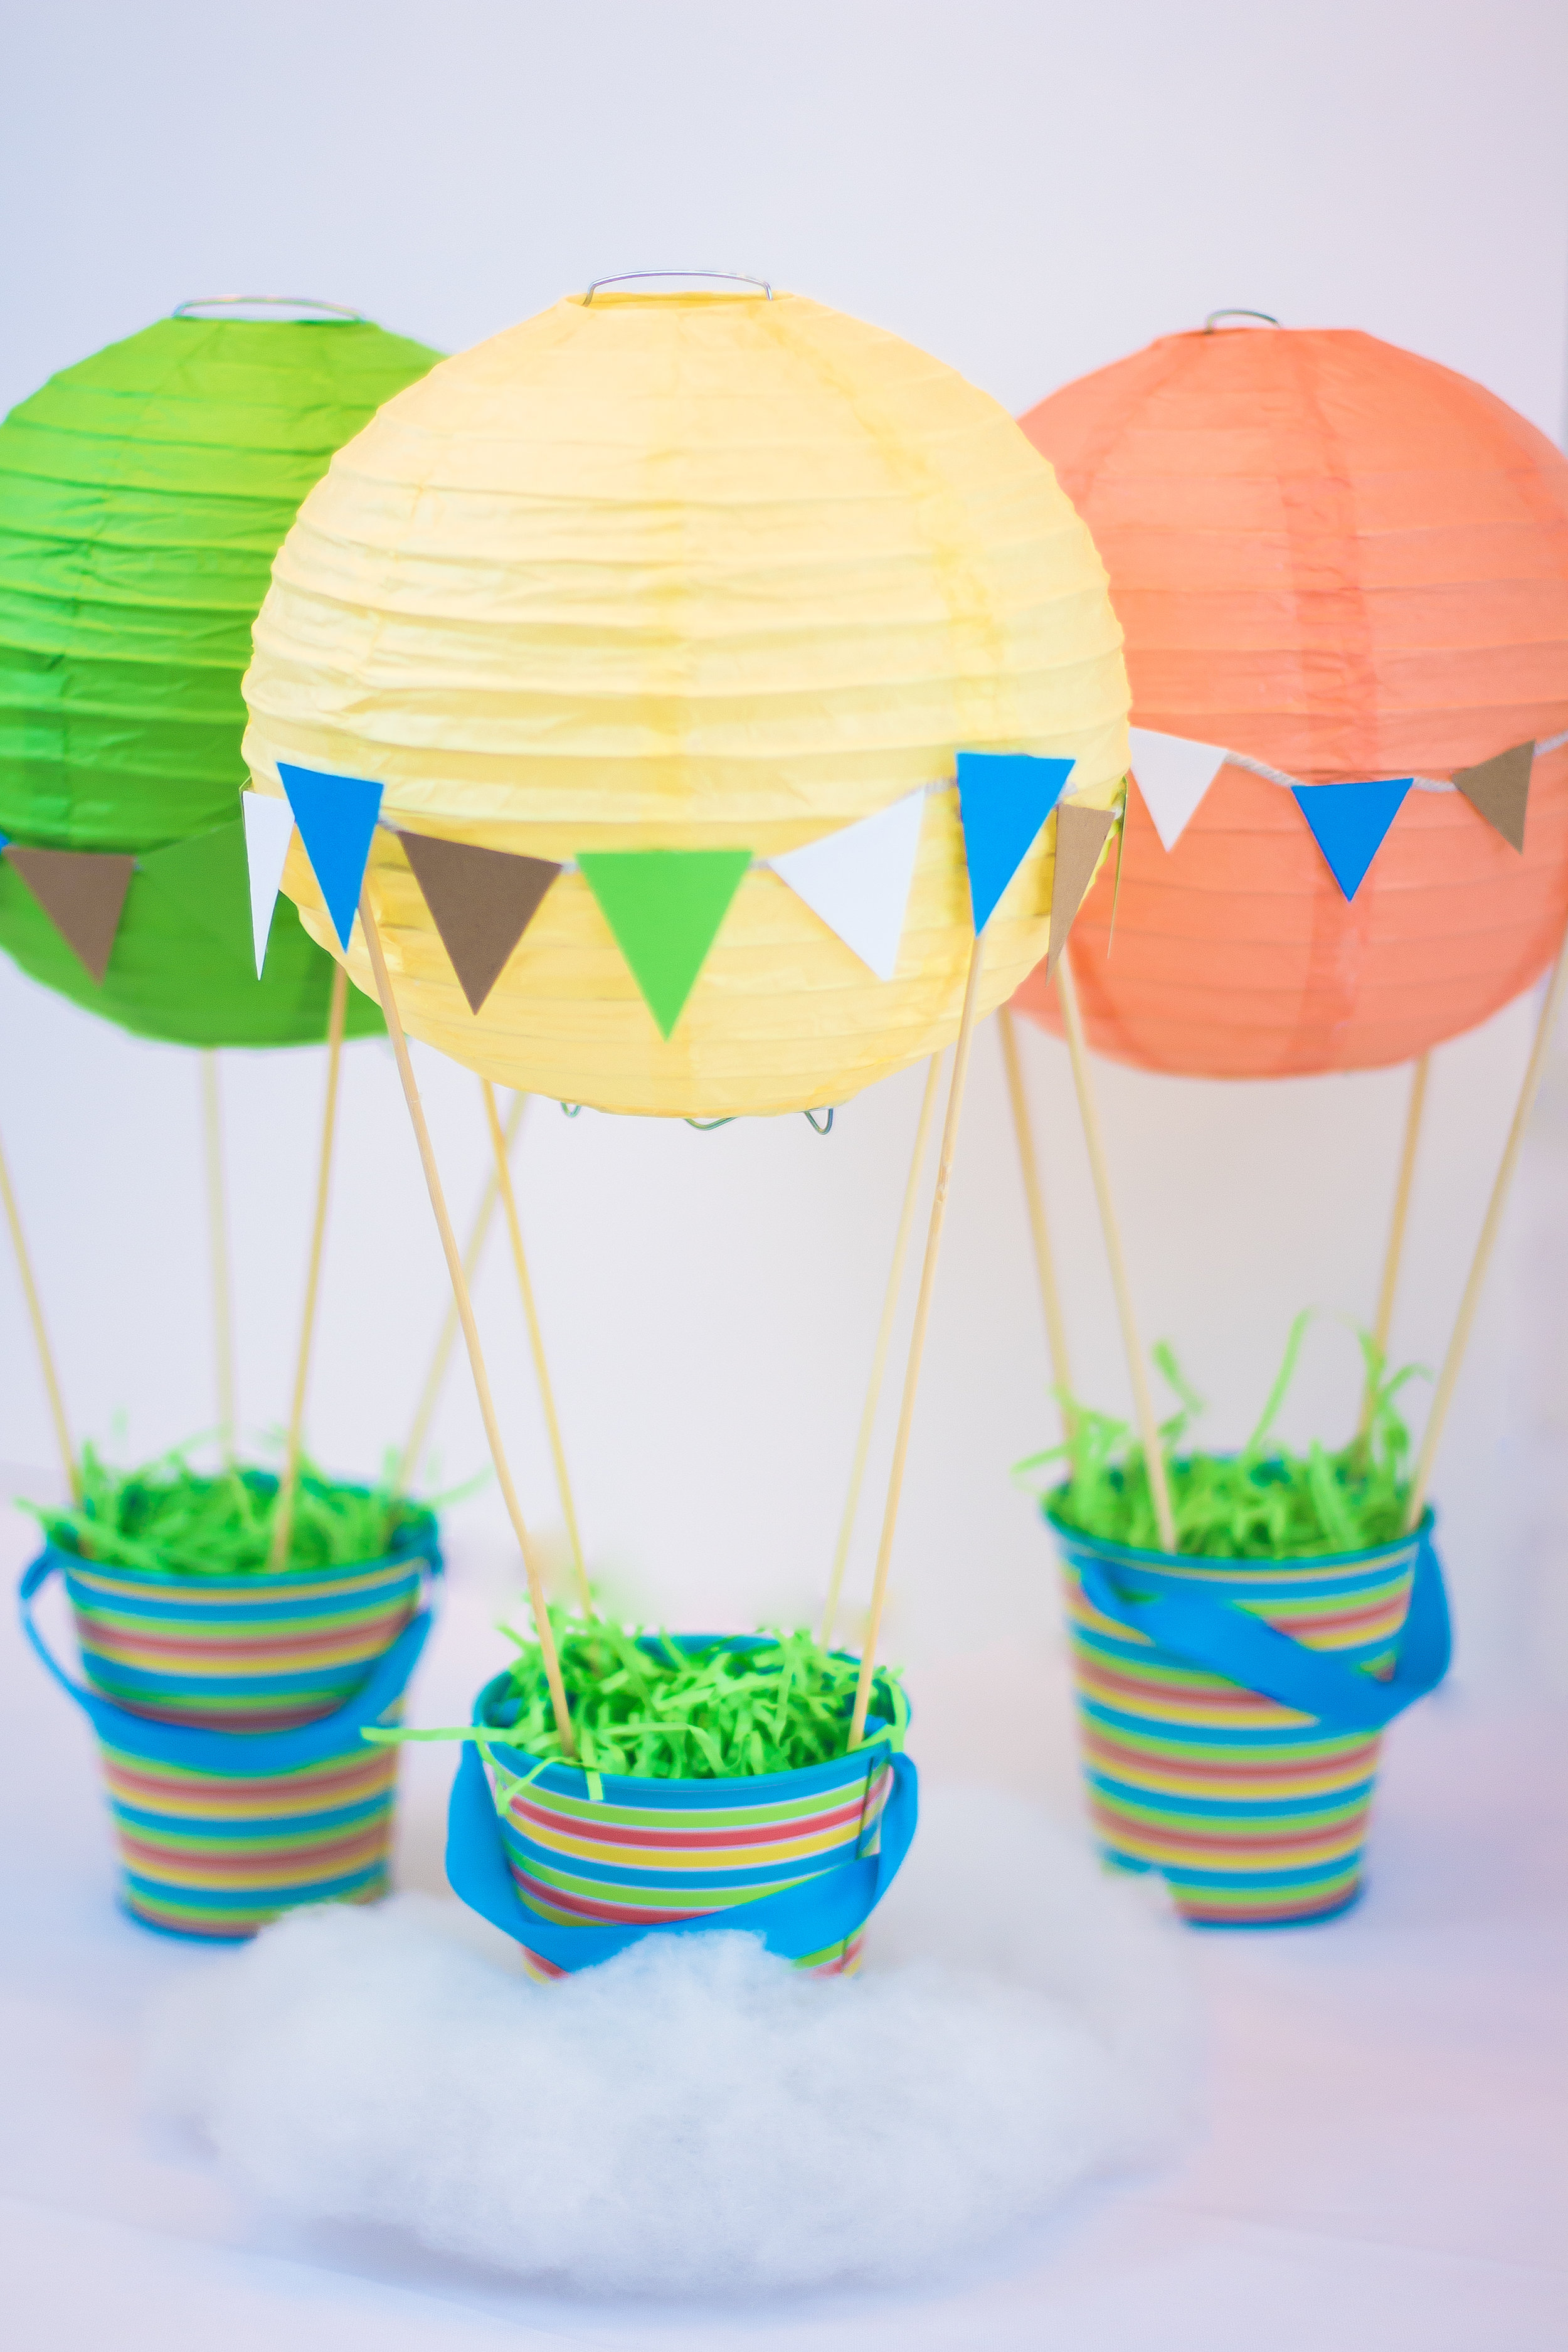
As promised, here's a quick tutorial on how to make these easy hot air balloon centerpieces from our Dr. Seuss themed birthday party in about ten minutes! The longest part of this process is just letting the hot glue dry so your sticks don't move, but I promise it's quick and cheap - these centerpieces cost me less than $5 each to make!
SUPPLIES
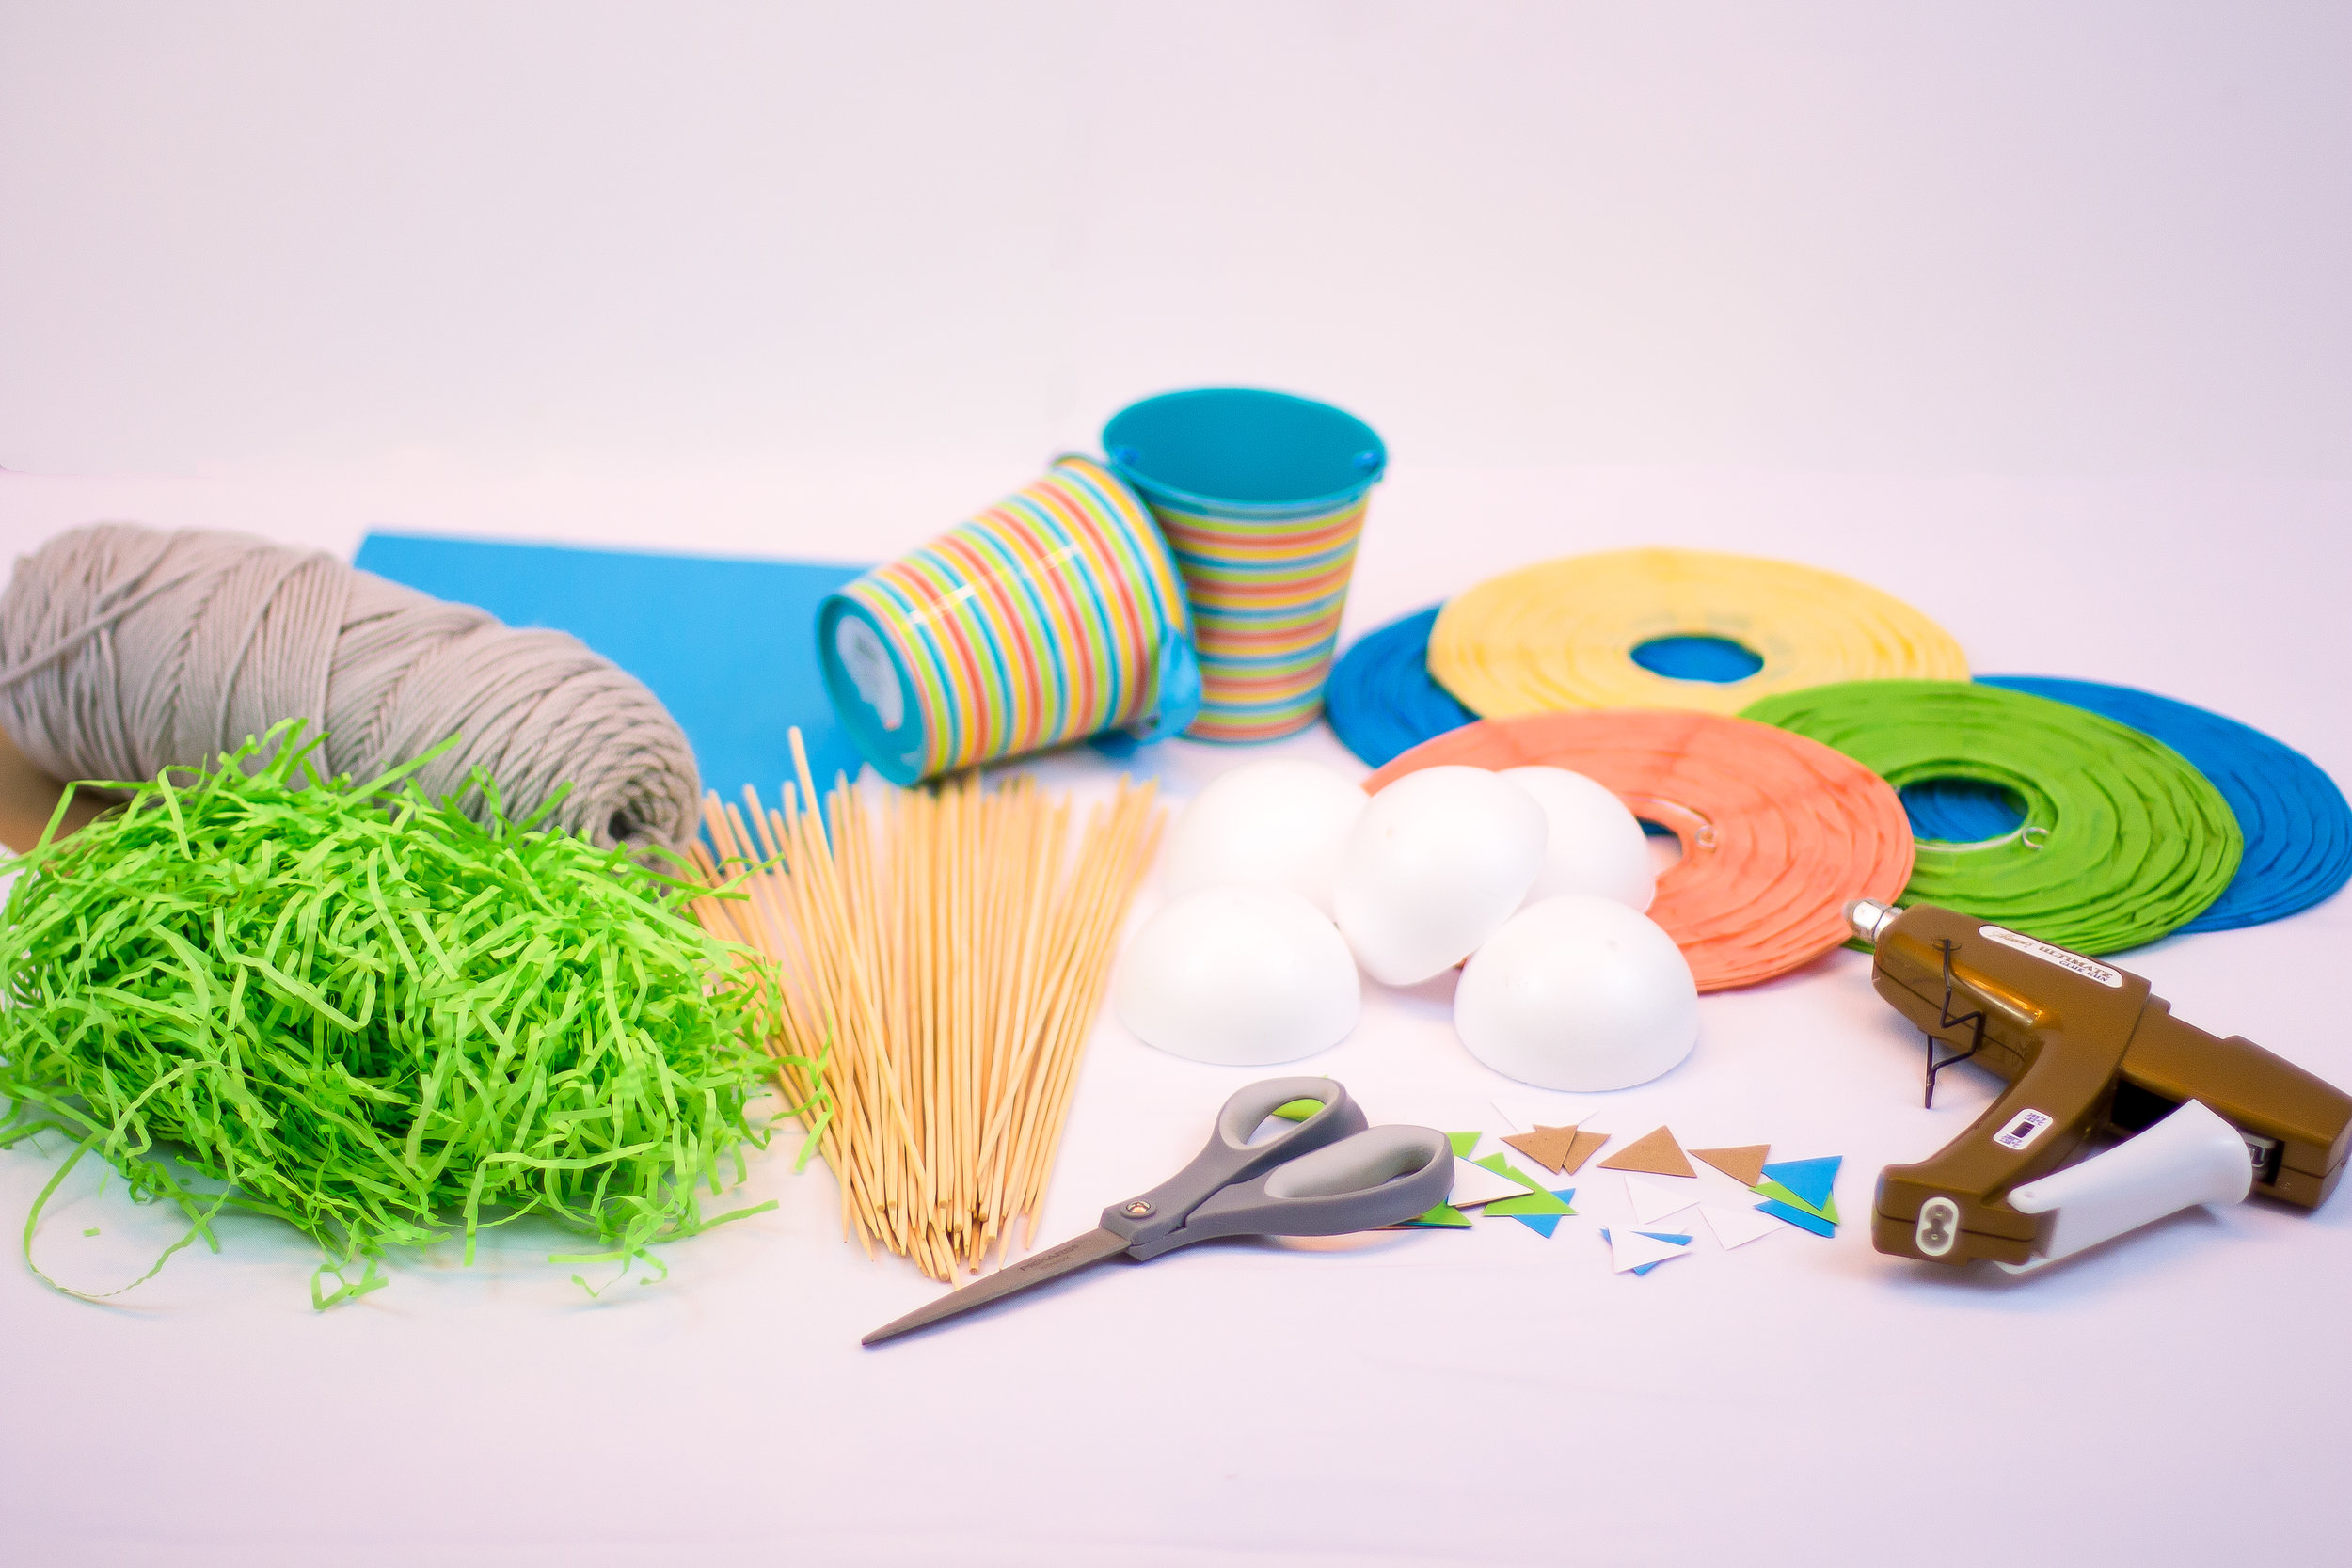
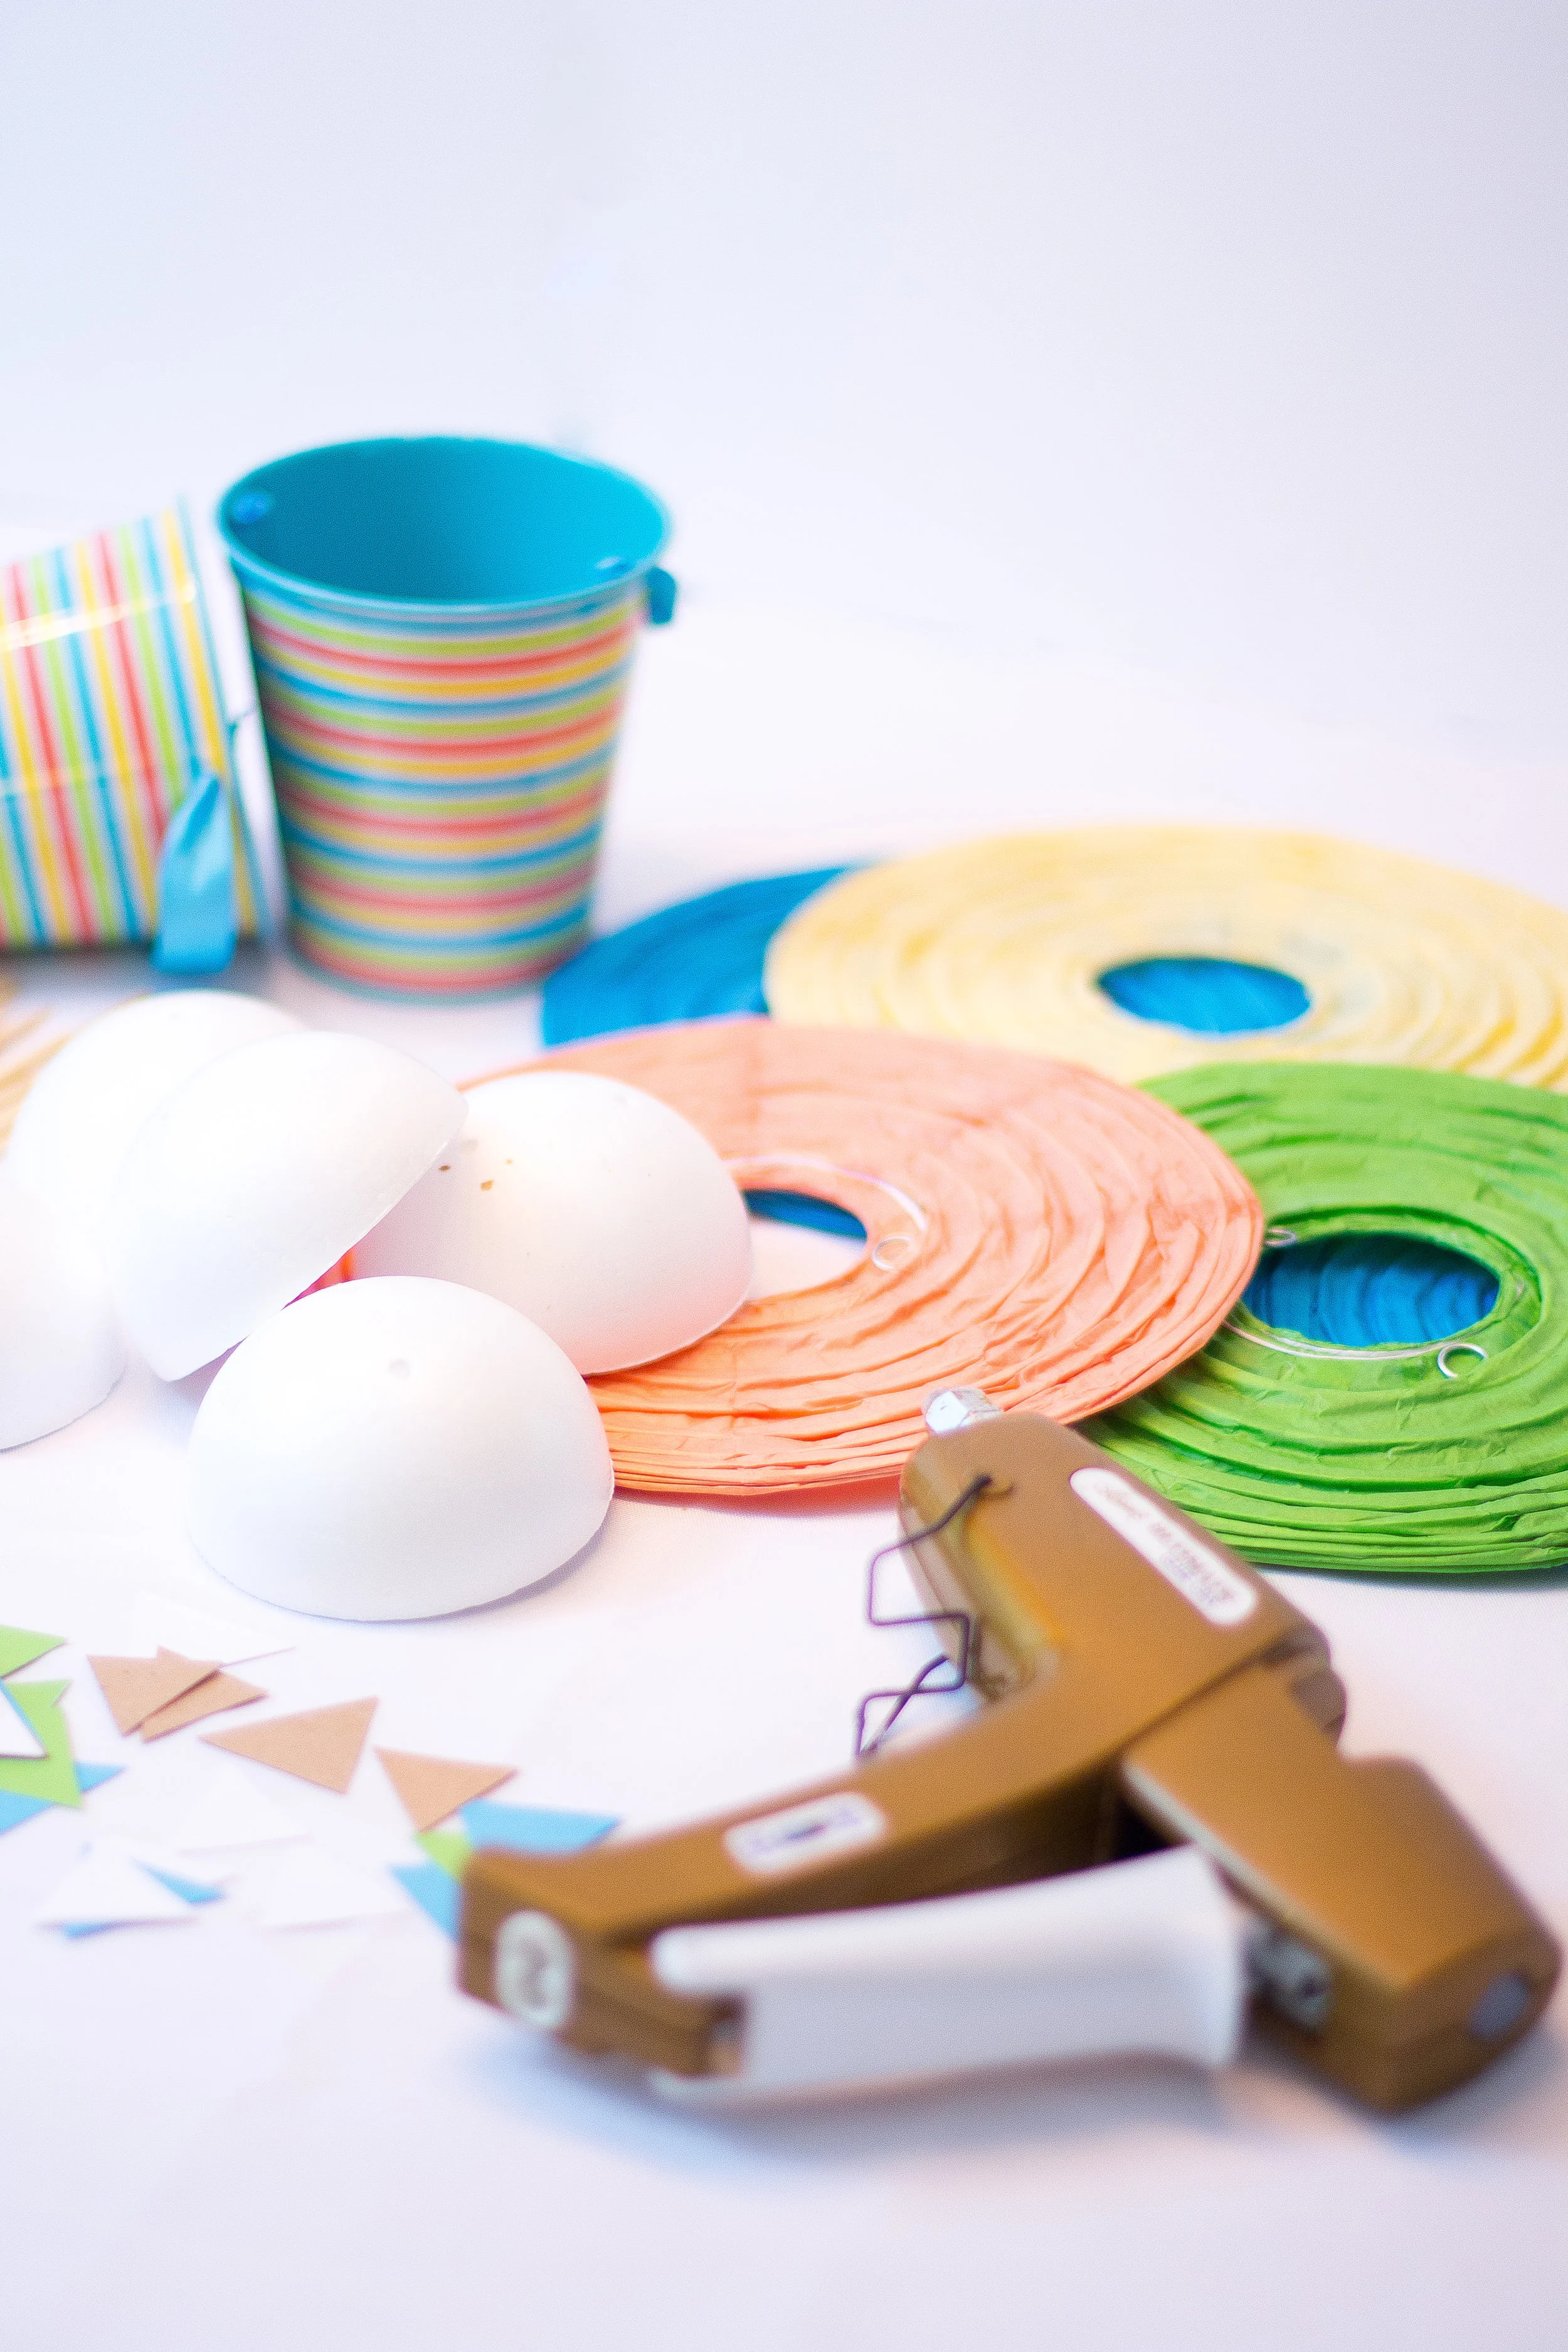
First, let's start with the supplies you'll need:
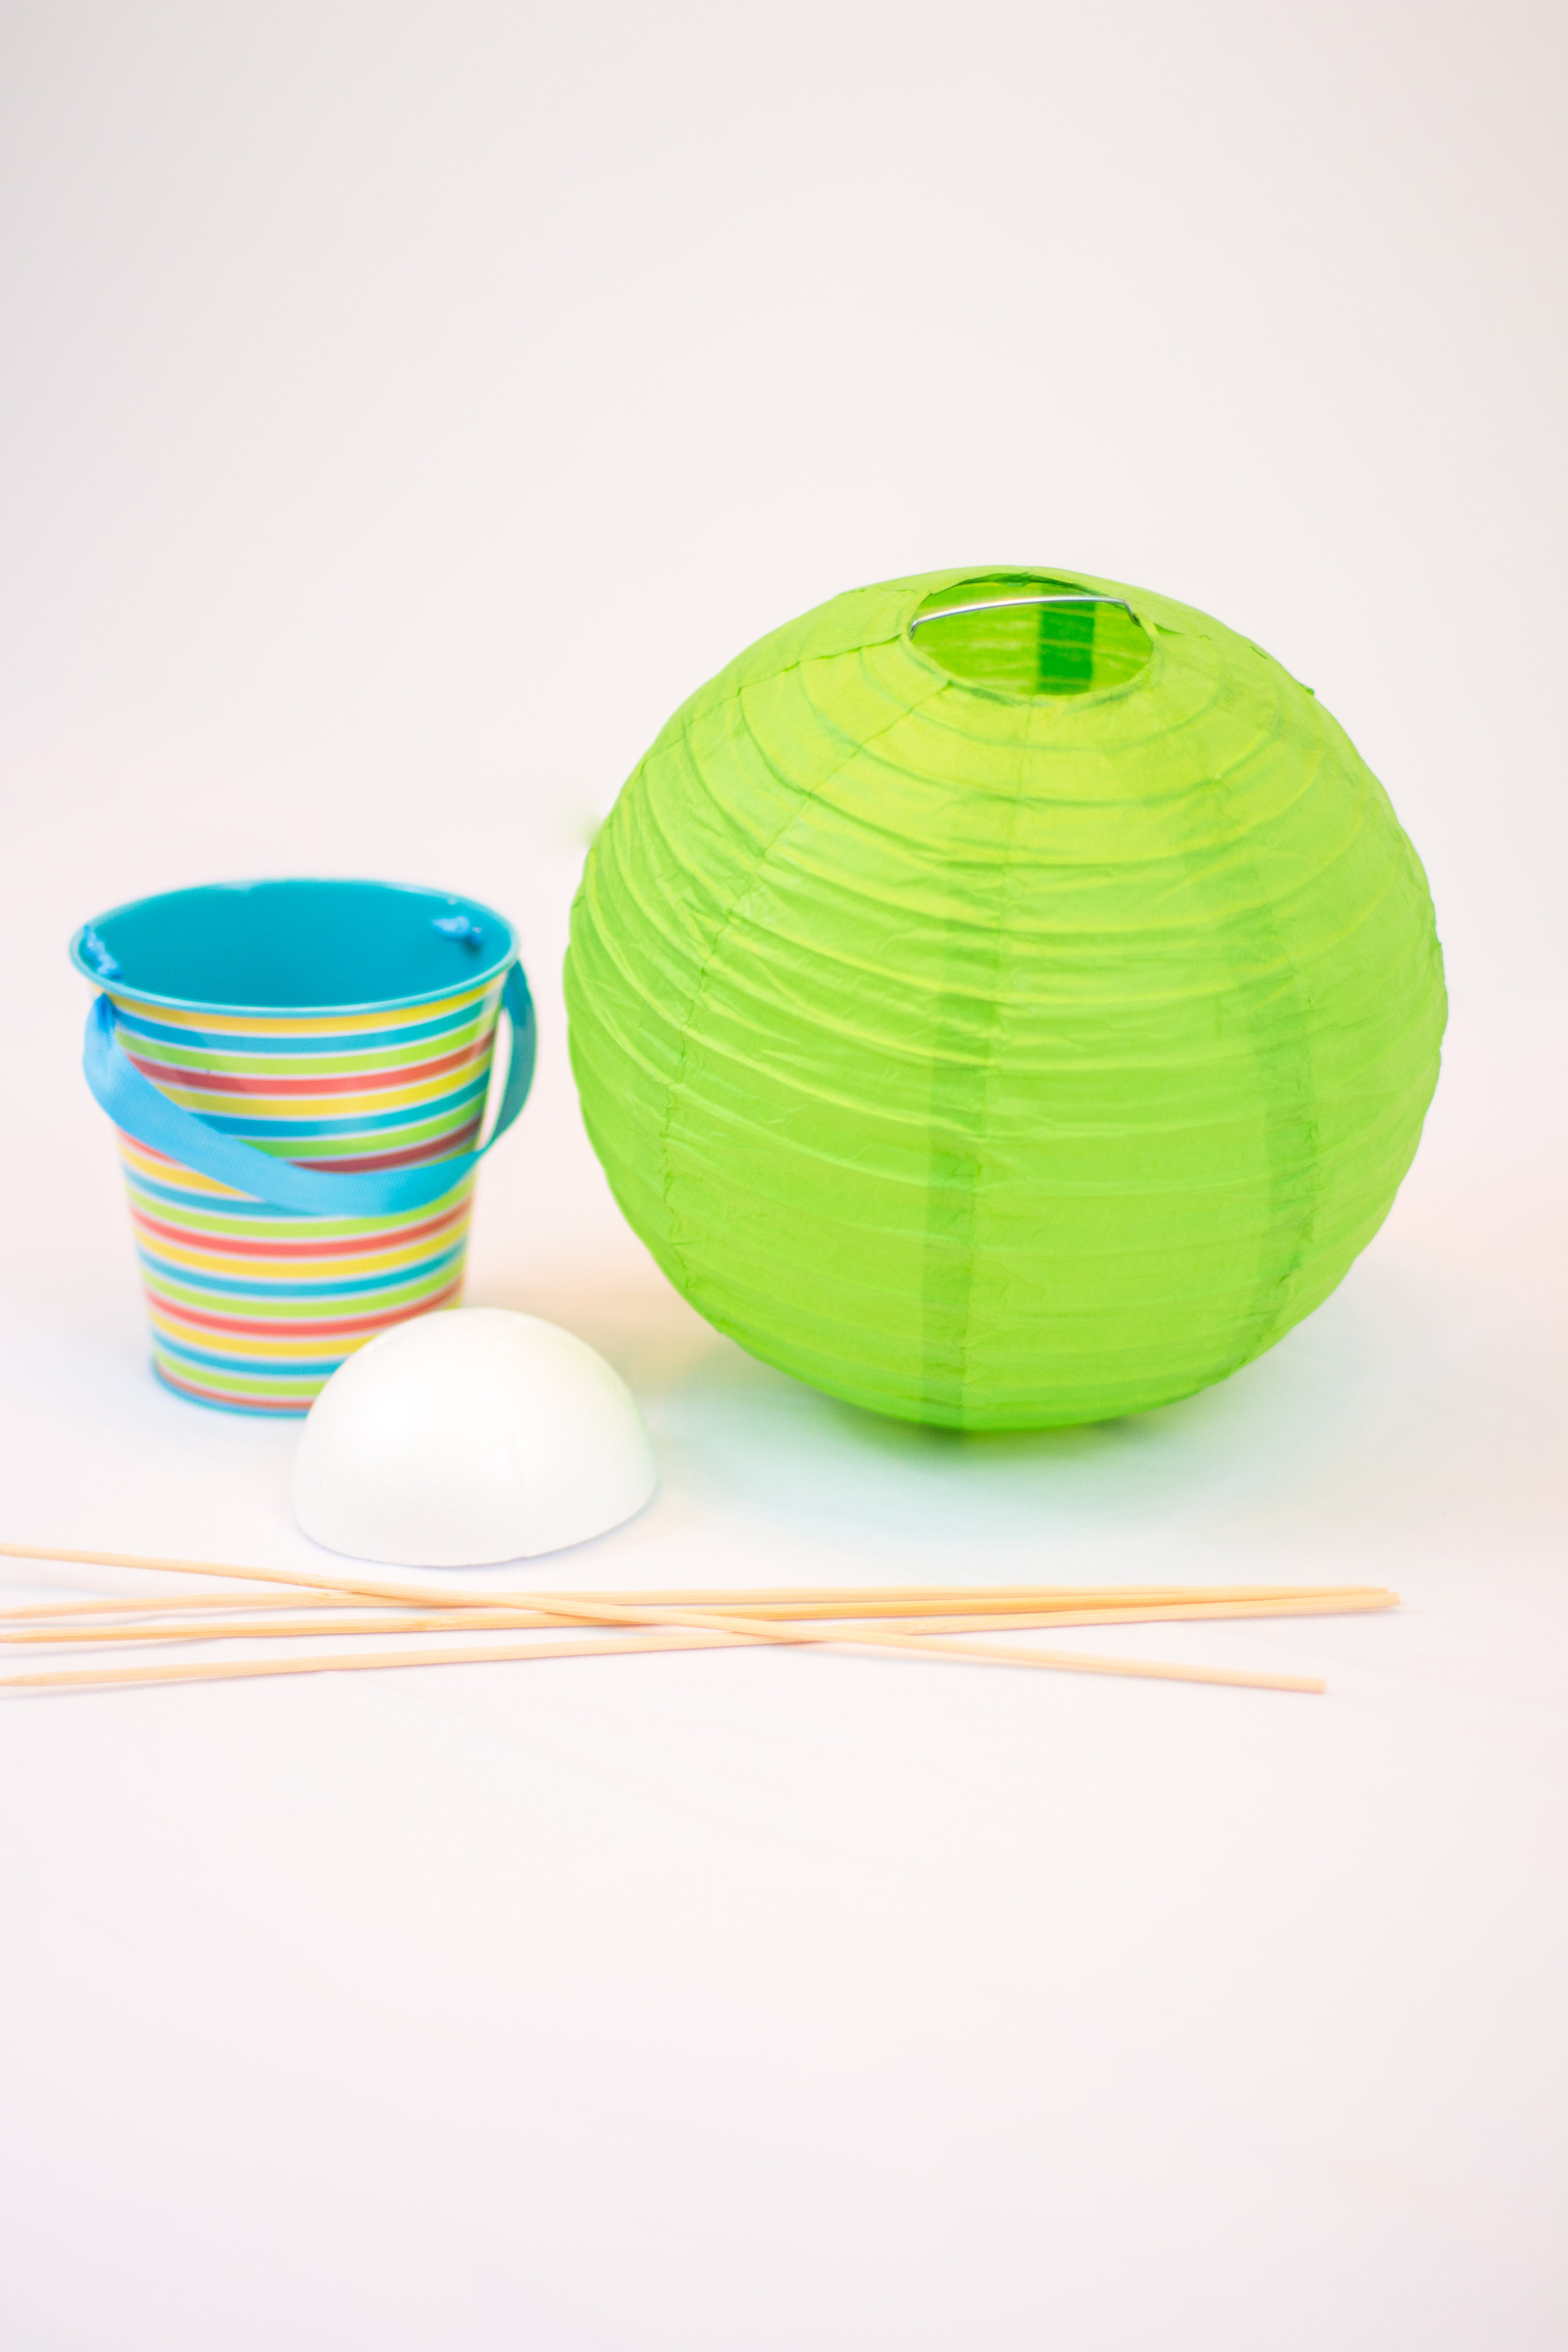
1. Paper lanterns (for this tutorial, I used 8 inch balloons from Paper Lantern Store)
2. Small bucket or basket for base (mine came from the dollar section at Target!)
3. Small styrofoam half ball for inside the base
4. 12 inch bamboo skewers (you can get at your local grocery store or also HERE)
5. Crinkle paper or filler of your choice
6. Yarn, jute or twine
7. Cardstock or construction paper in color of your choice, cut into small triangles
8. Scissors
9. Hot glue gun
Now let's get to it!
First, put a thin line of hot glue around the edge of the styrofoam half ball and push it firmly into the bottom of the bucket or base. This will help keep it from slipping when you're pushing the skewers into it later (trust me, I learned the hard way).

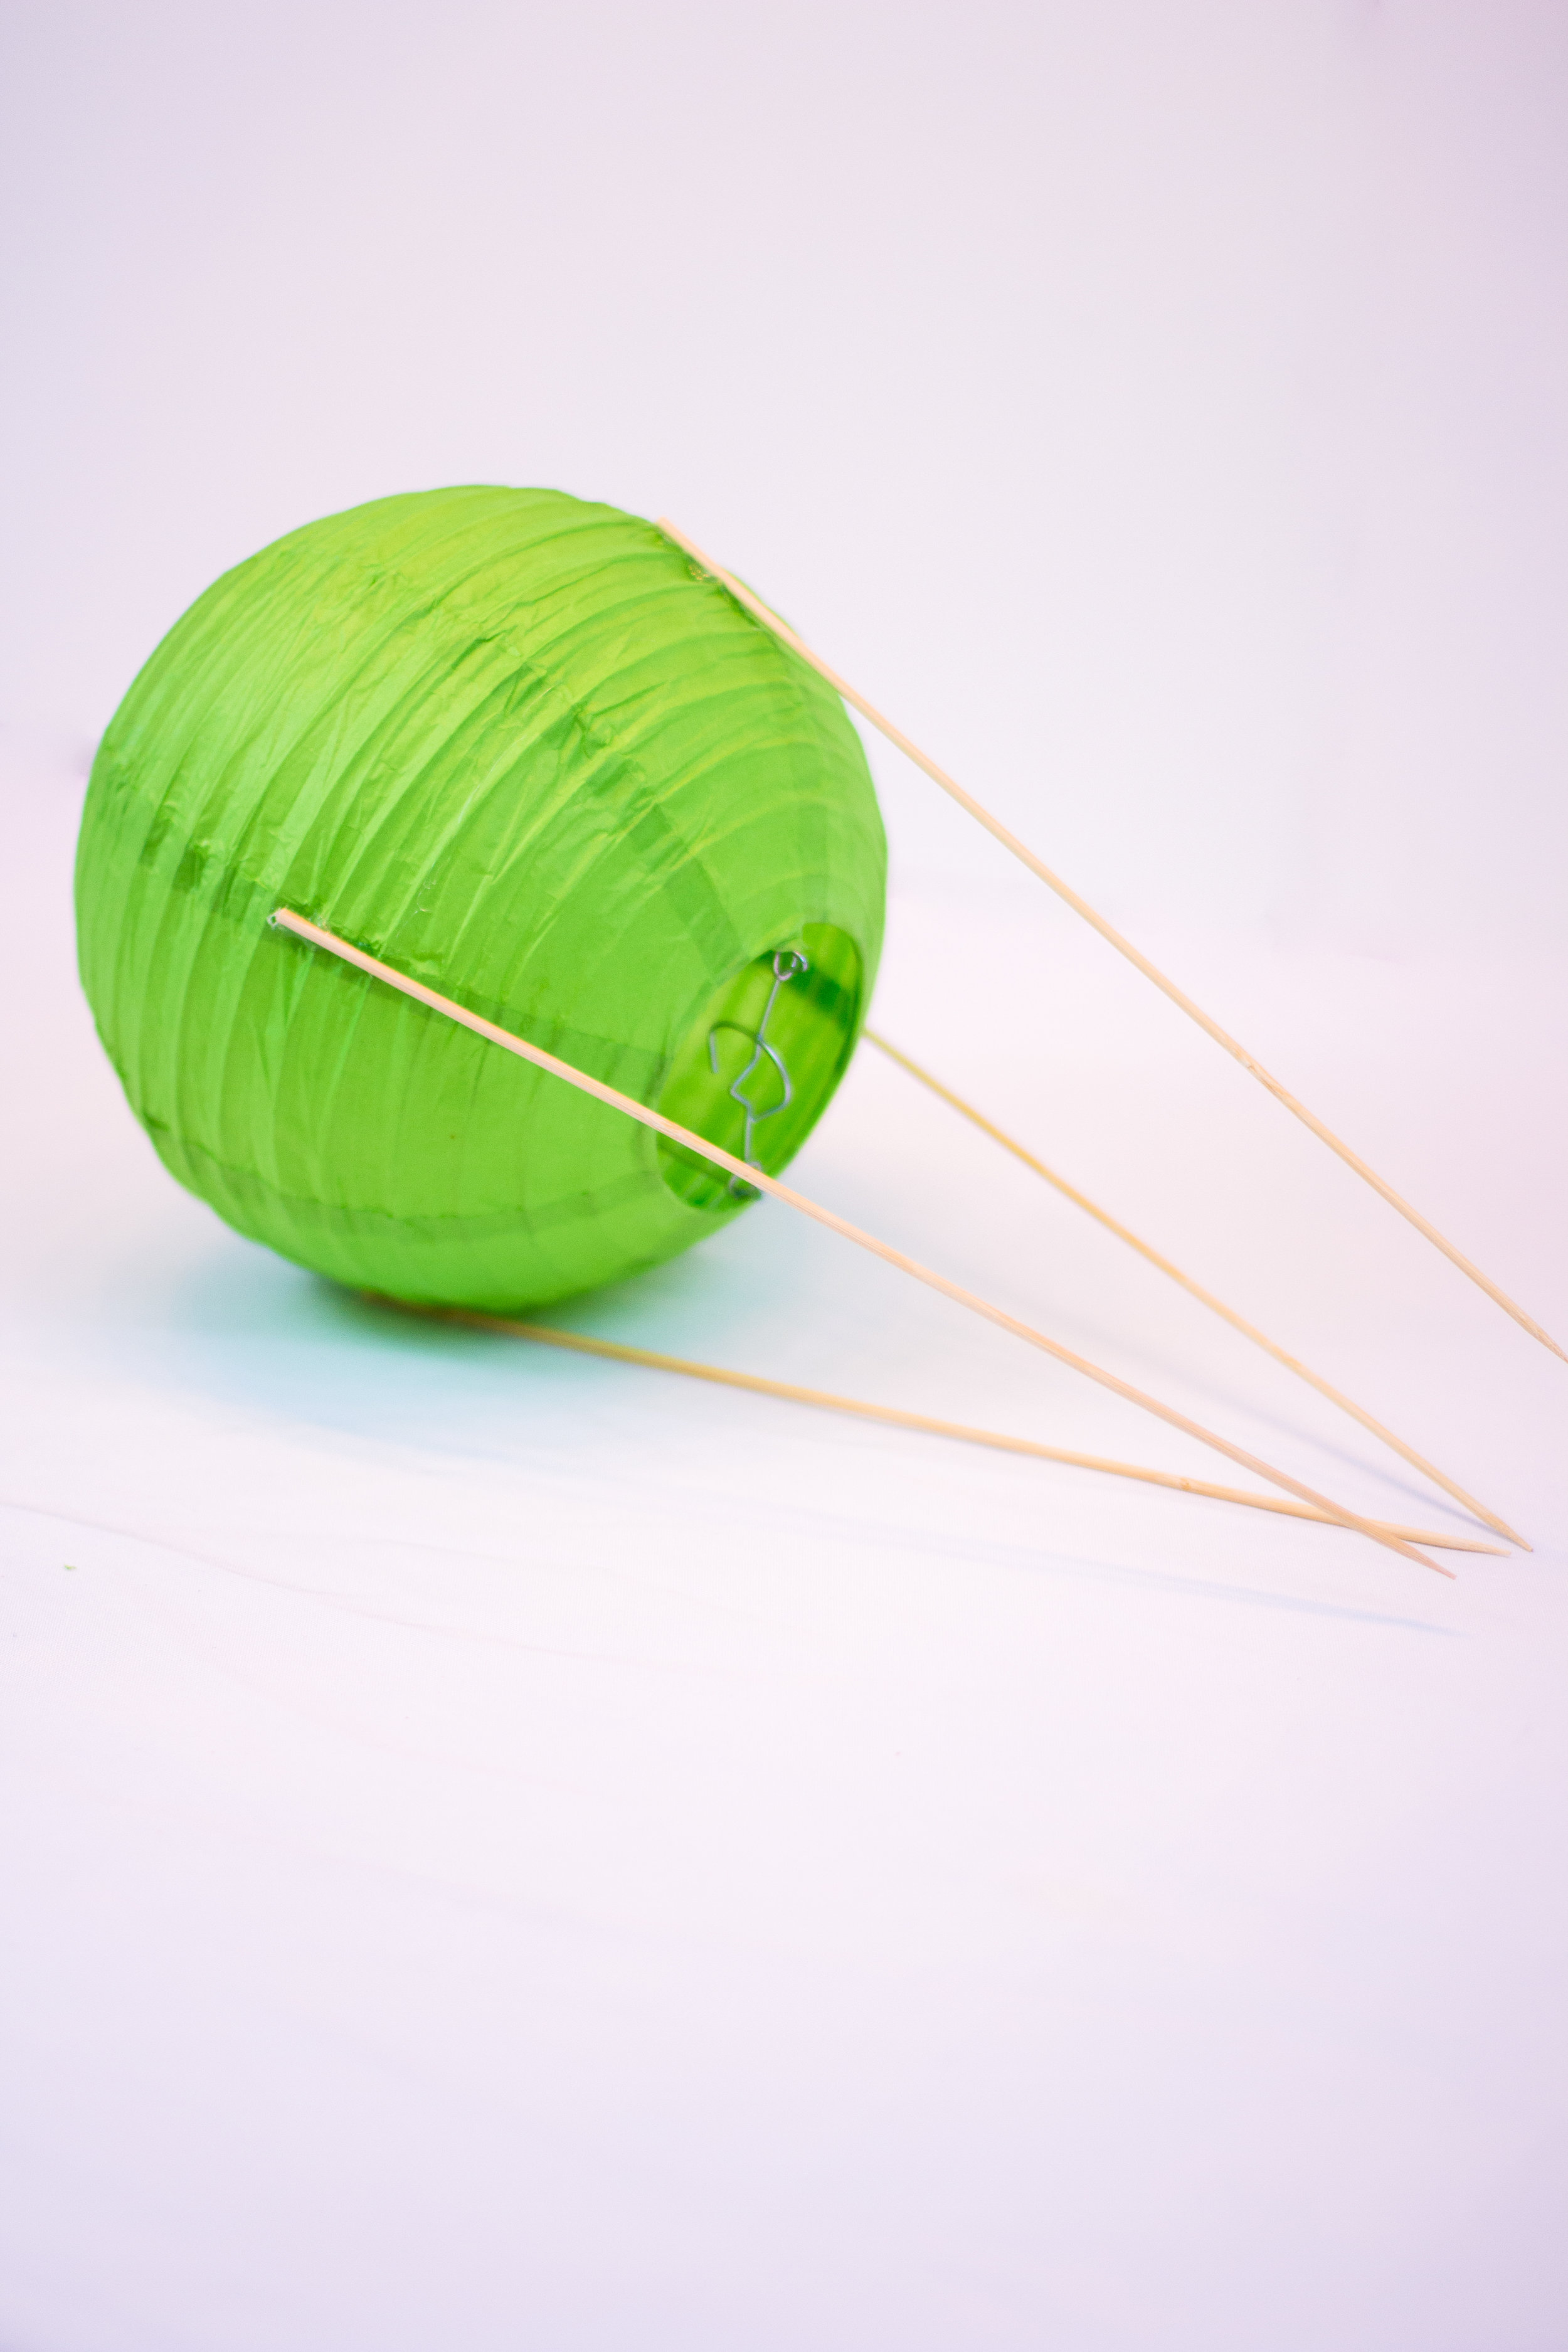
While that glue dries, next you will use a small line of glue to attach each of the skewers to the paper lantern. Make sure the pointy side of the skewer is at the opposite end, because you'll want the sharp point to help press down into the styrofoam when we attach it.
Hold each skewer in place for a good minute MINIMUM to let the glue fully cool and harden...I learned the hard way with my first one, as I had the lantern rolled over to the next one, the first skewer slid sideways and then hardened without me knowing, and when I tried to remove it to fix, I ripped a giant hole in the lantern. FAIL! Learn from my mistake and make sure it's cool and secure before you move on! (this is a good project to do while watching tv to kill the cooling time)
(OPTIONAL) For a pop of color or to dress up the skewers, you can wrap them in yarn, twine or jute and secure BEFORE you attach them to the lantern!

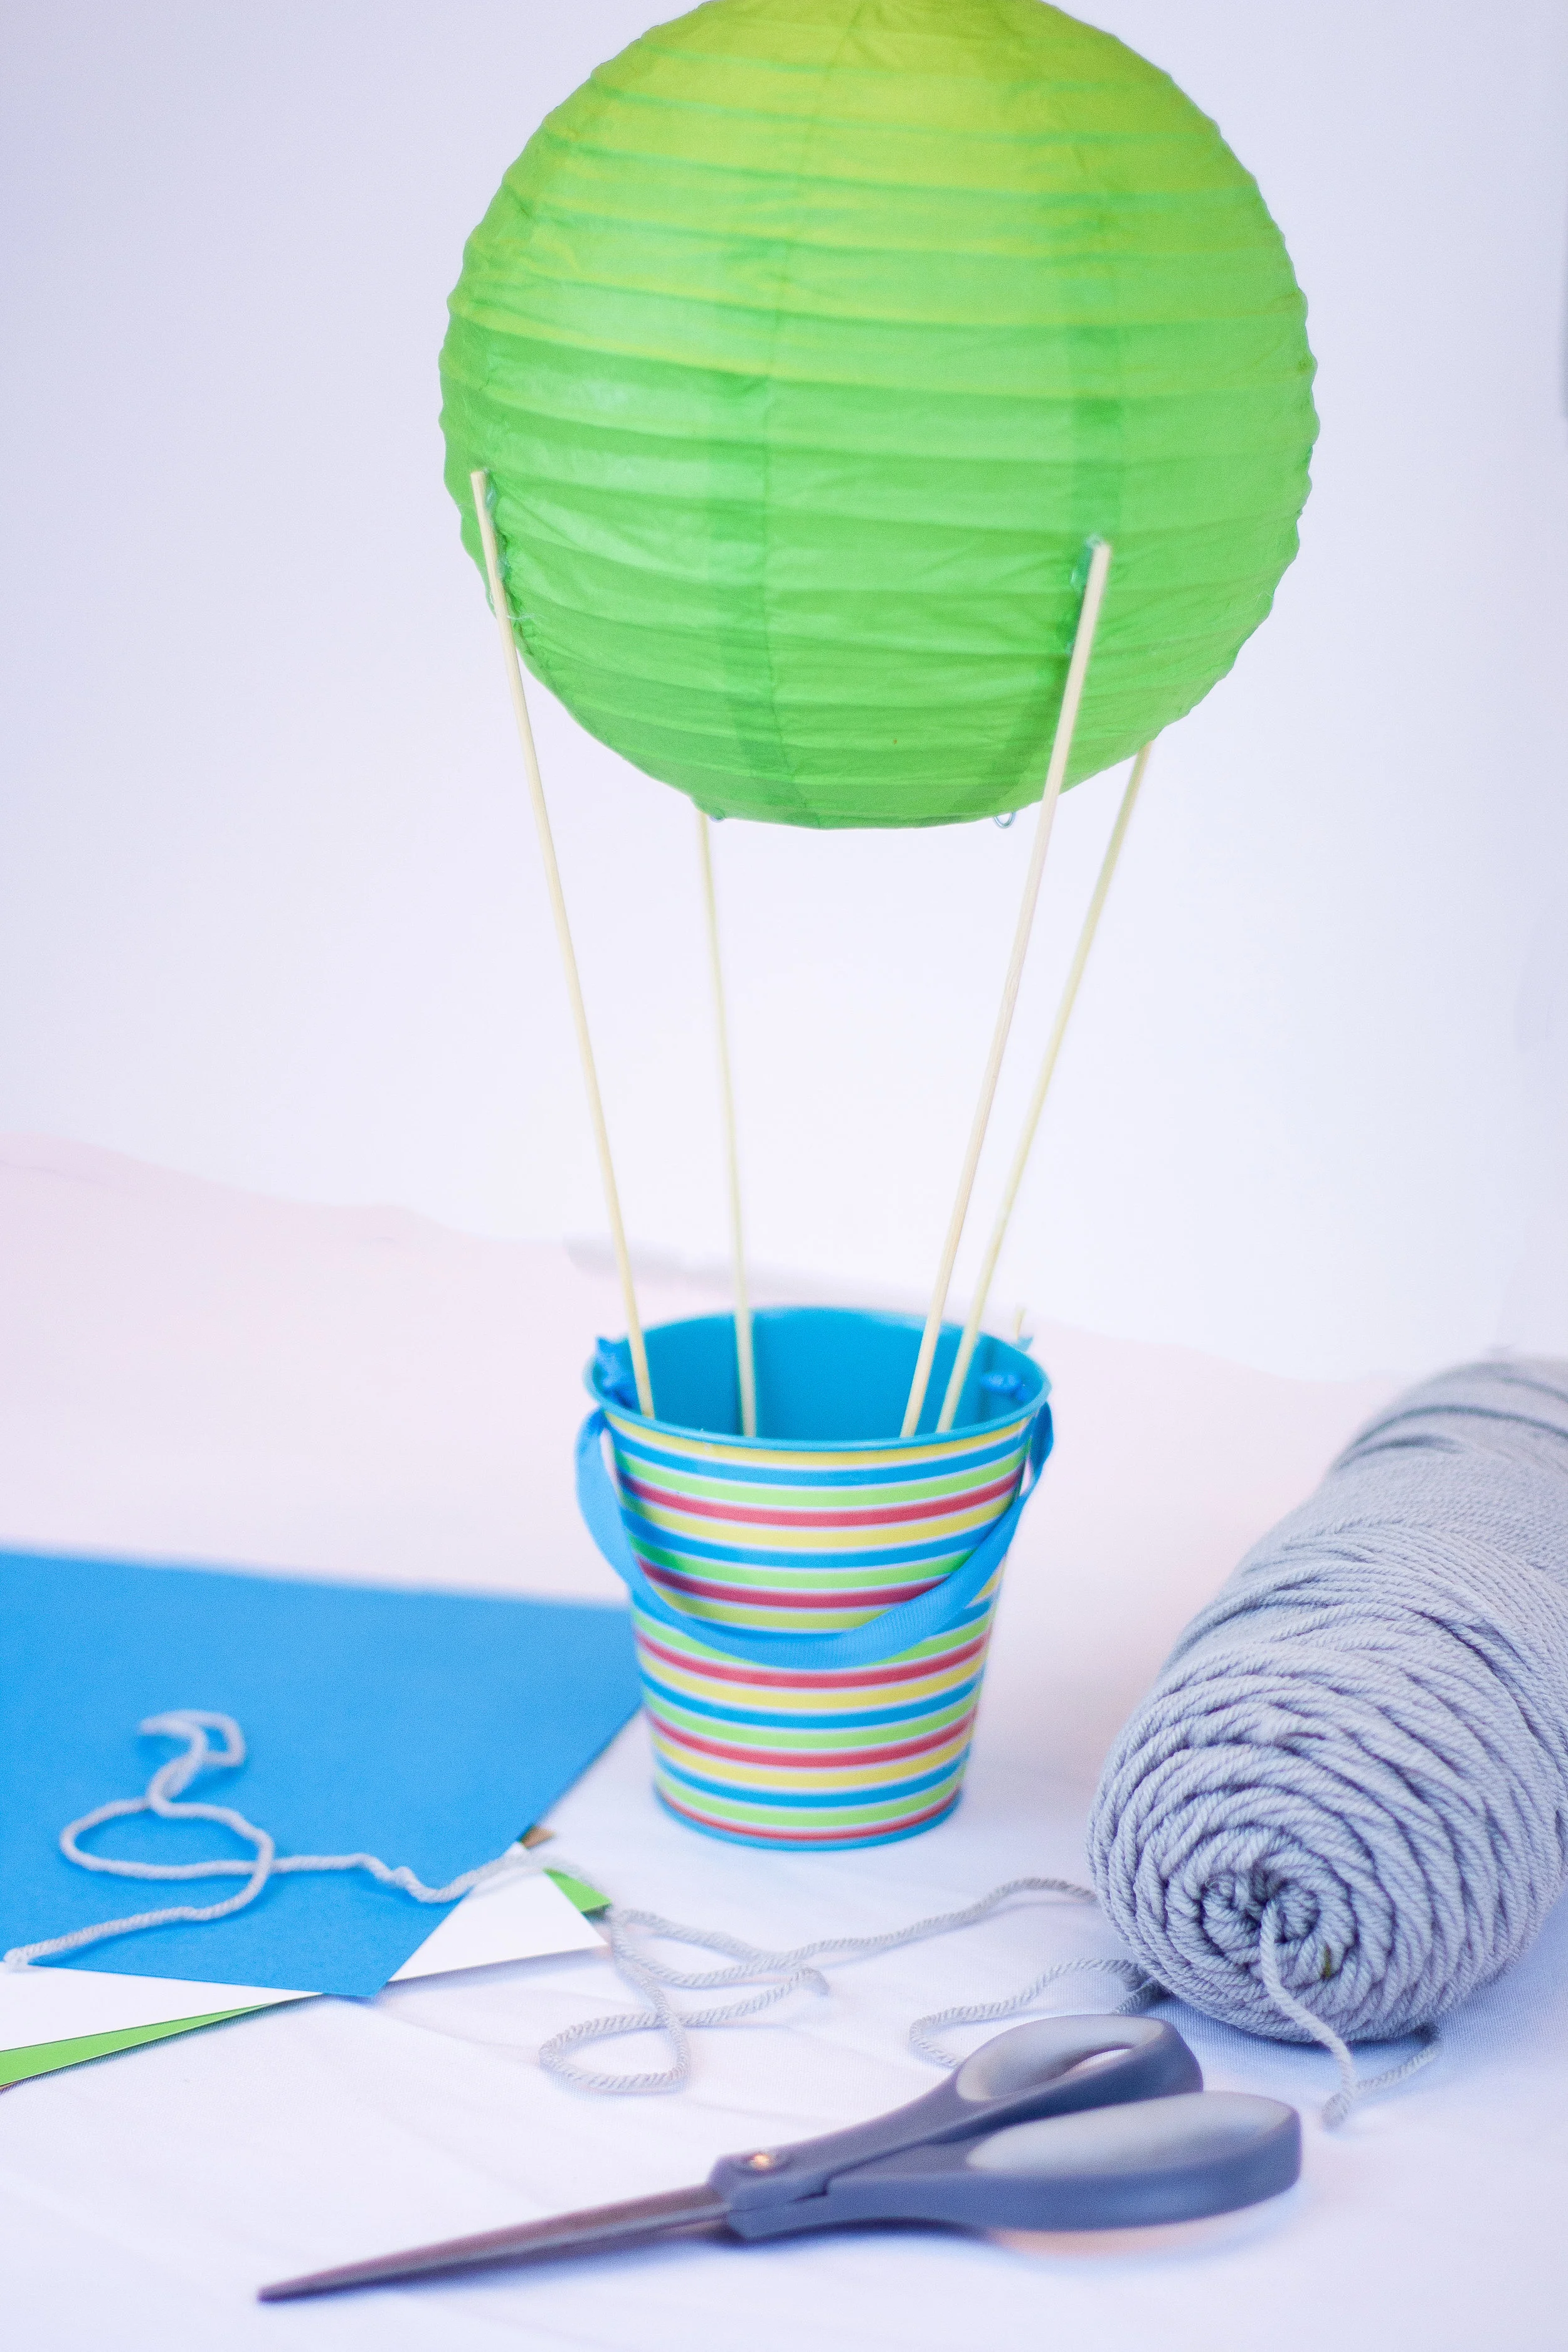
Once all four skewers are lined up, glued and fully cooled, they should angle towards each other at the bottom. Now you're ready to insert them into the styrofoam ball at the base of the bucket.
This next part just takes a little patience and strategy. I start with two skewers opposite each other and gently push them down into the styrofoam at a slight angle, just a little bit. Once they're about a half inch in, I do the same with the other two skewers. You'll bump into a little bit of tension at the top of the skewer where it's attached to the balloon, so be sure to ease them in to avoid ripping it apart from the lantern.
I continue alternating between the two sets of skewers pushing them down into the styrofoam until I feel like they are secure and the balloon is level.
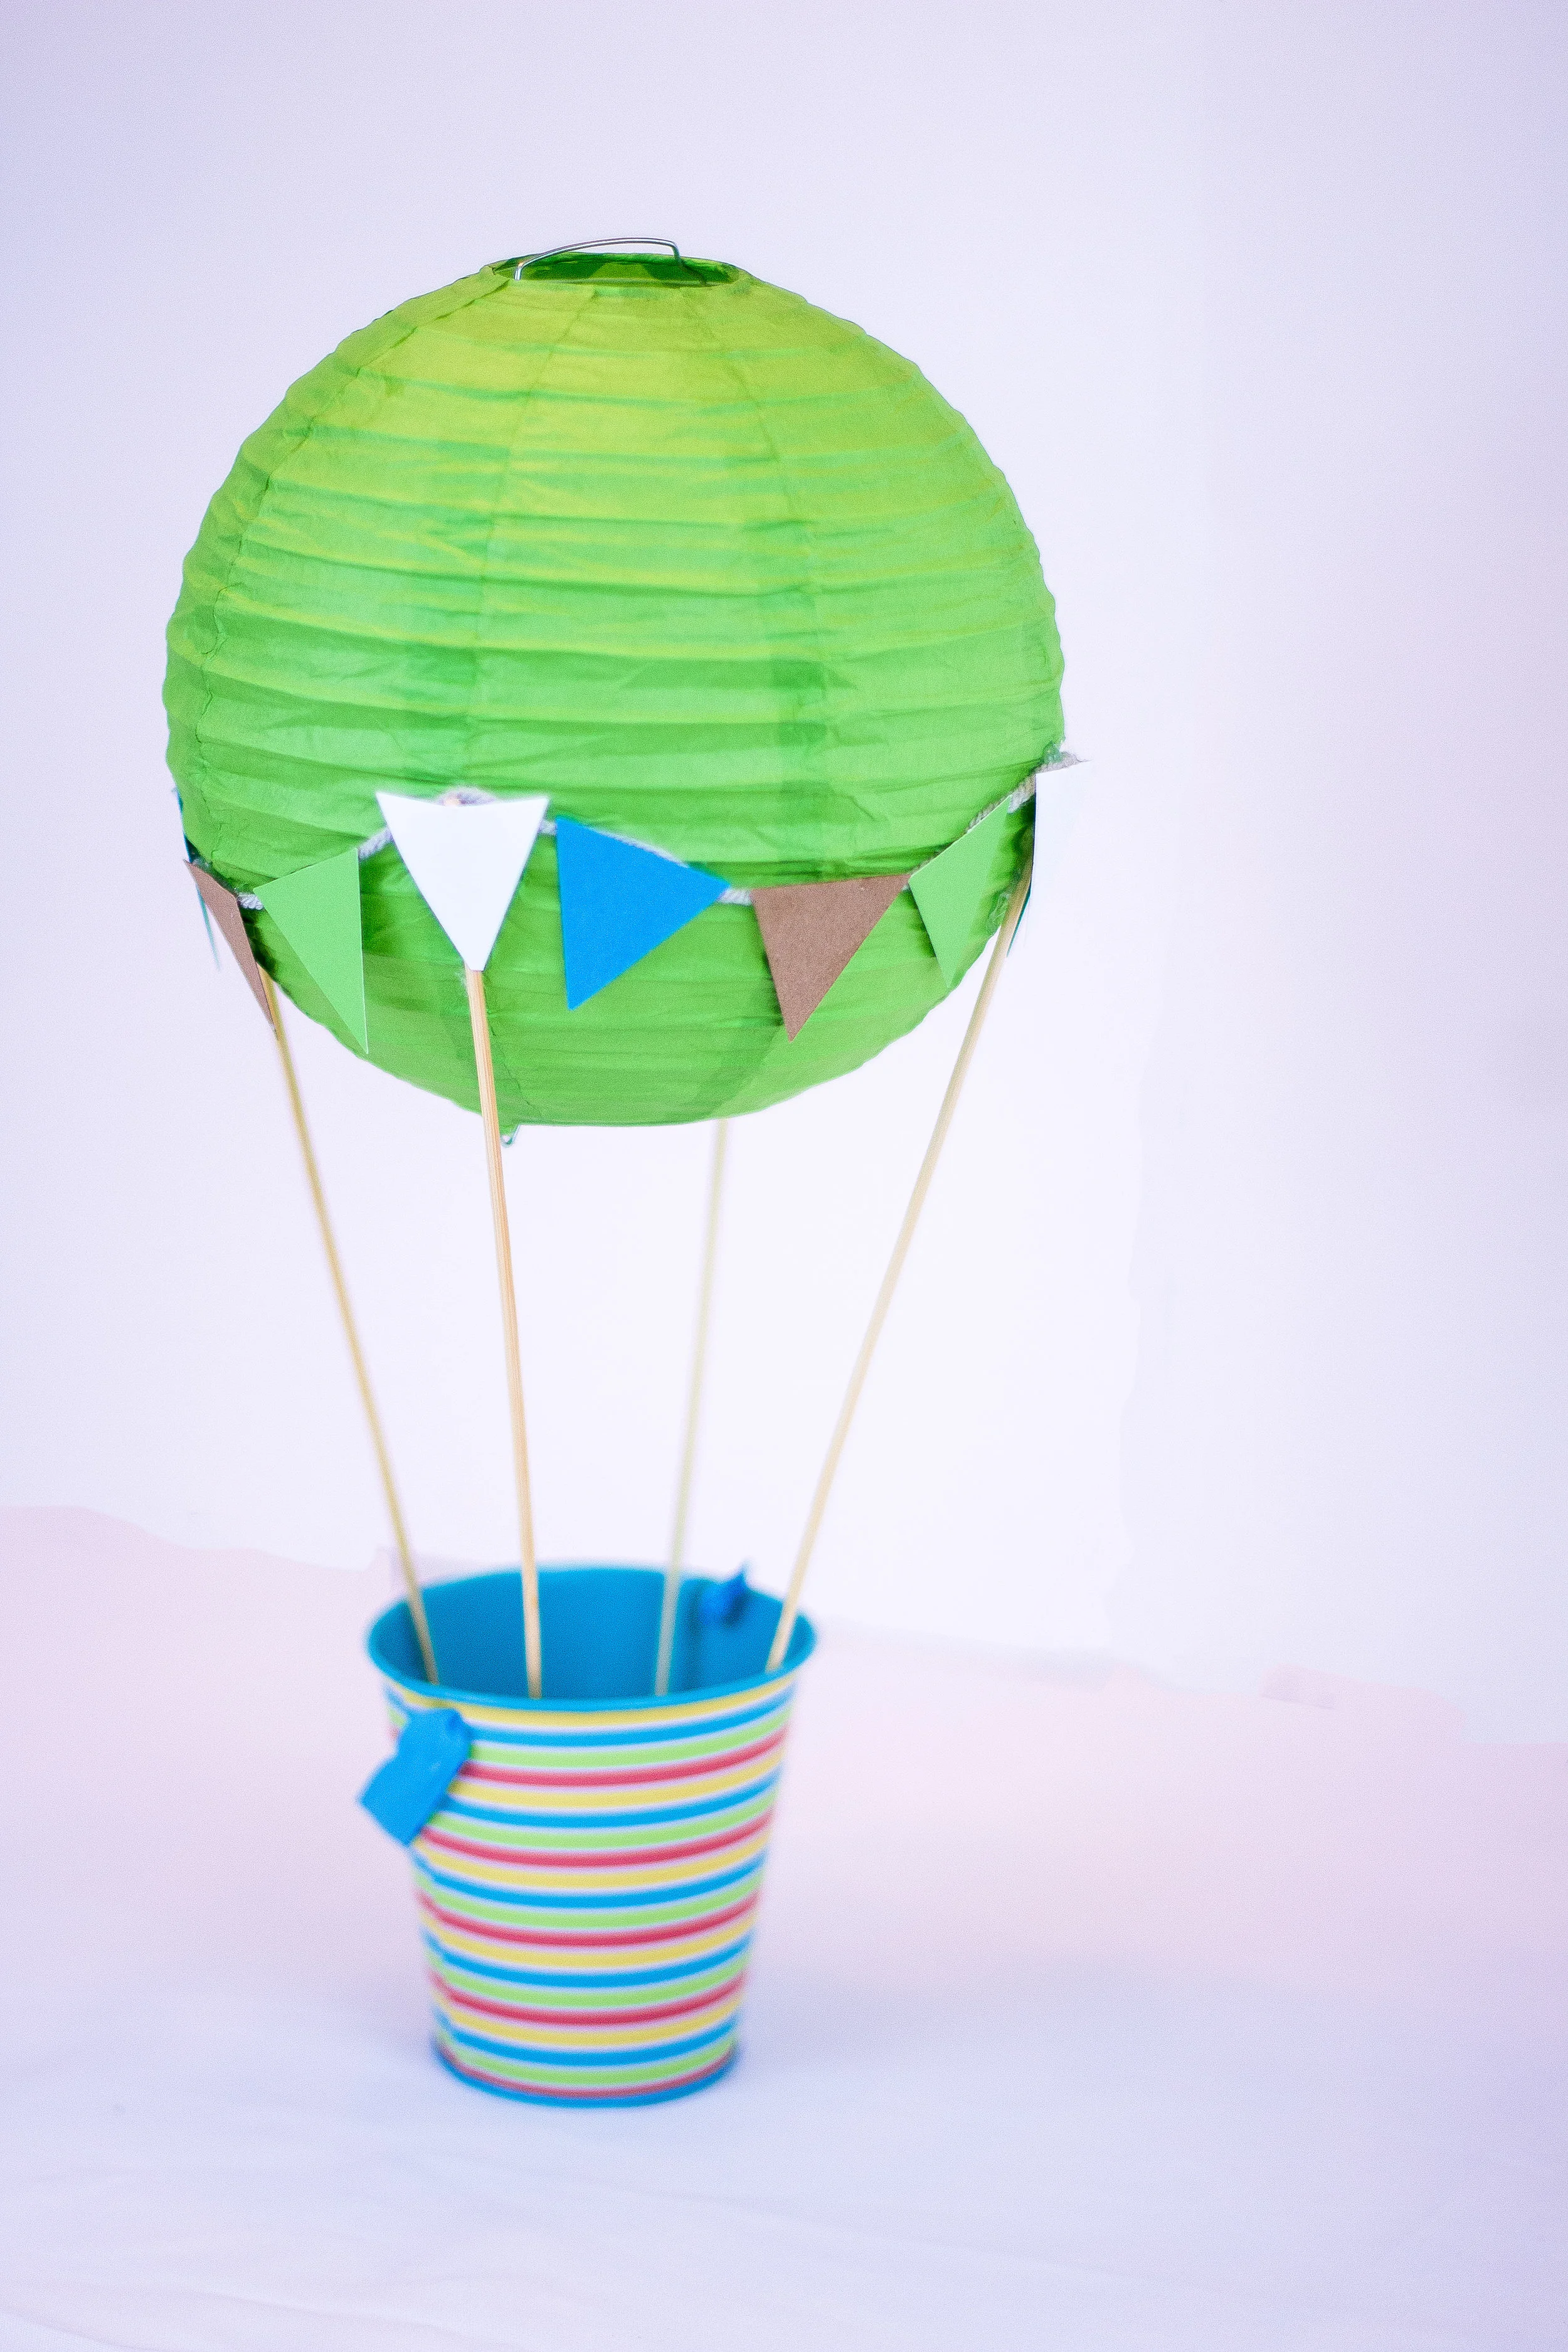
Now you're ready to apply the bunting! This adds some cute pops of color, and also helps mask the point where the skewer is attached to the lantern. First, I use a dab of hot glue at the top of the skewer and press the end of the yarn into it. Then, glue one of the card stock triangles on top of the skewer and yarn to hide it. (for the triangle pennants, you can use a punch like THIS to help make sure they're all consistently the same size and save time!)
Next, continue to drape the yarn around the balloon, adding a dab of glue at each skewer point, then attach your triangle pennants all the way around with dabs of hot glue as well.
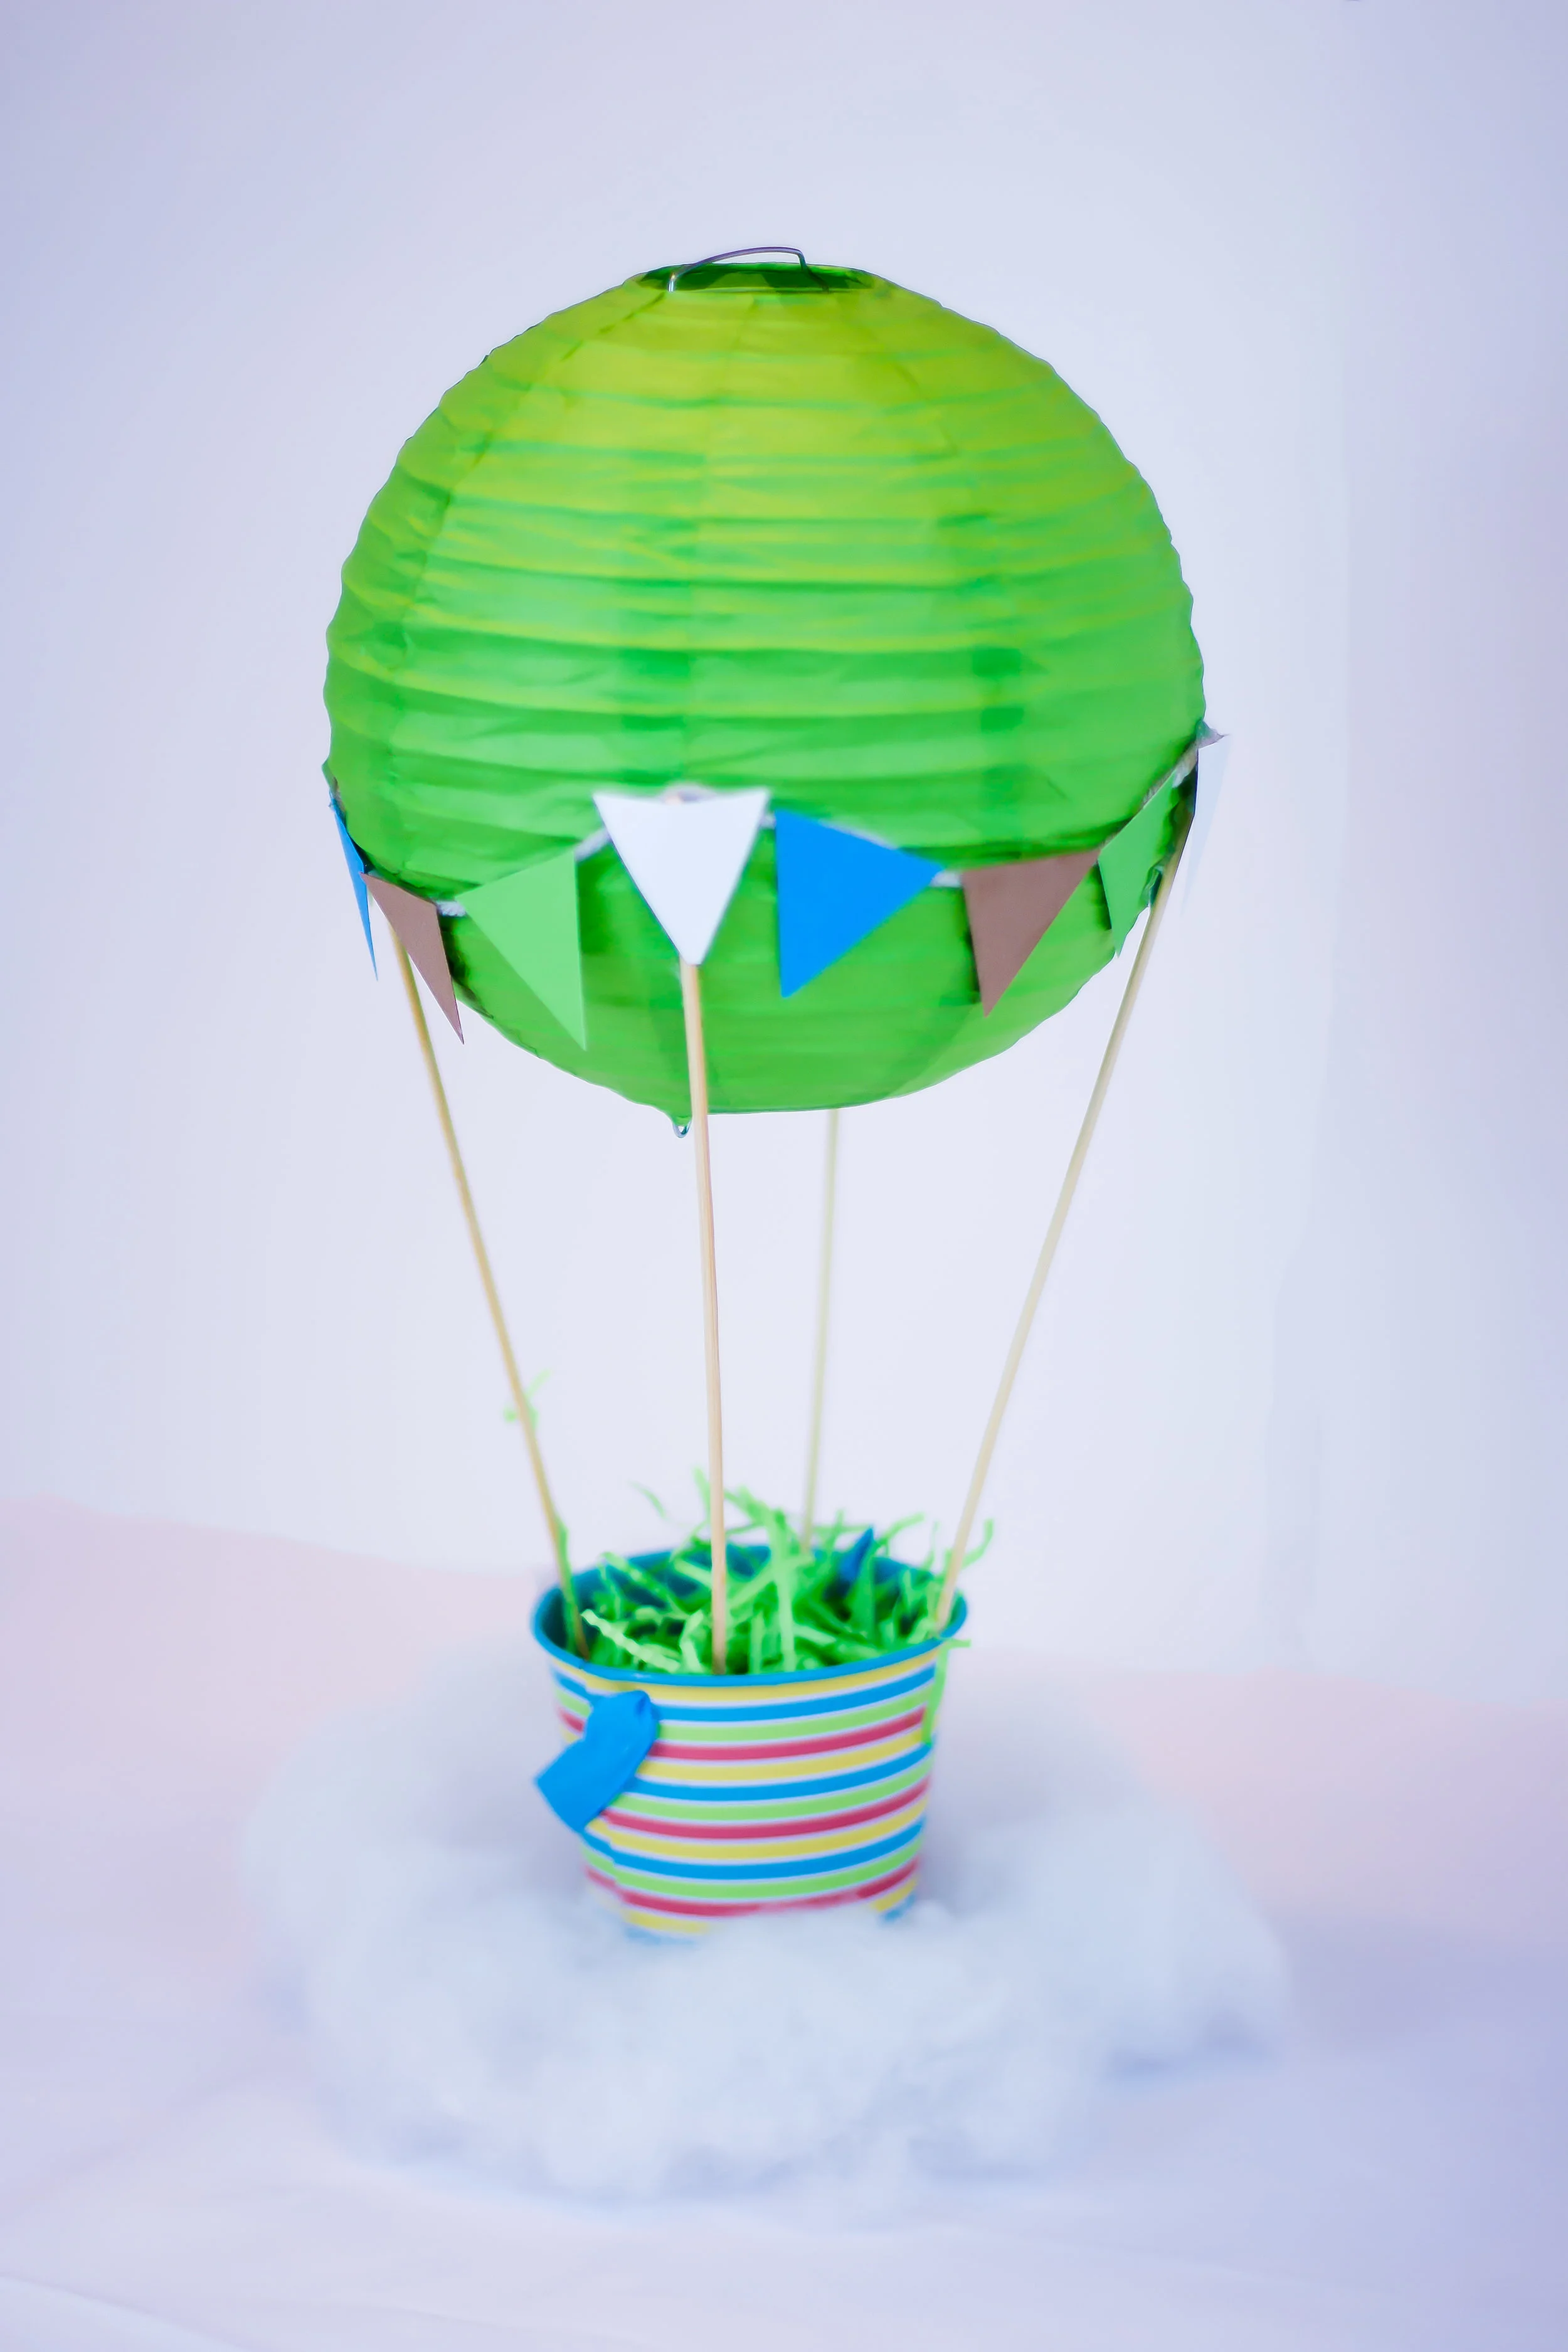
You're almost done! Now you just need to add your filler to hide the styrofoam in your bucket. For this tutorial I used some bright colored crinkle paper to match (just a small amount), but you can use just about anything. My client actually re-purposed these centerpieces a week after their party for Easter by adding a few cute Easter eggs on top of the crinkle paper!

And that's it, you're all done! For a little extra "something" on your table, put a little bit of cotton batting around the base of the bucket to make your balloon look like it's floating in the clouds. These centerpieces also hang easily from anywhere with fishing wire, so the sky is the limit to what you can do with them and your decor!


TUTORIAL VIDEO
Here's a quick 'fast-action' version of the tutorial so you can see the steps above!

Feel free to comment below with any questions, and happy crafting!

DISCLAIMER: This post contains some affiliate links. This does not affect the price of the products you're purchasing, but I do receive a small kickback for any purchase made. I only link to products that I personally use and highly recommend!