Check out all the patriotic details from this Red, White & TWO themed birthday celebration by Sweetwood Creative Co.!
Sweetwood Style
Event Design Inspiration & All Things Creative
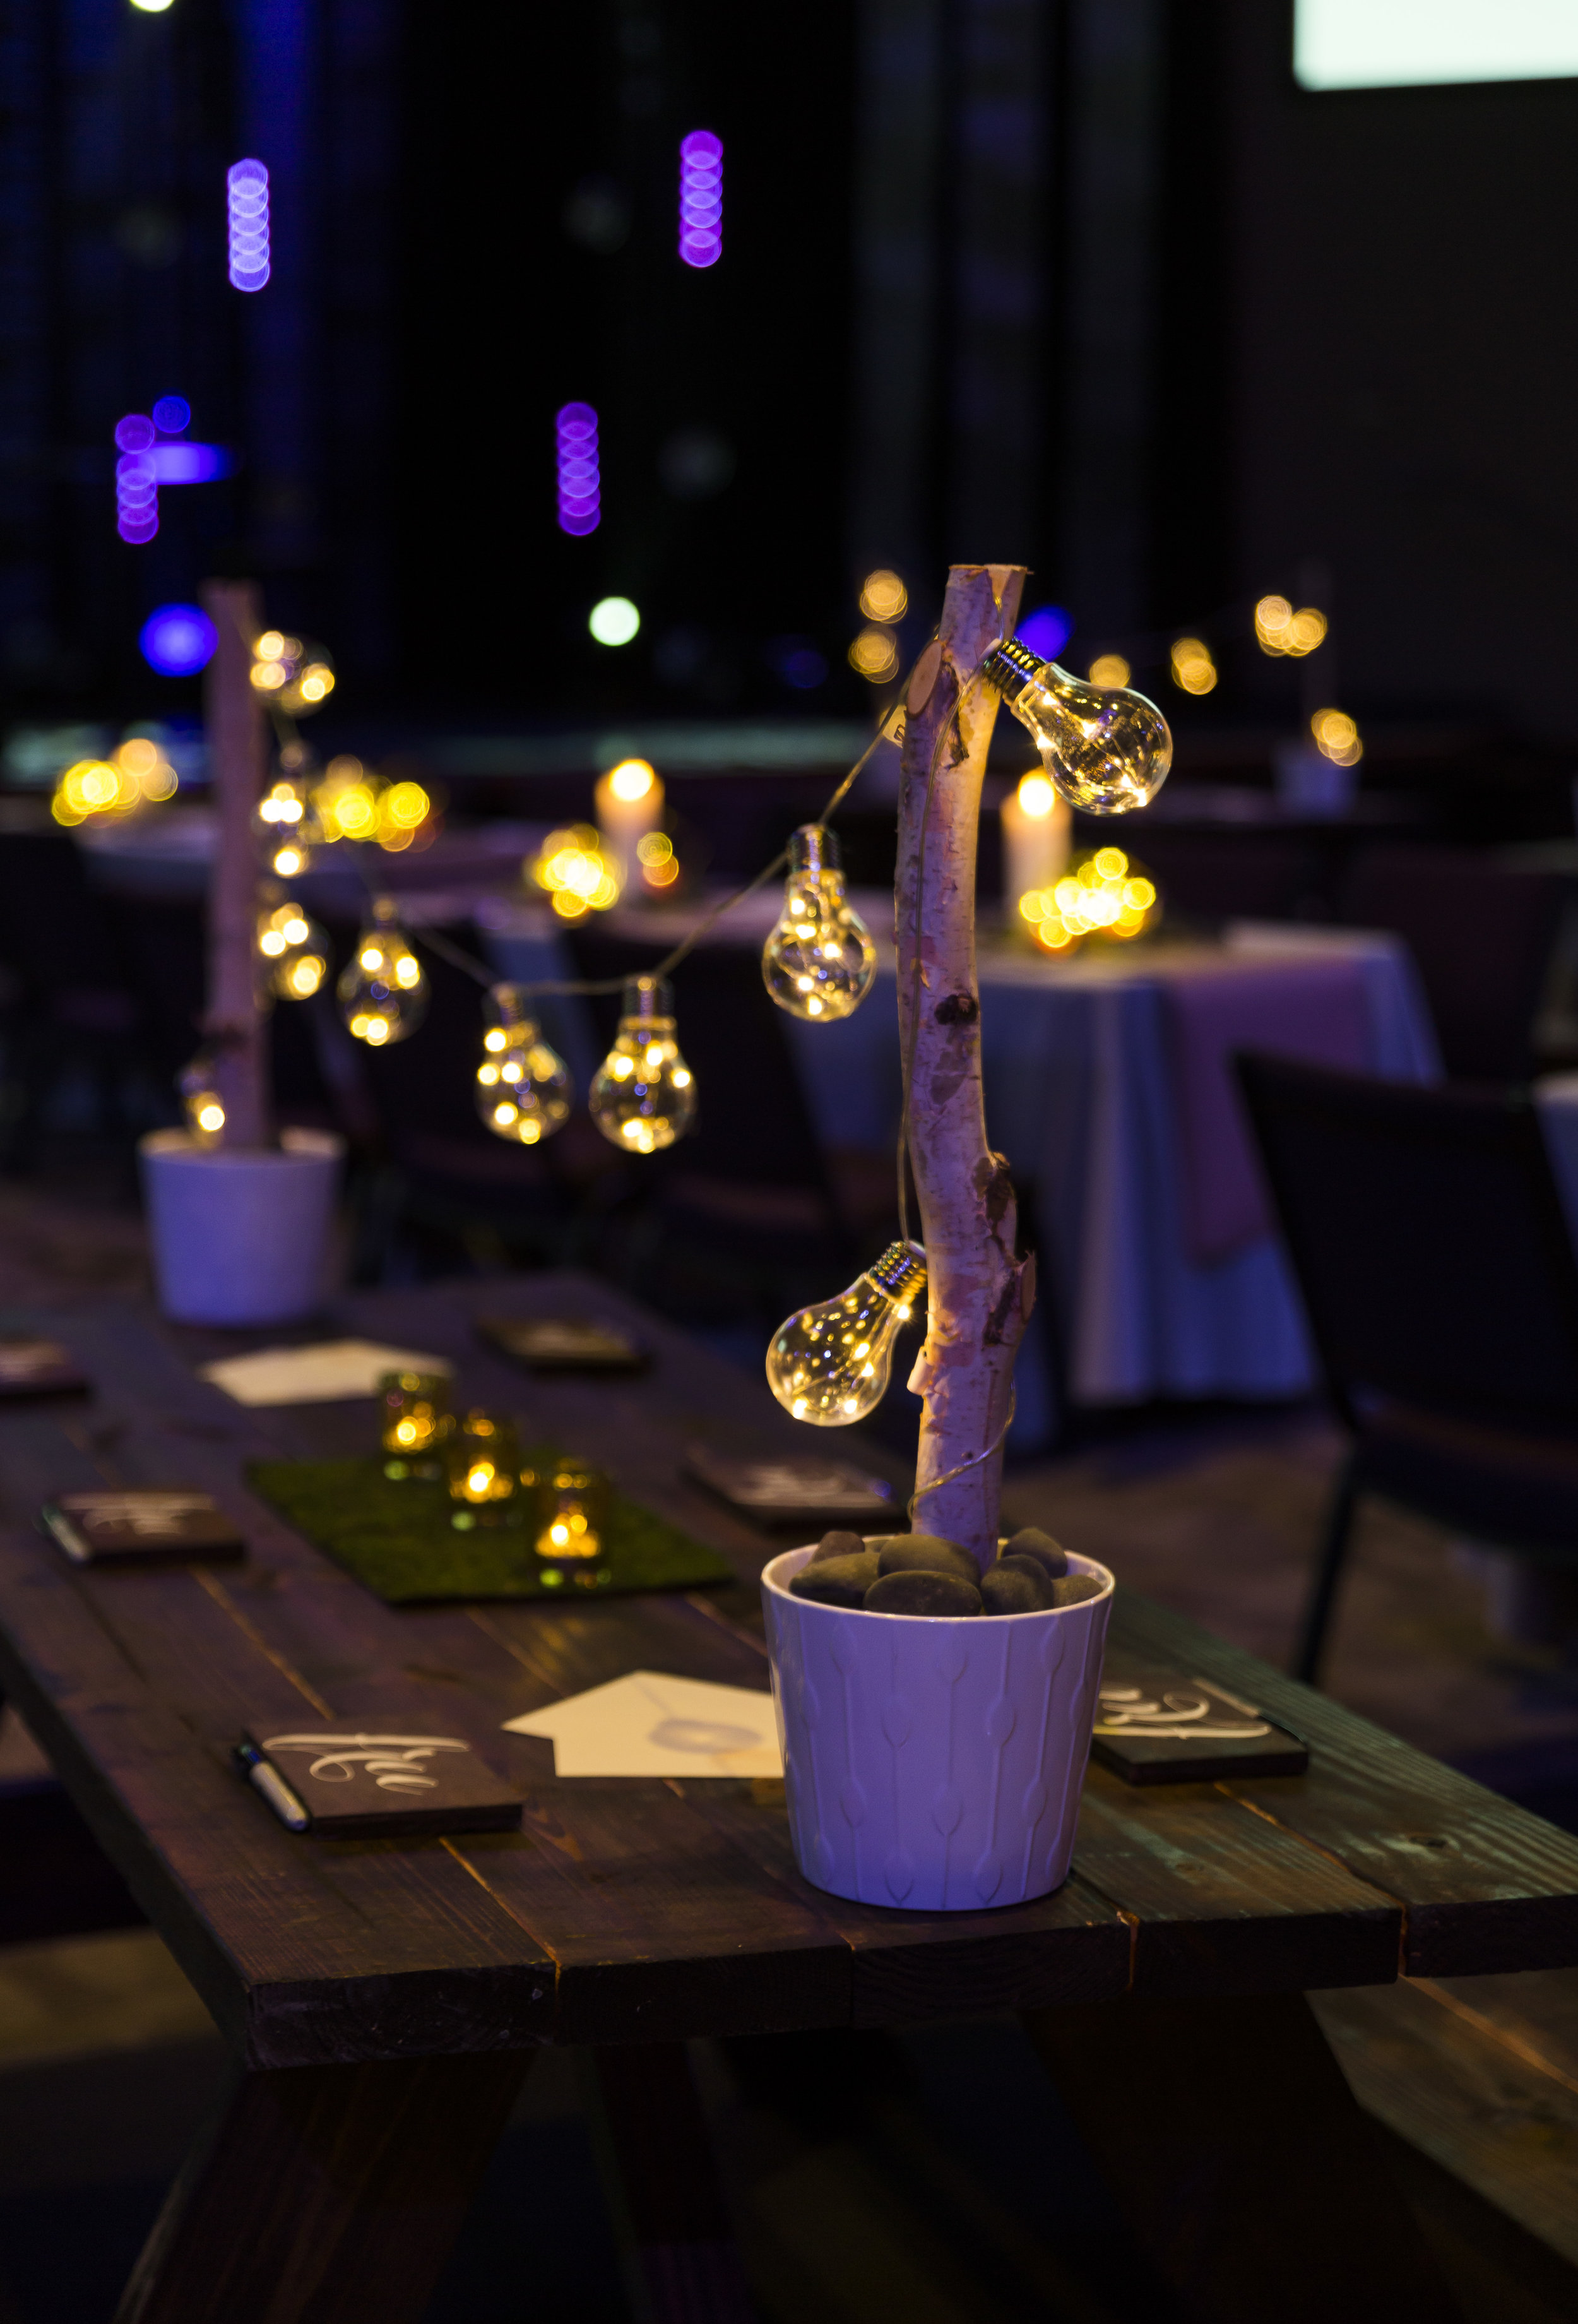
Today I'm excited to bring you a tutorial for my favorite custom centerpiece I've built to date! We made these beauties to complement some picnic tables we had rented for our event - it was a great way to bring the outdoors inside and create a cozy, rustic and casual environment.
IKEA MUSKOT Plant Pot - 9 1/2" (2 per centerpiece)
10 ct. Battery Operated Edison String Lights - I got mine at World Market (no longer available) but you can find similar HERE at Target.
4ft Birch Sticks 3-Pk from Hobby Lobby (they don't have them online) $15.99/set of 3, but use your HL app for 40% off!
GREAT STUFF 16 oz. Gaps and Cracks Insulating Foam Sealant with Quick Stop Straw - Home Depot (I used 2 cans for 15 sets of centerpieces)
Vigoro 0.4 cu. ft. Mexican Beach Pebbles - 2 bags for 15 sets of centerpieces (you could also use moss or something else to fit your theme/style!)
Rubber gloves (for use with the spray foam)
Tape of some sort (masking or gaff recommended) to help hold sticks in place while they dry
TOTAL COST PER CENTERPIECE: All in all, it cost us about $35 per centerpiece set. And the great thing is that we've already used these in multiple events - they are super versatile and add a touch of a soft glow to any room!
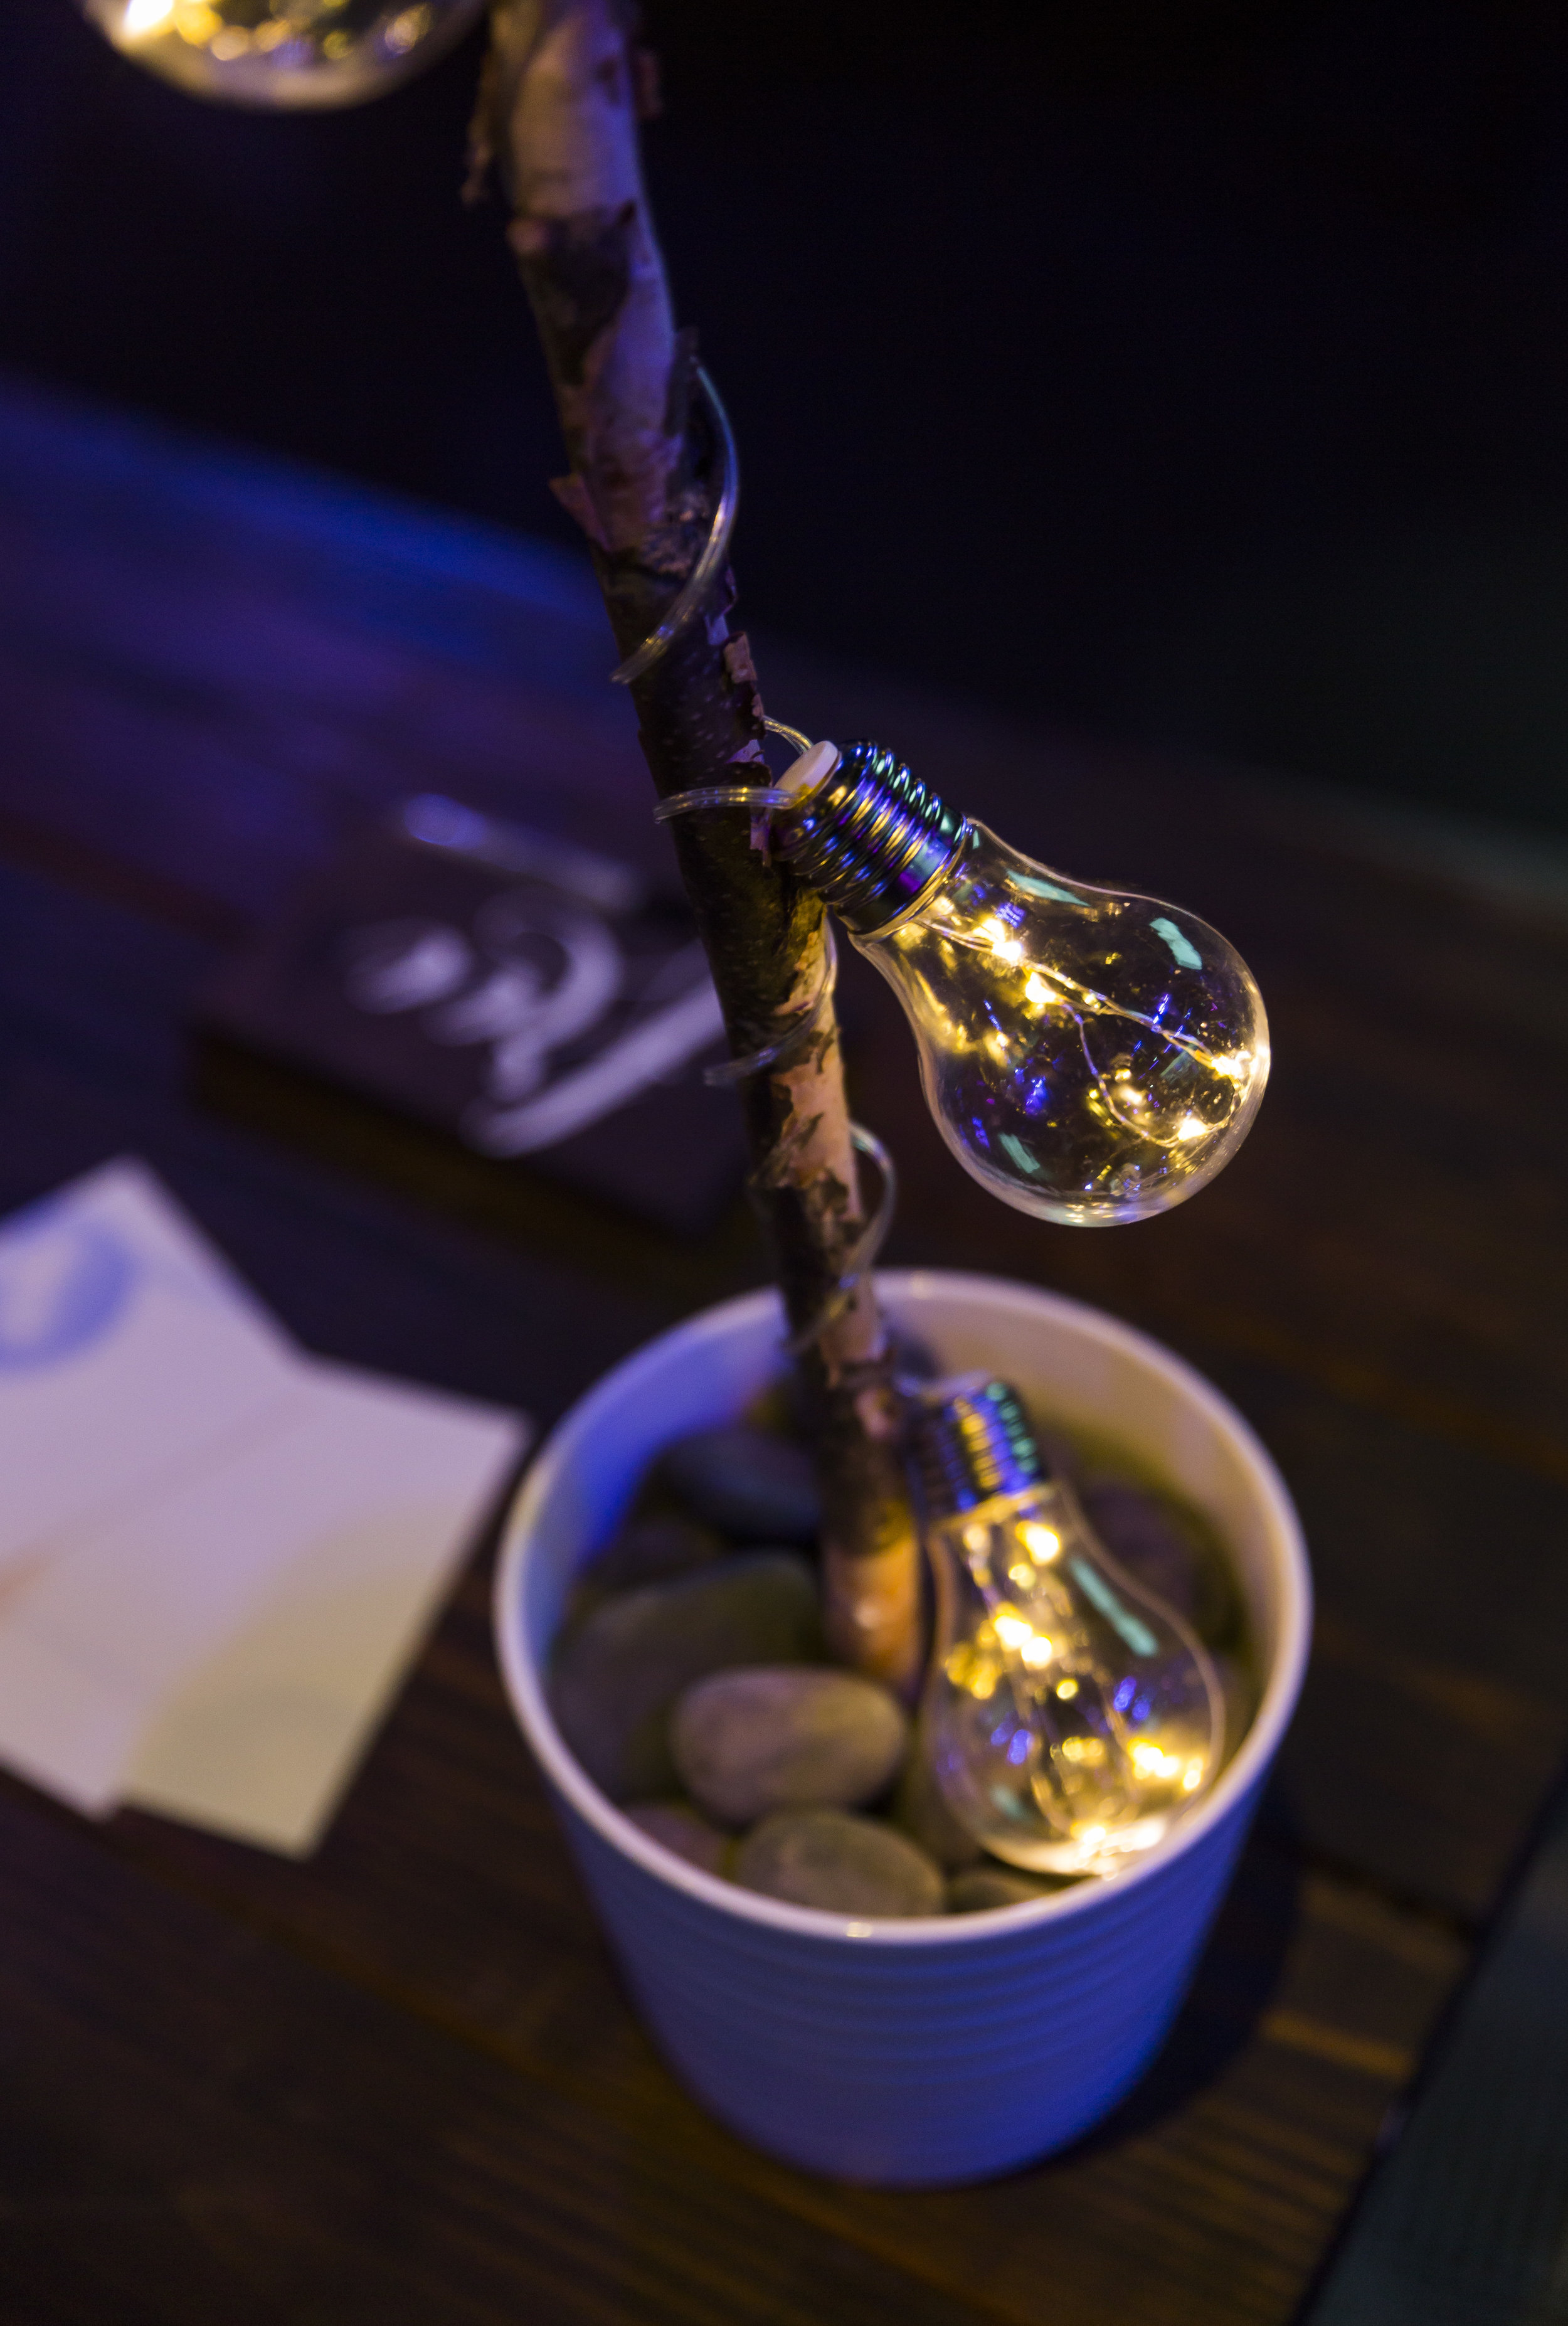
First, I sweet talked my dear husband into cutting all of the birch sticks in half for me, so each centerpiece stands 2ft. high. Each birch log looks a little different, so as he cut them I numbered the bottom of the sticks to make sure each centerpiece matched in both pots. I also had him cut a notch in the top of each log so that the string lights can sit securely on top.

Next, I used the spray foam to secure the logs inside the pot. PLEASE USE GLOVES! This stuff is legit and it will legit take the skin off your hands, so please use caution! It also expands fast, so start with small sprays to get the amount you need.

I filled the pot up a little less than halfway, then used the logs and/or tape to hold them in place while it dried. Allow several hours to fully set.

Once they fully set, you're ready to add the lights and rocks. Wrap the lights around each log and secure in the notch on top of each pole. Finally, bury the battery pack under the pebbles and you're all set!
The great thing about these centerpieces is that you can swap out the rocks for moss or something else cute to match the theme and style of your event - they are very versatile! We finished the look up with a strip of moss in the center of the picnic table and three cute votives.

At our latest event, we also used them on some of the food tables. See more about that event HERE.

I love the soft, outdoorsy look we were able to create with these centerpieces, even when our events were inside. Bonus: they would look awesome in a back yard or on a porch as well!
Photo Credit: Sarah Marie Photography

(DISCLAIMER: This post contains some affiliate links.)
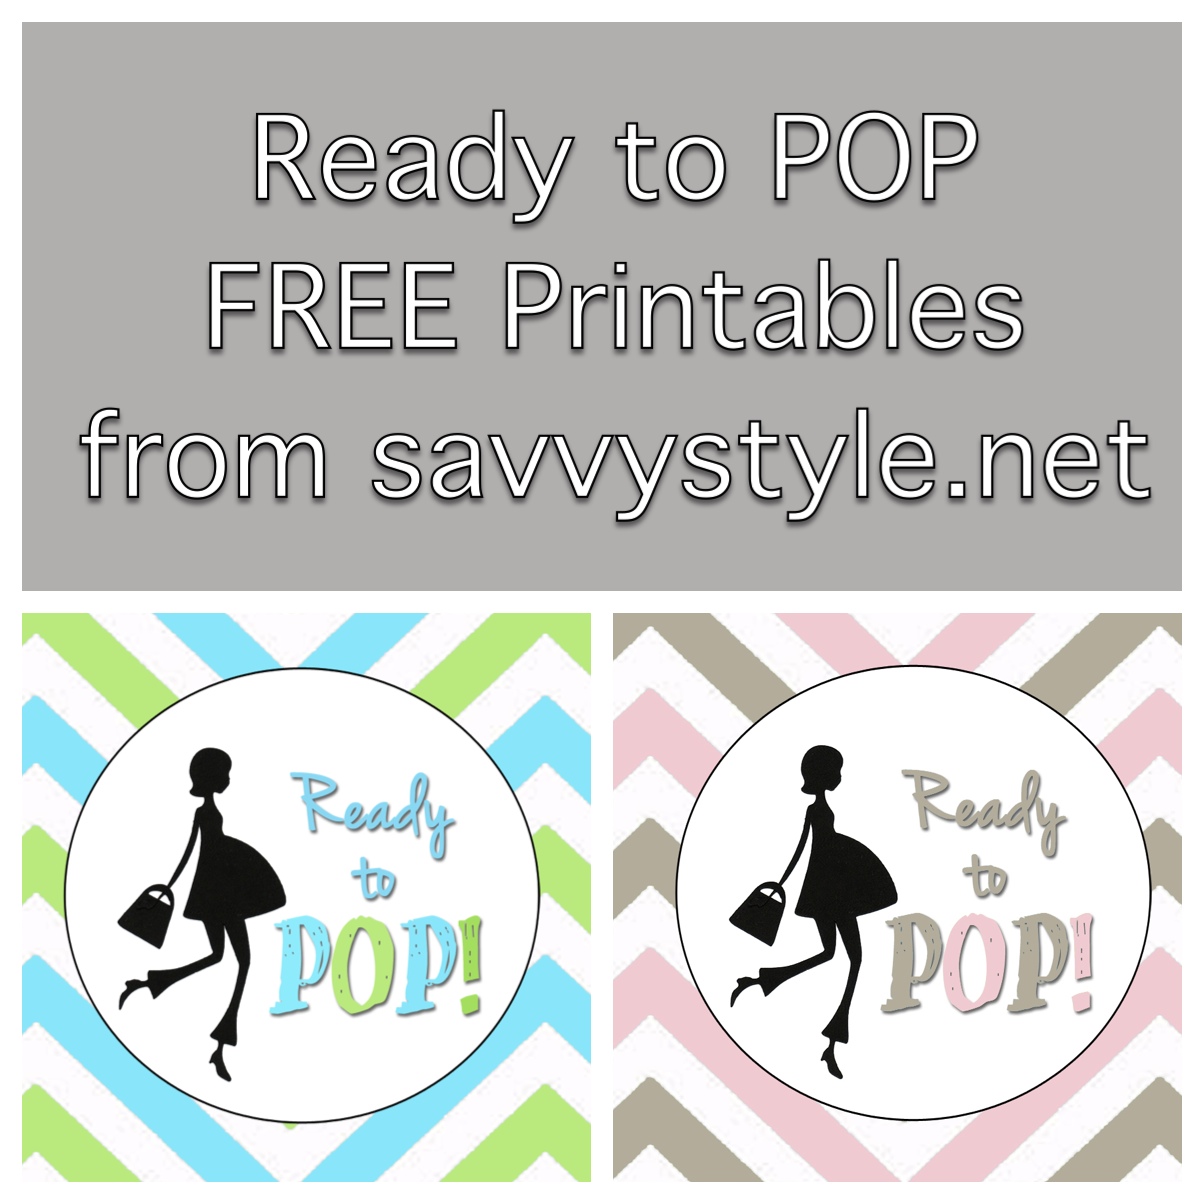
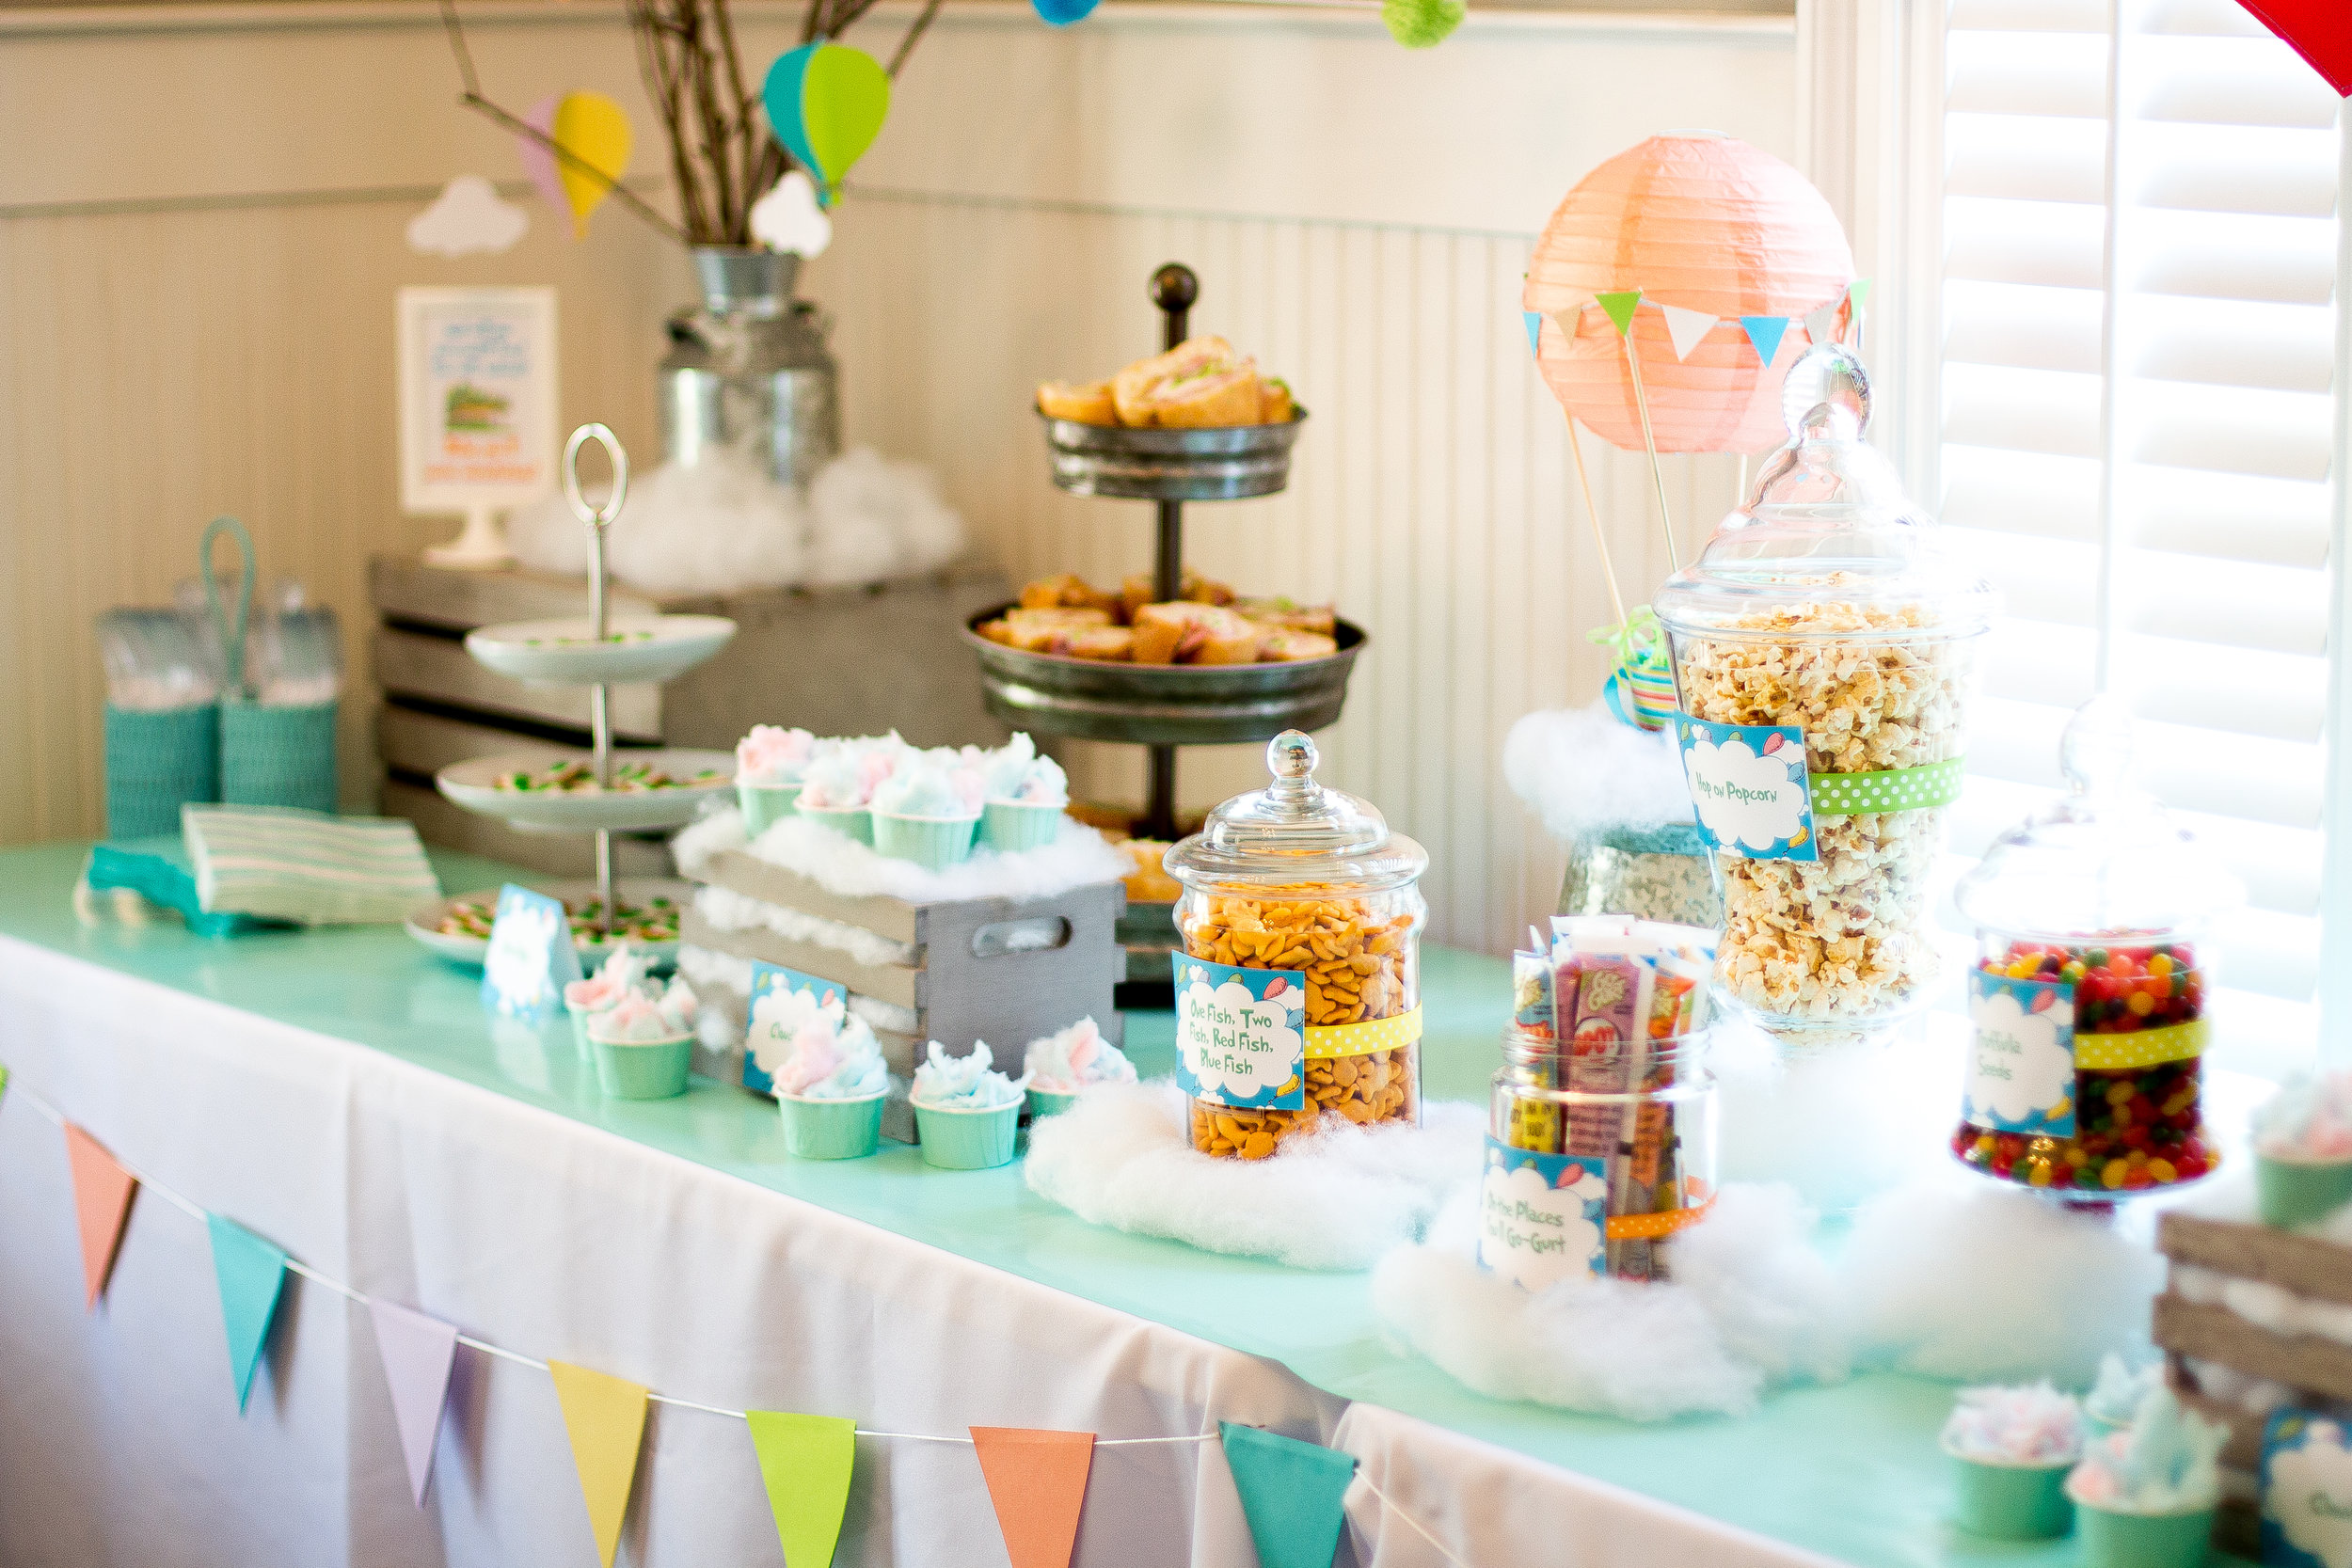
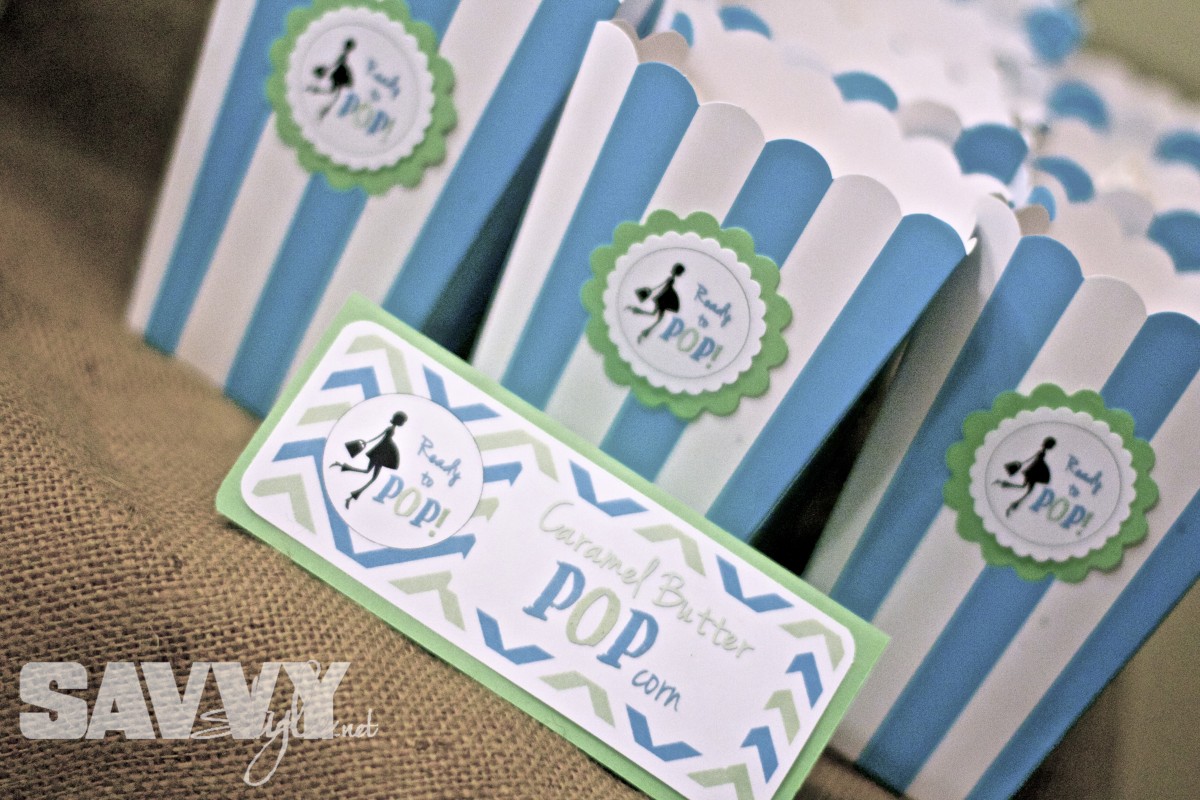
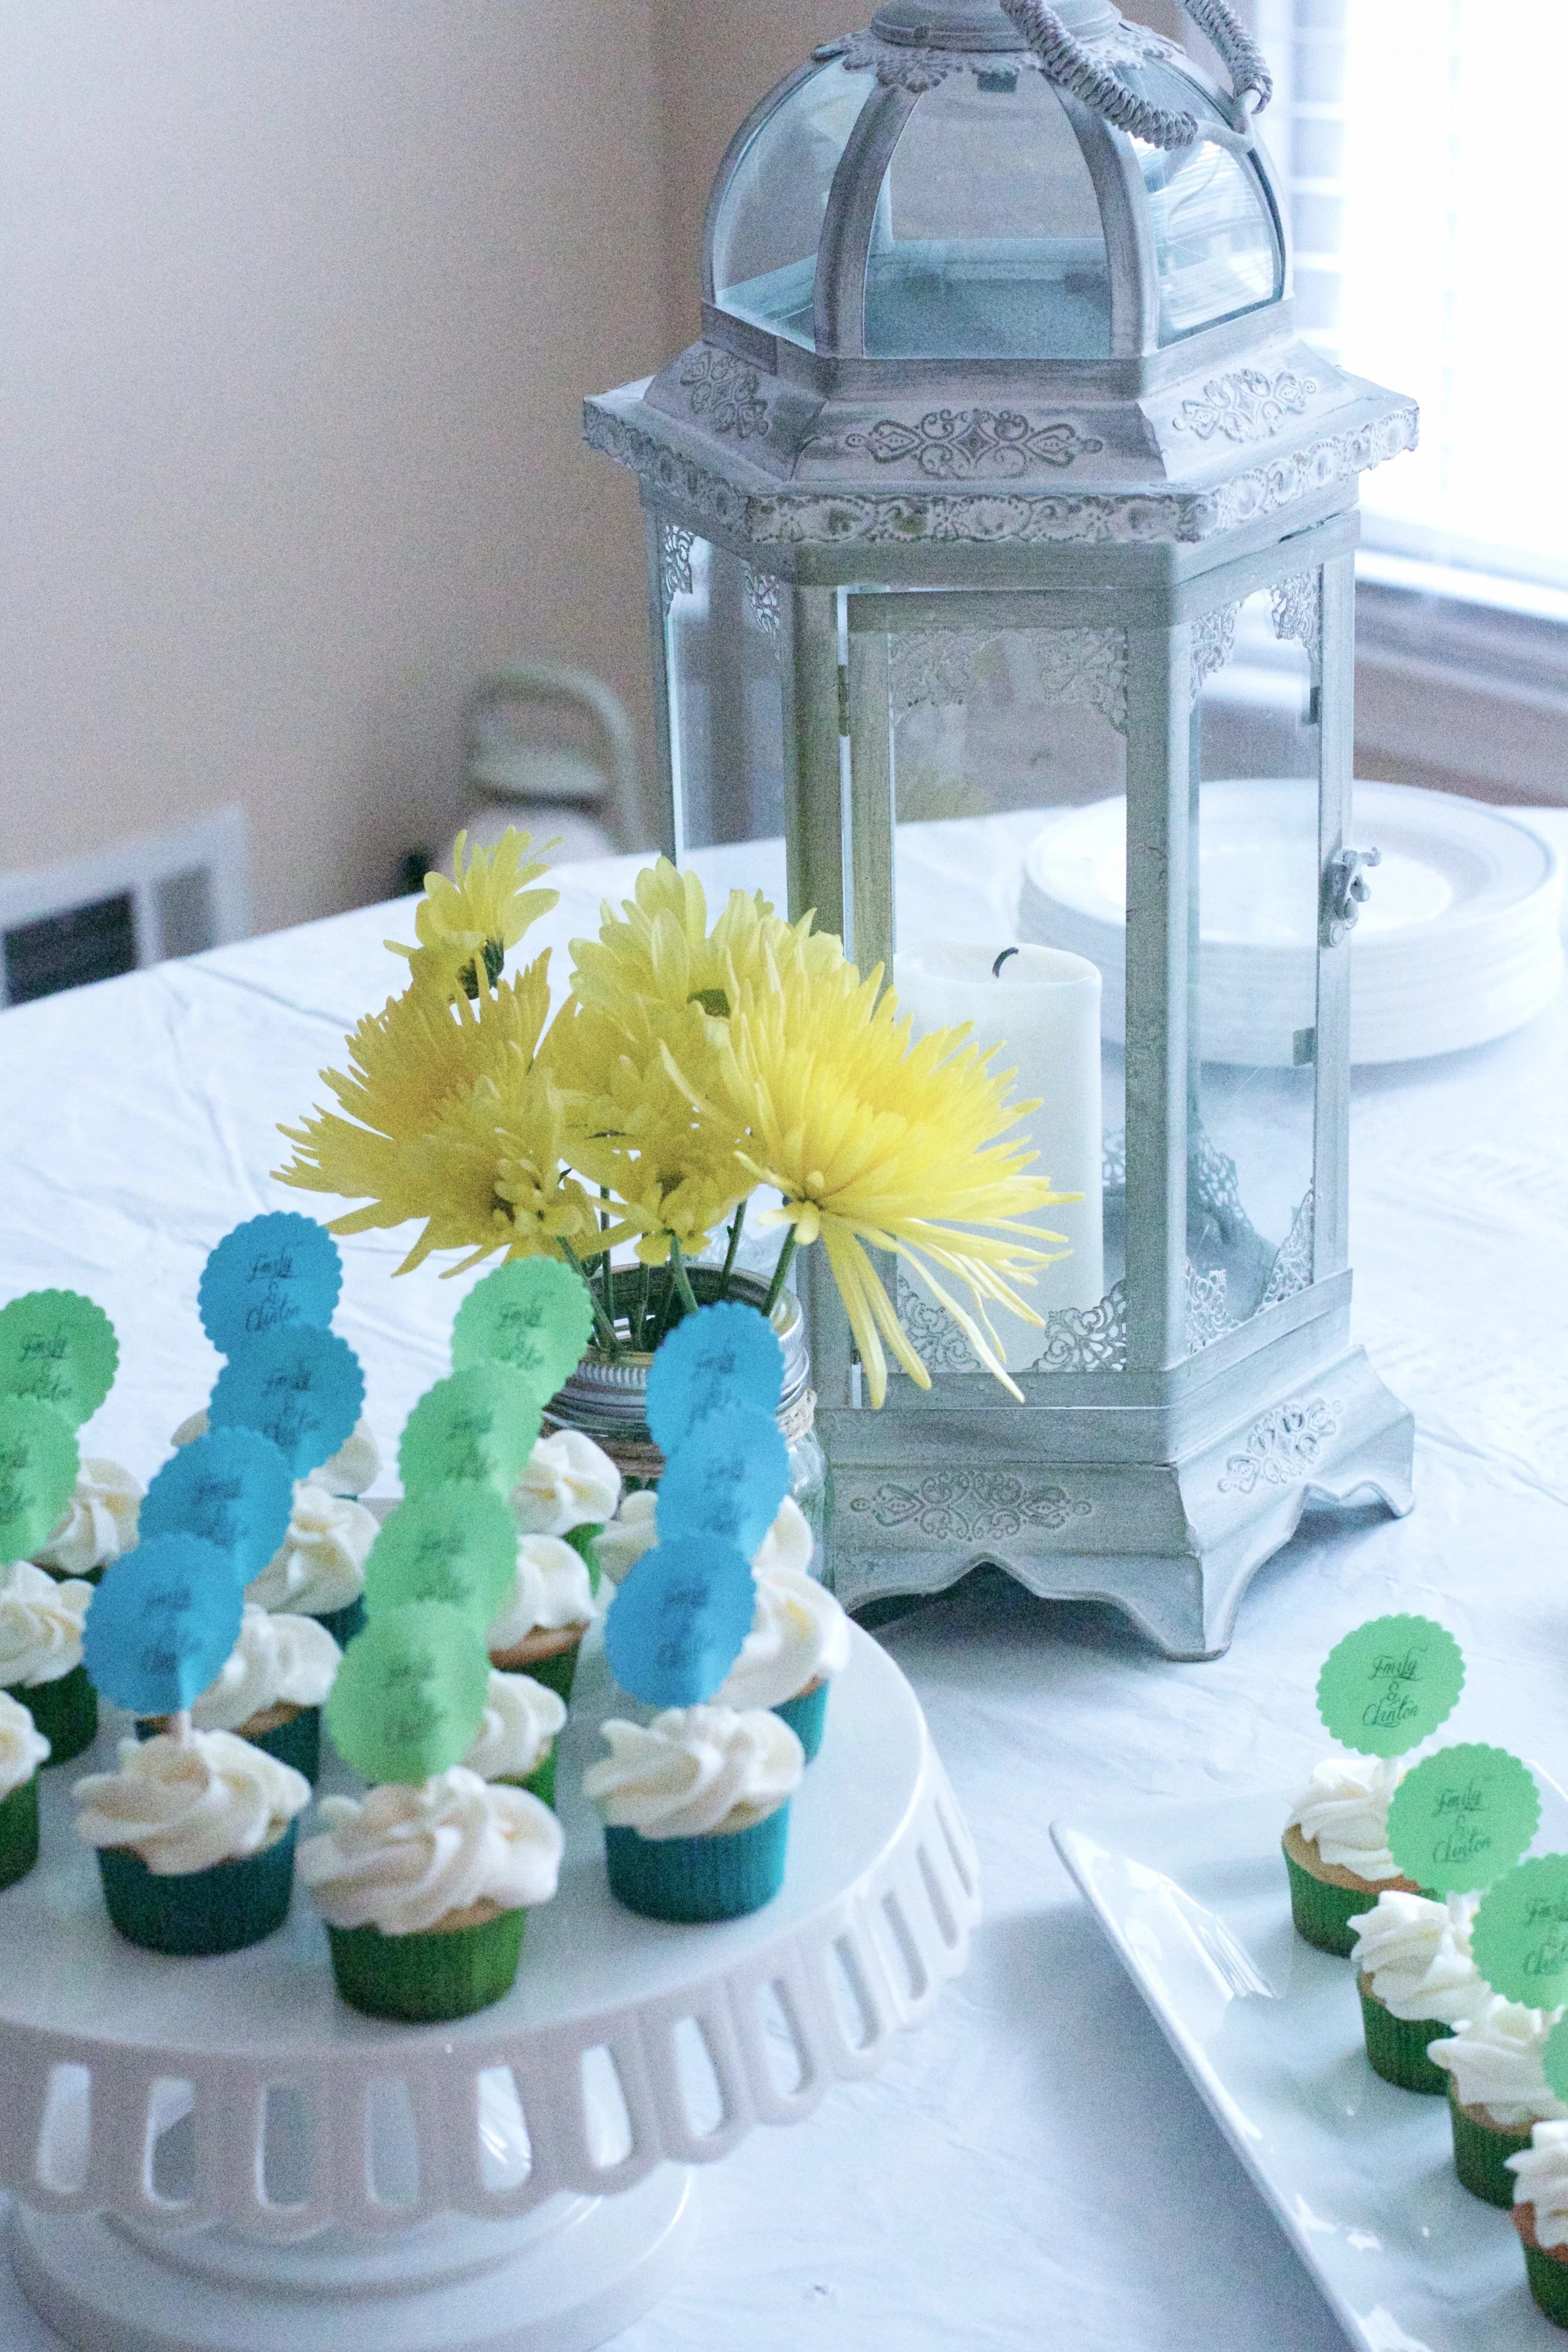
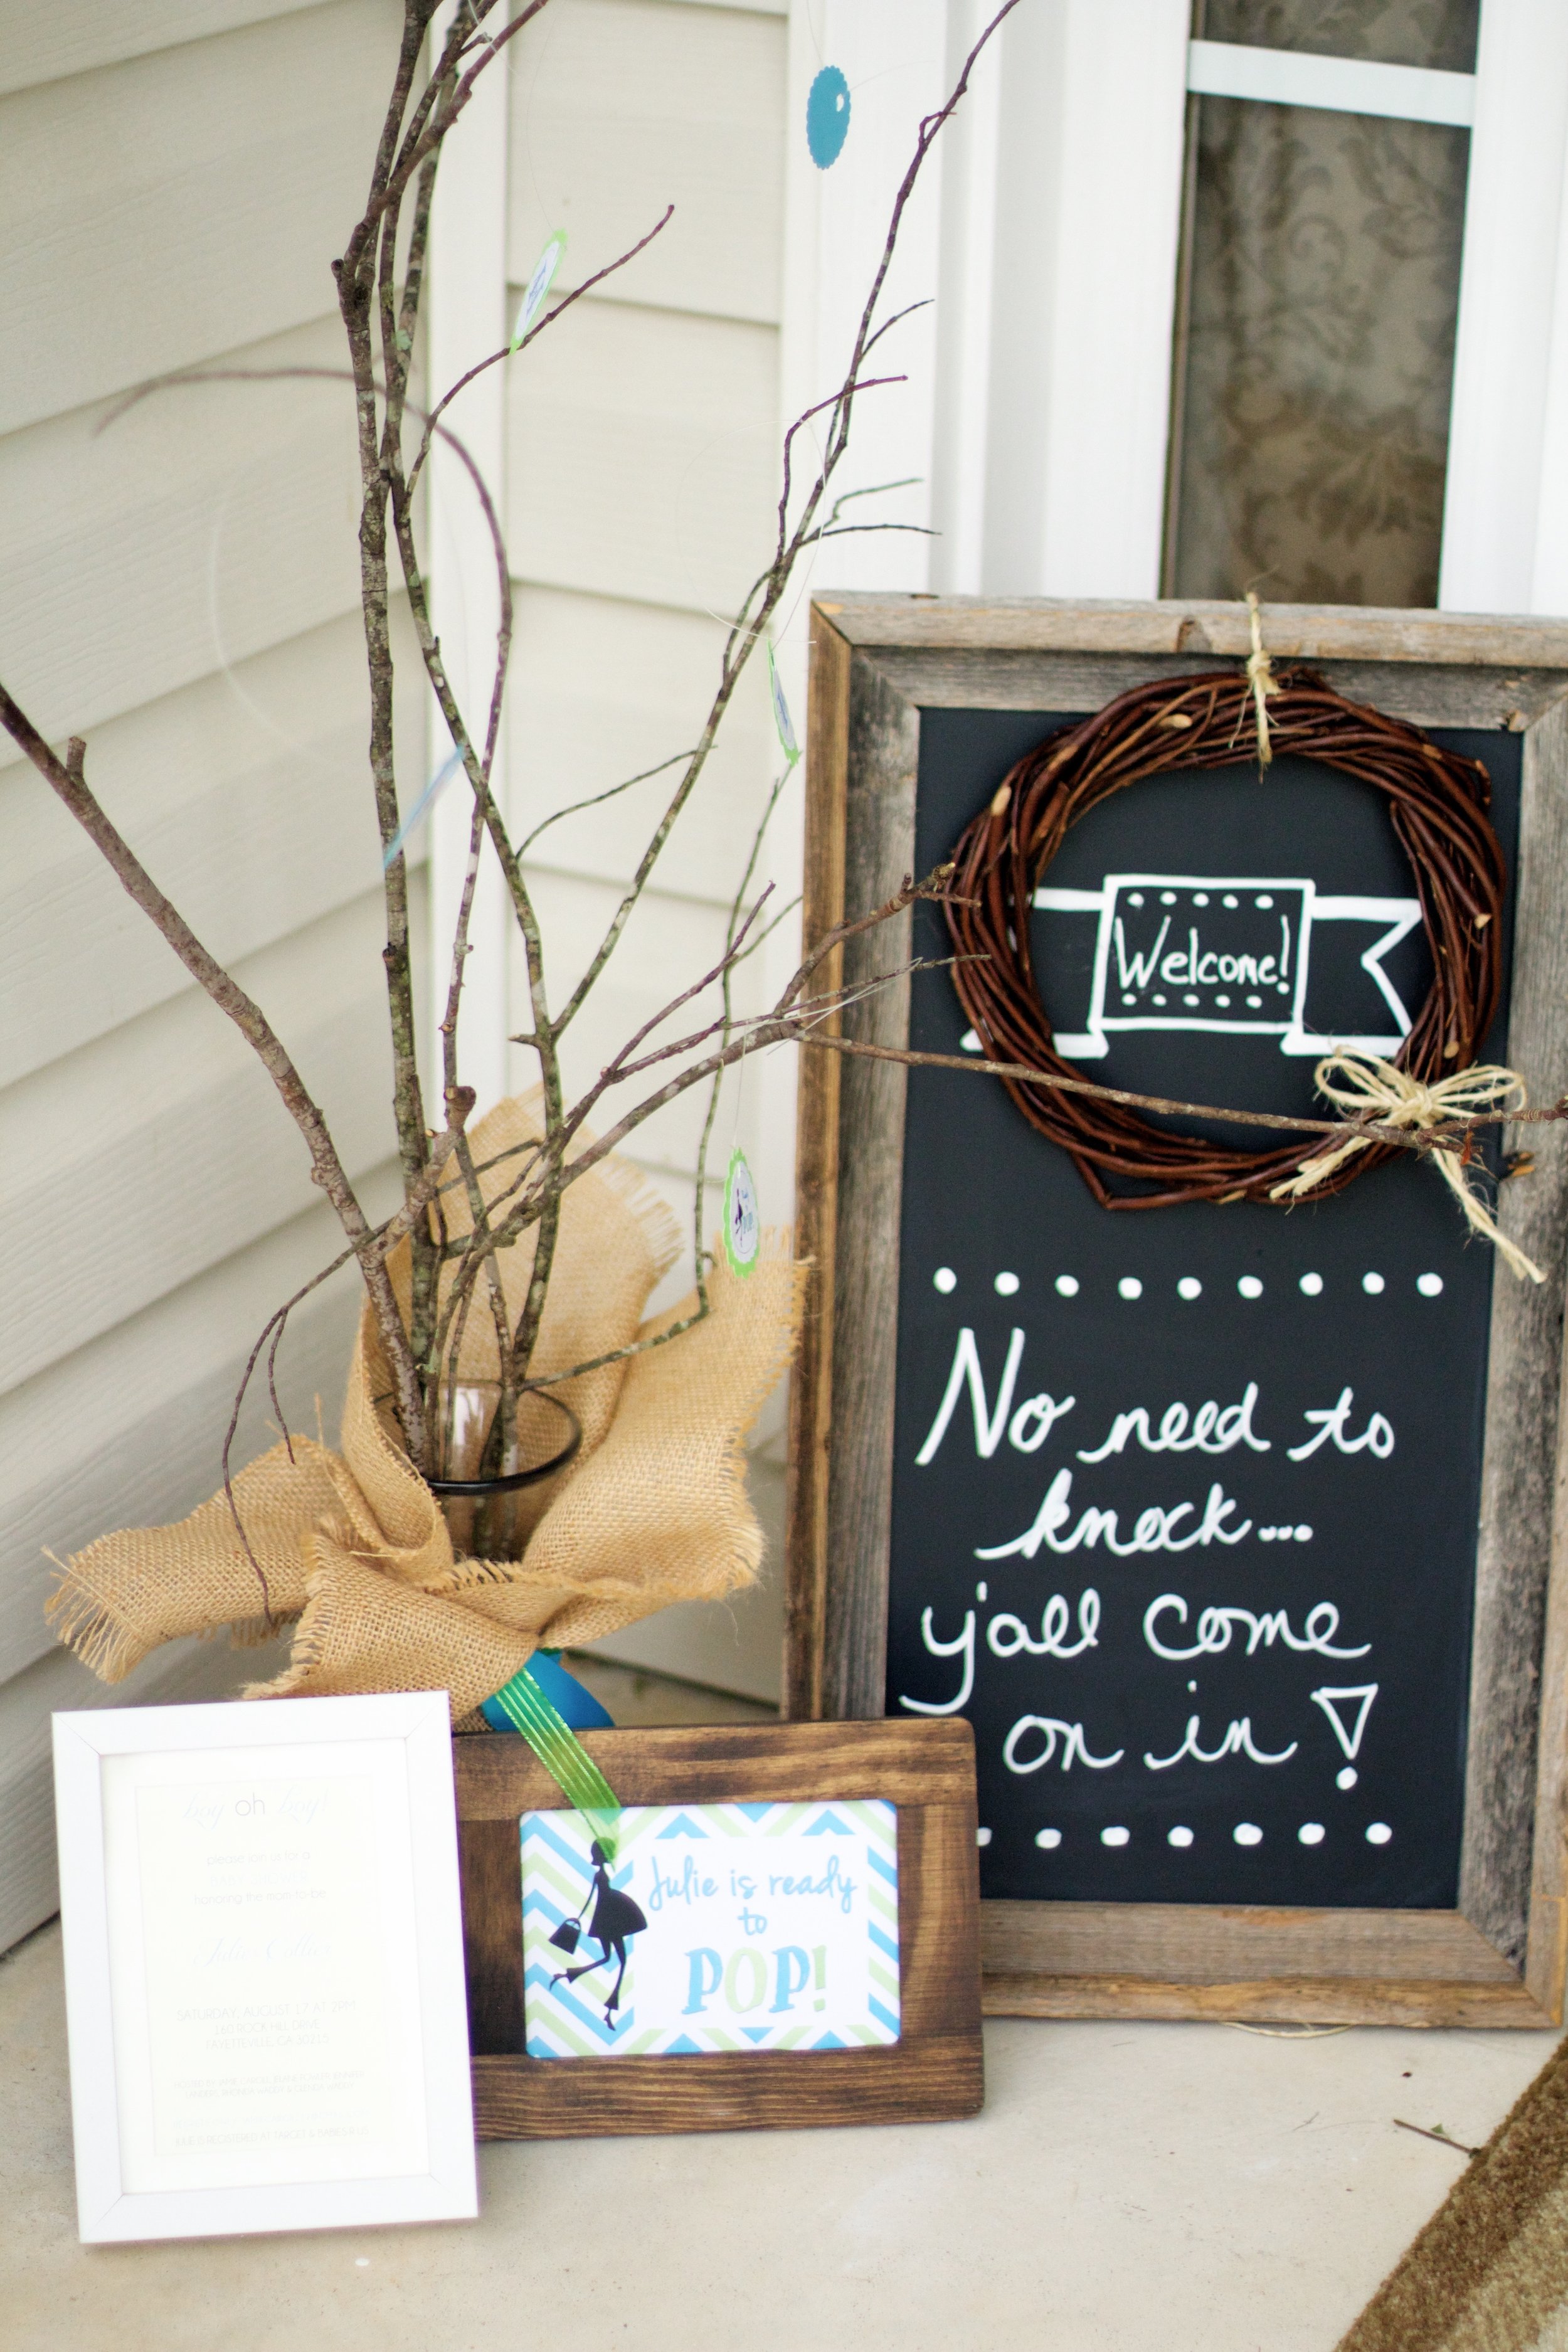
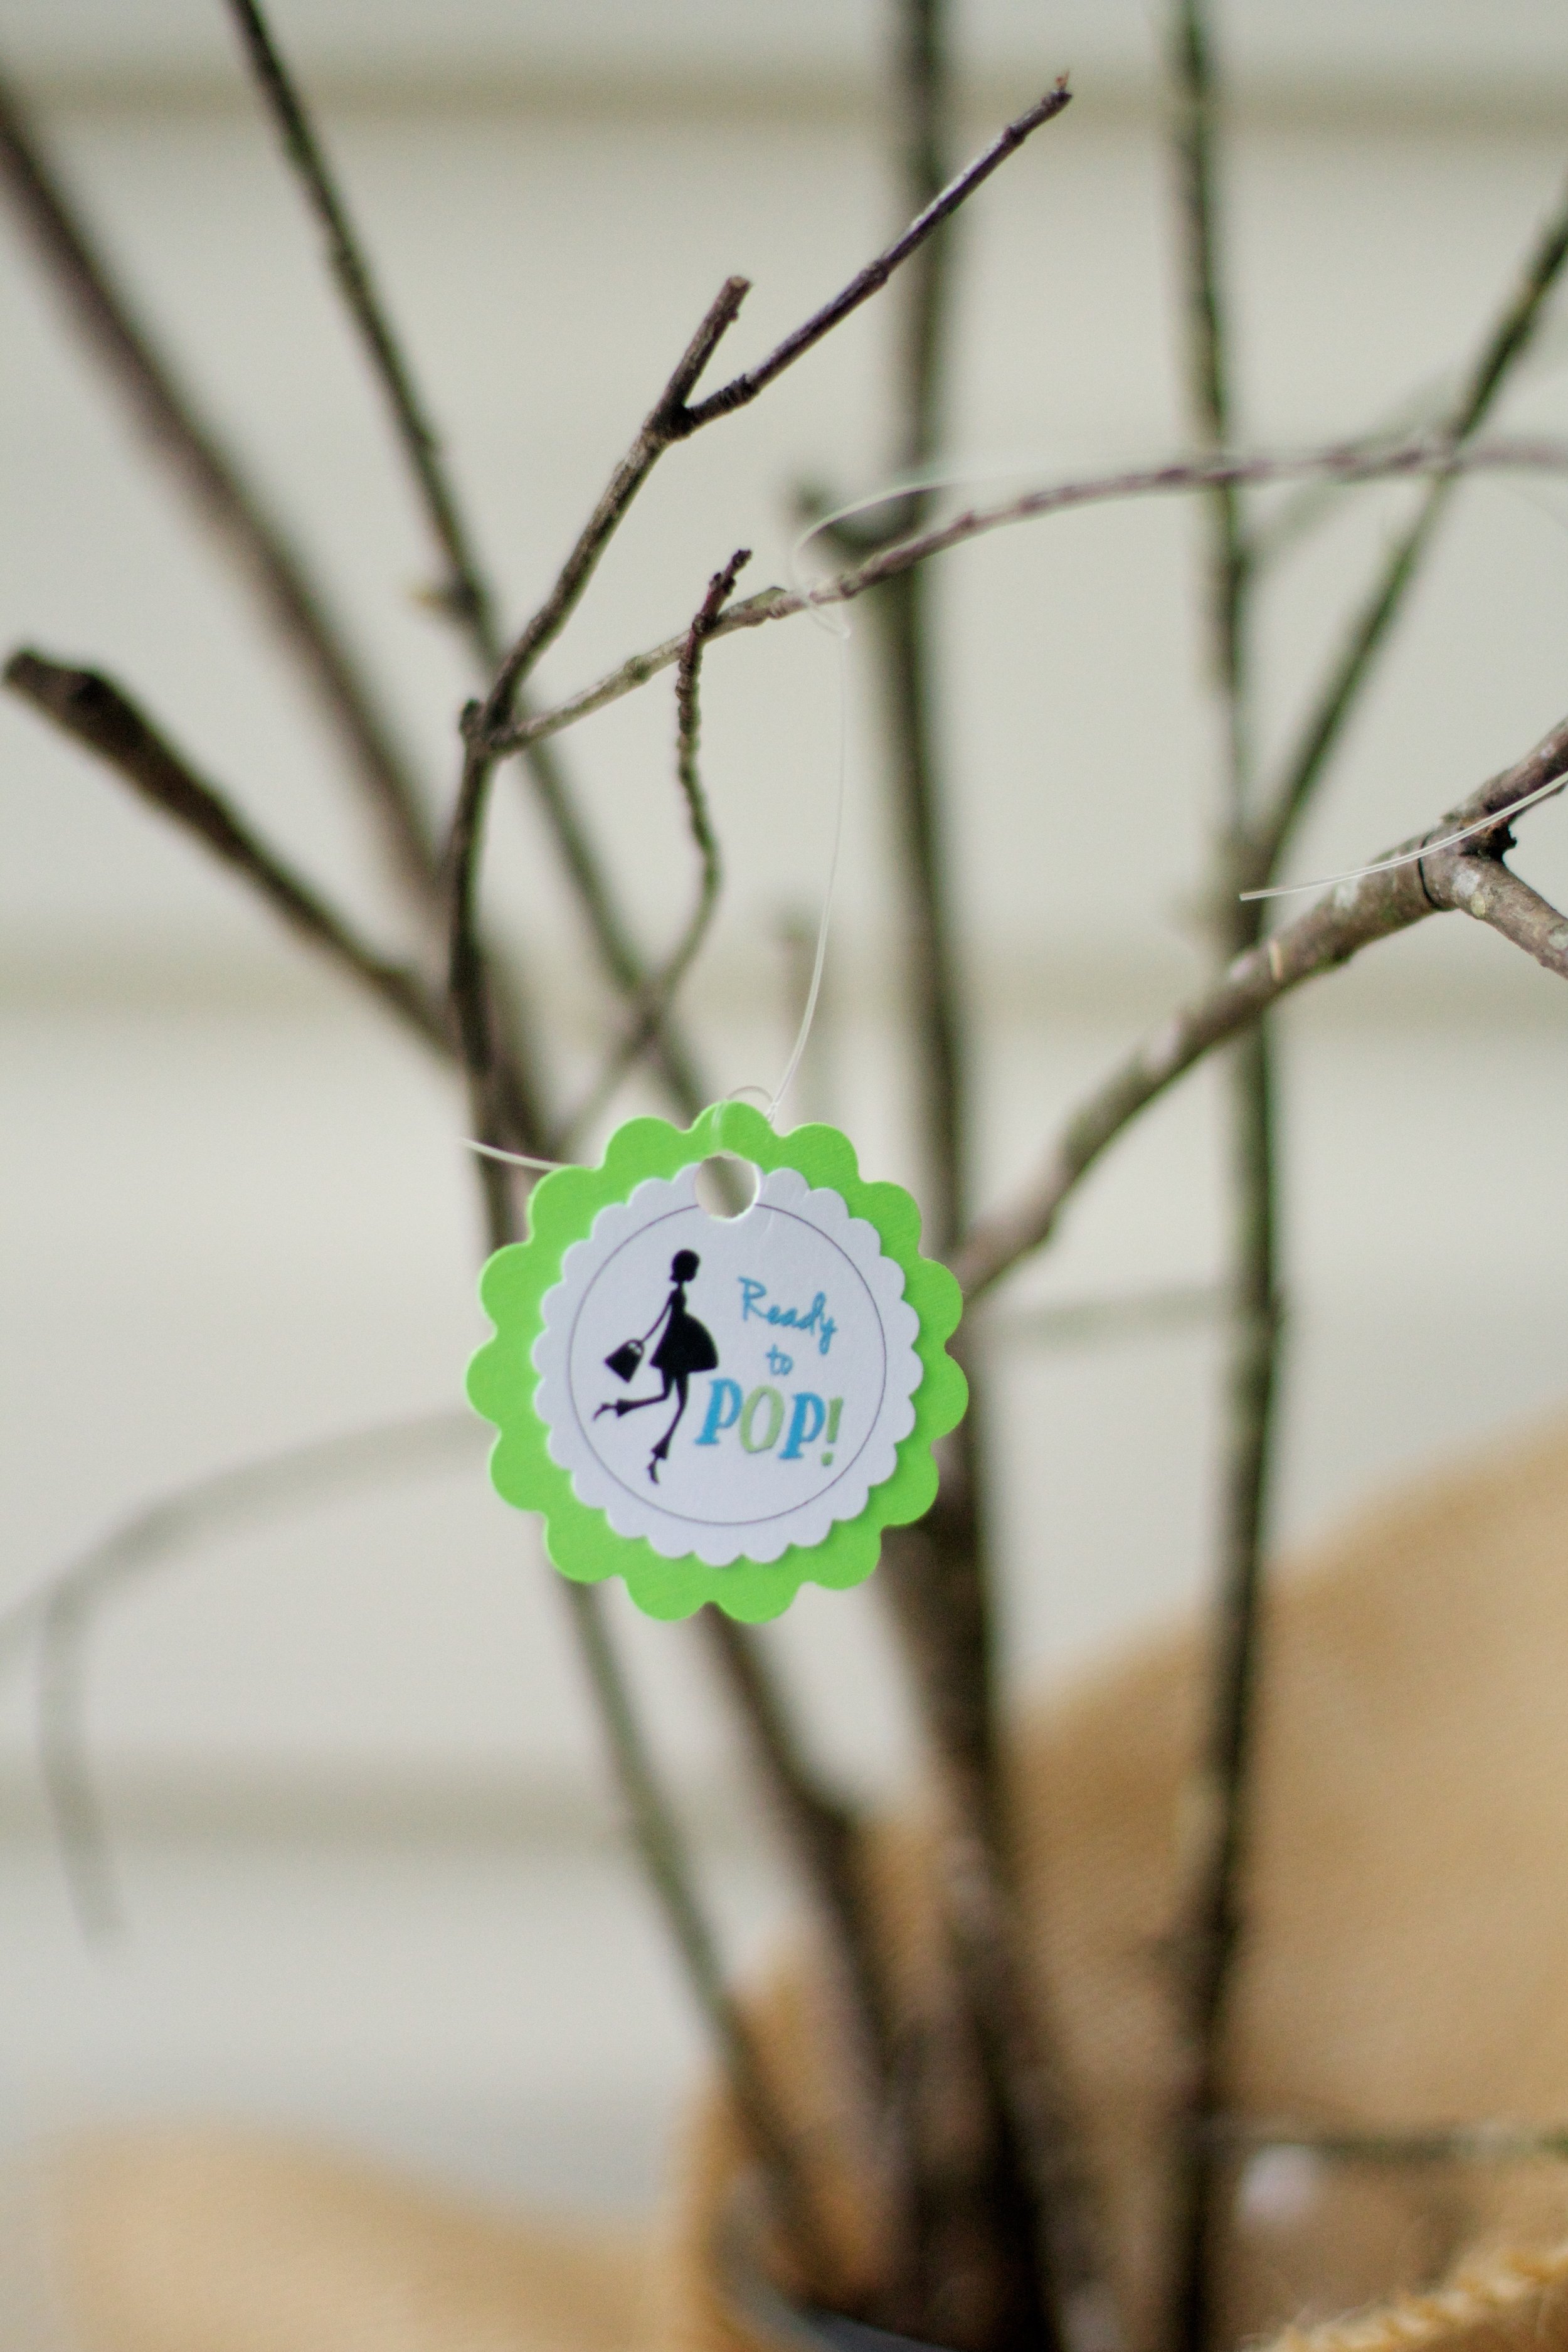
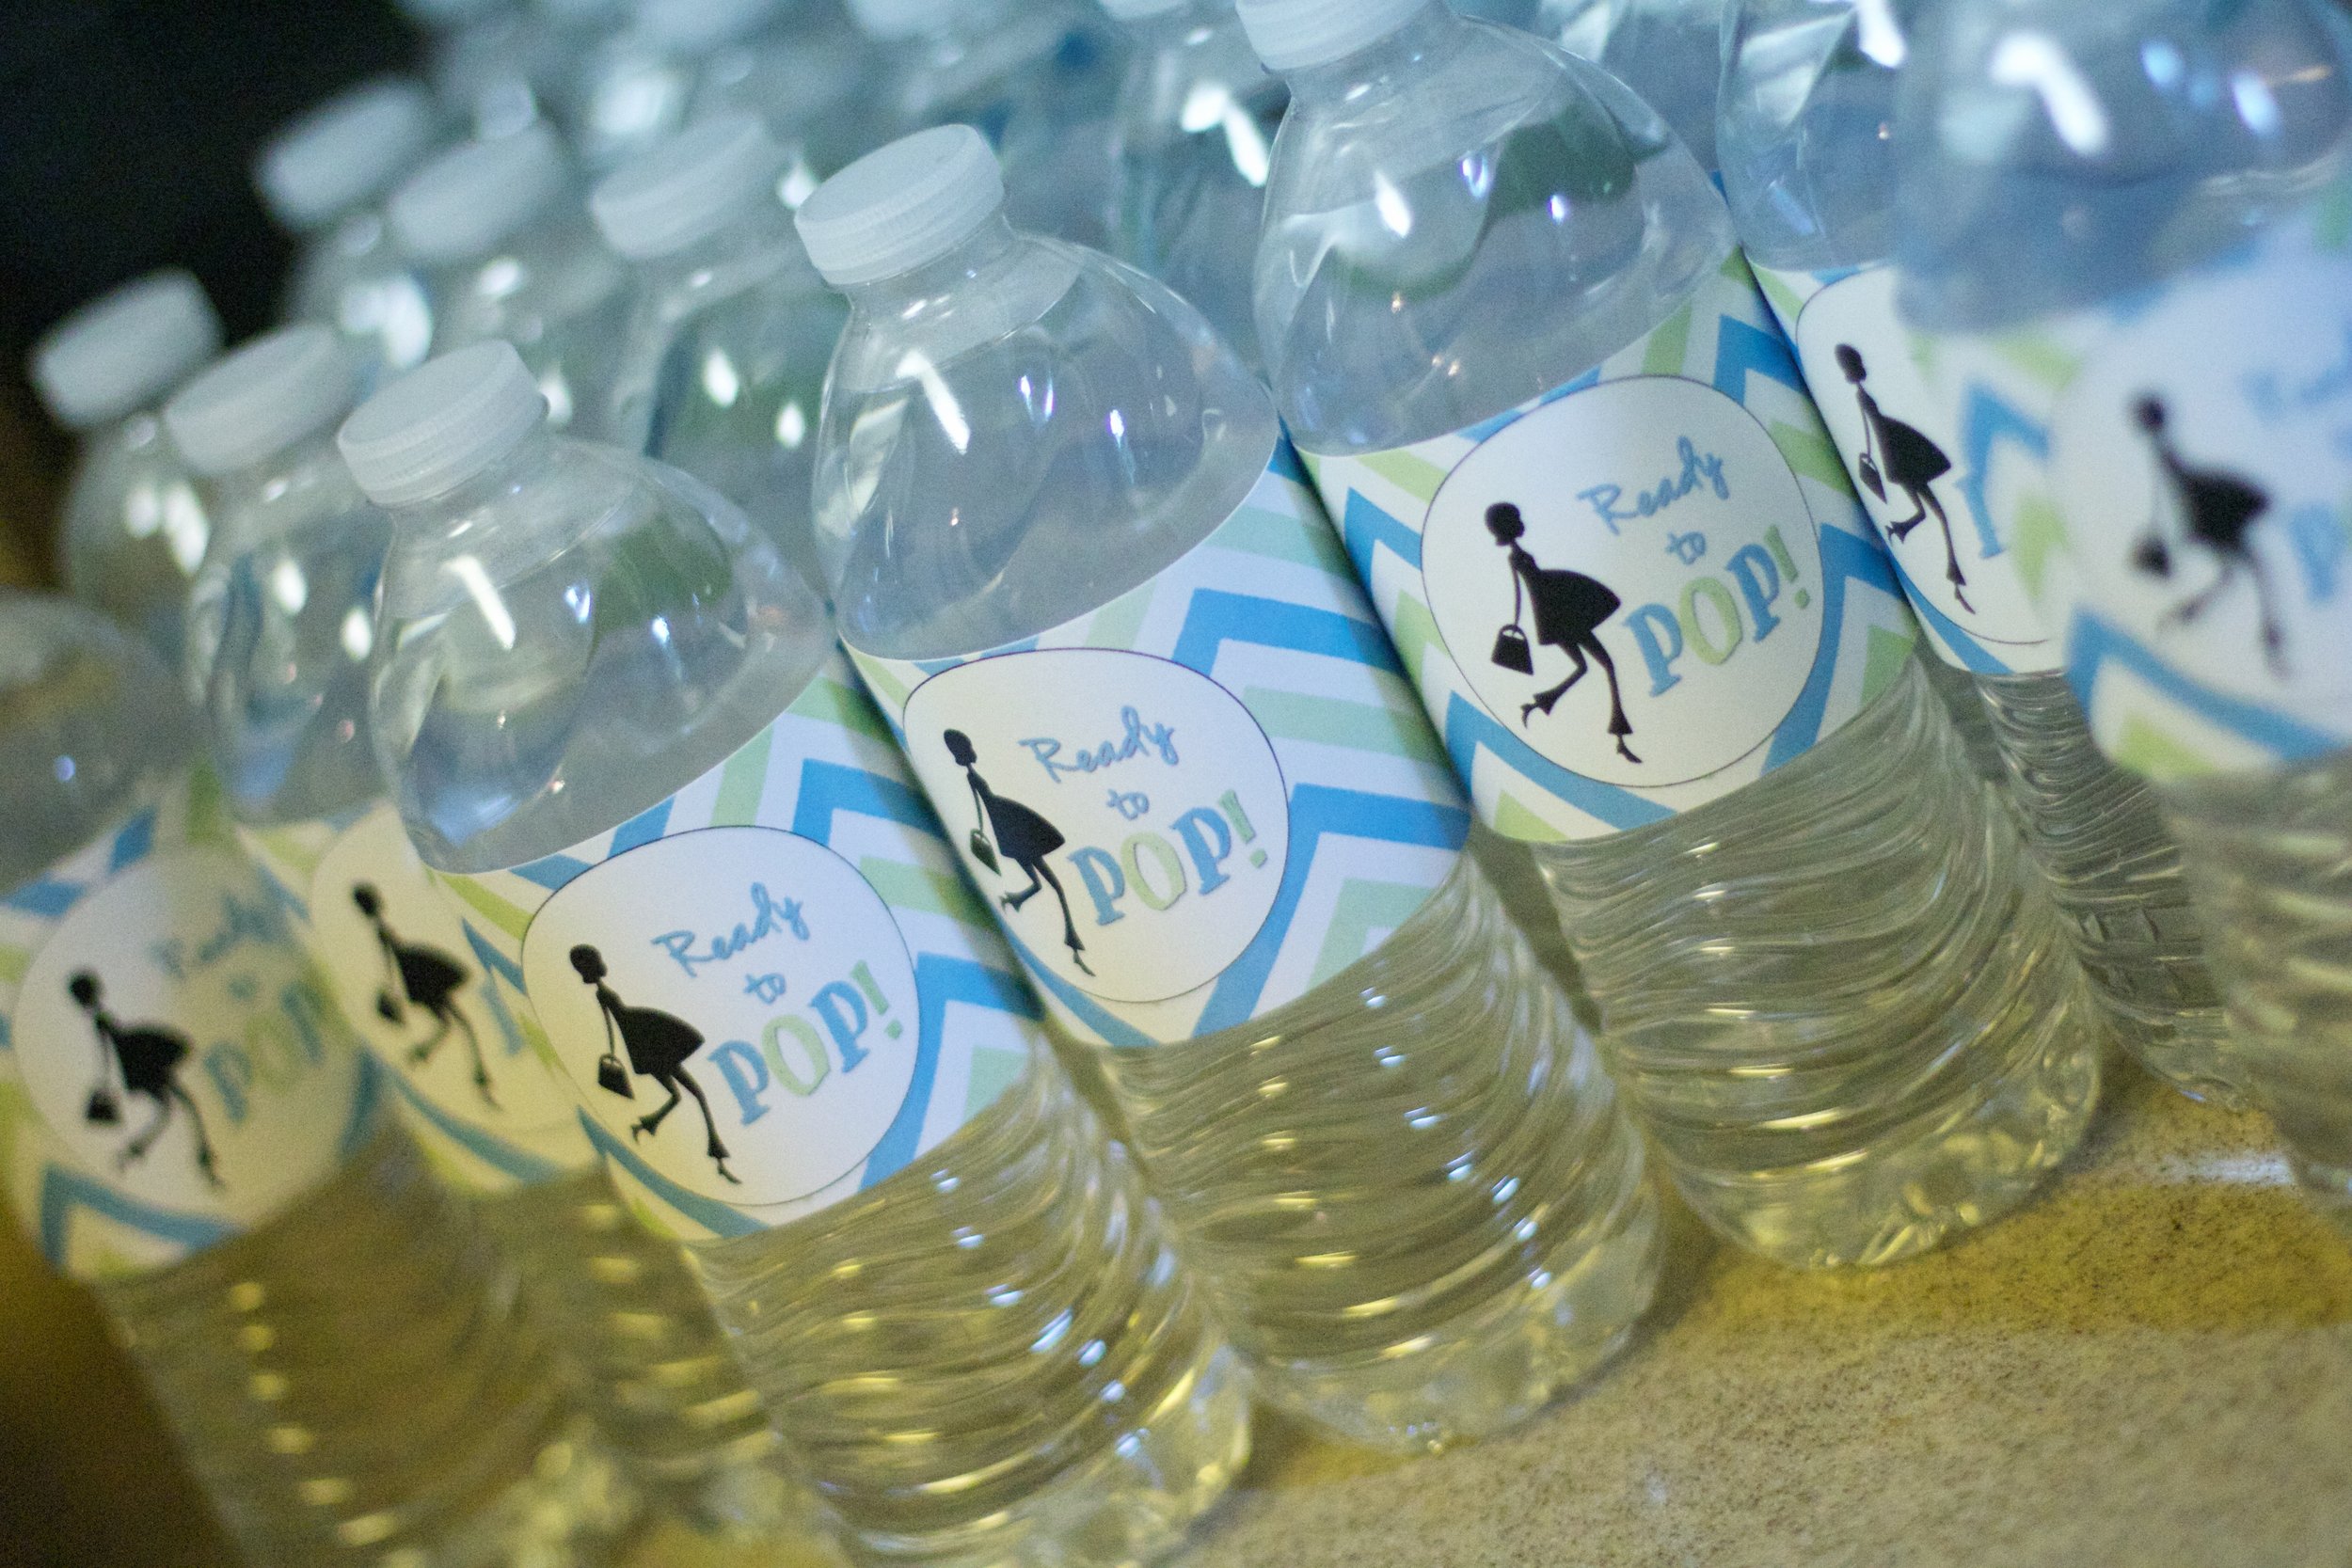
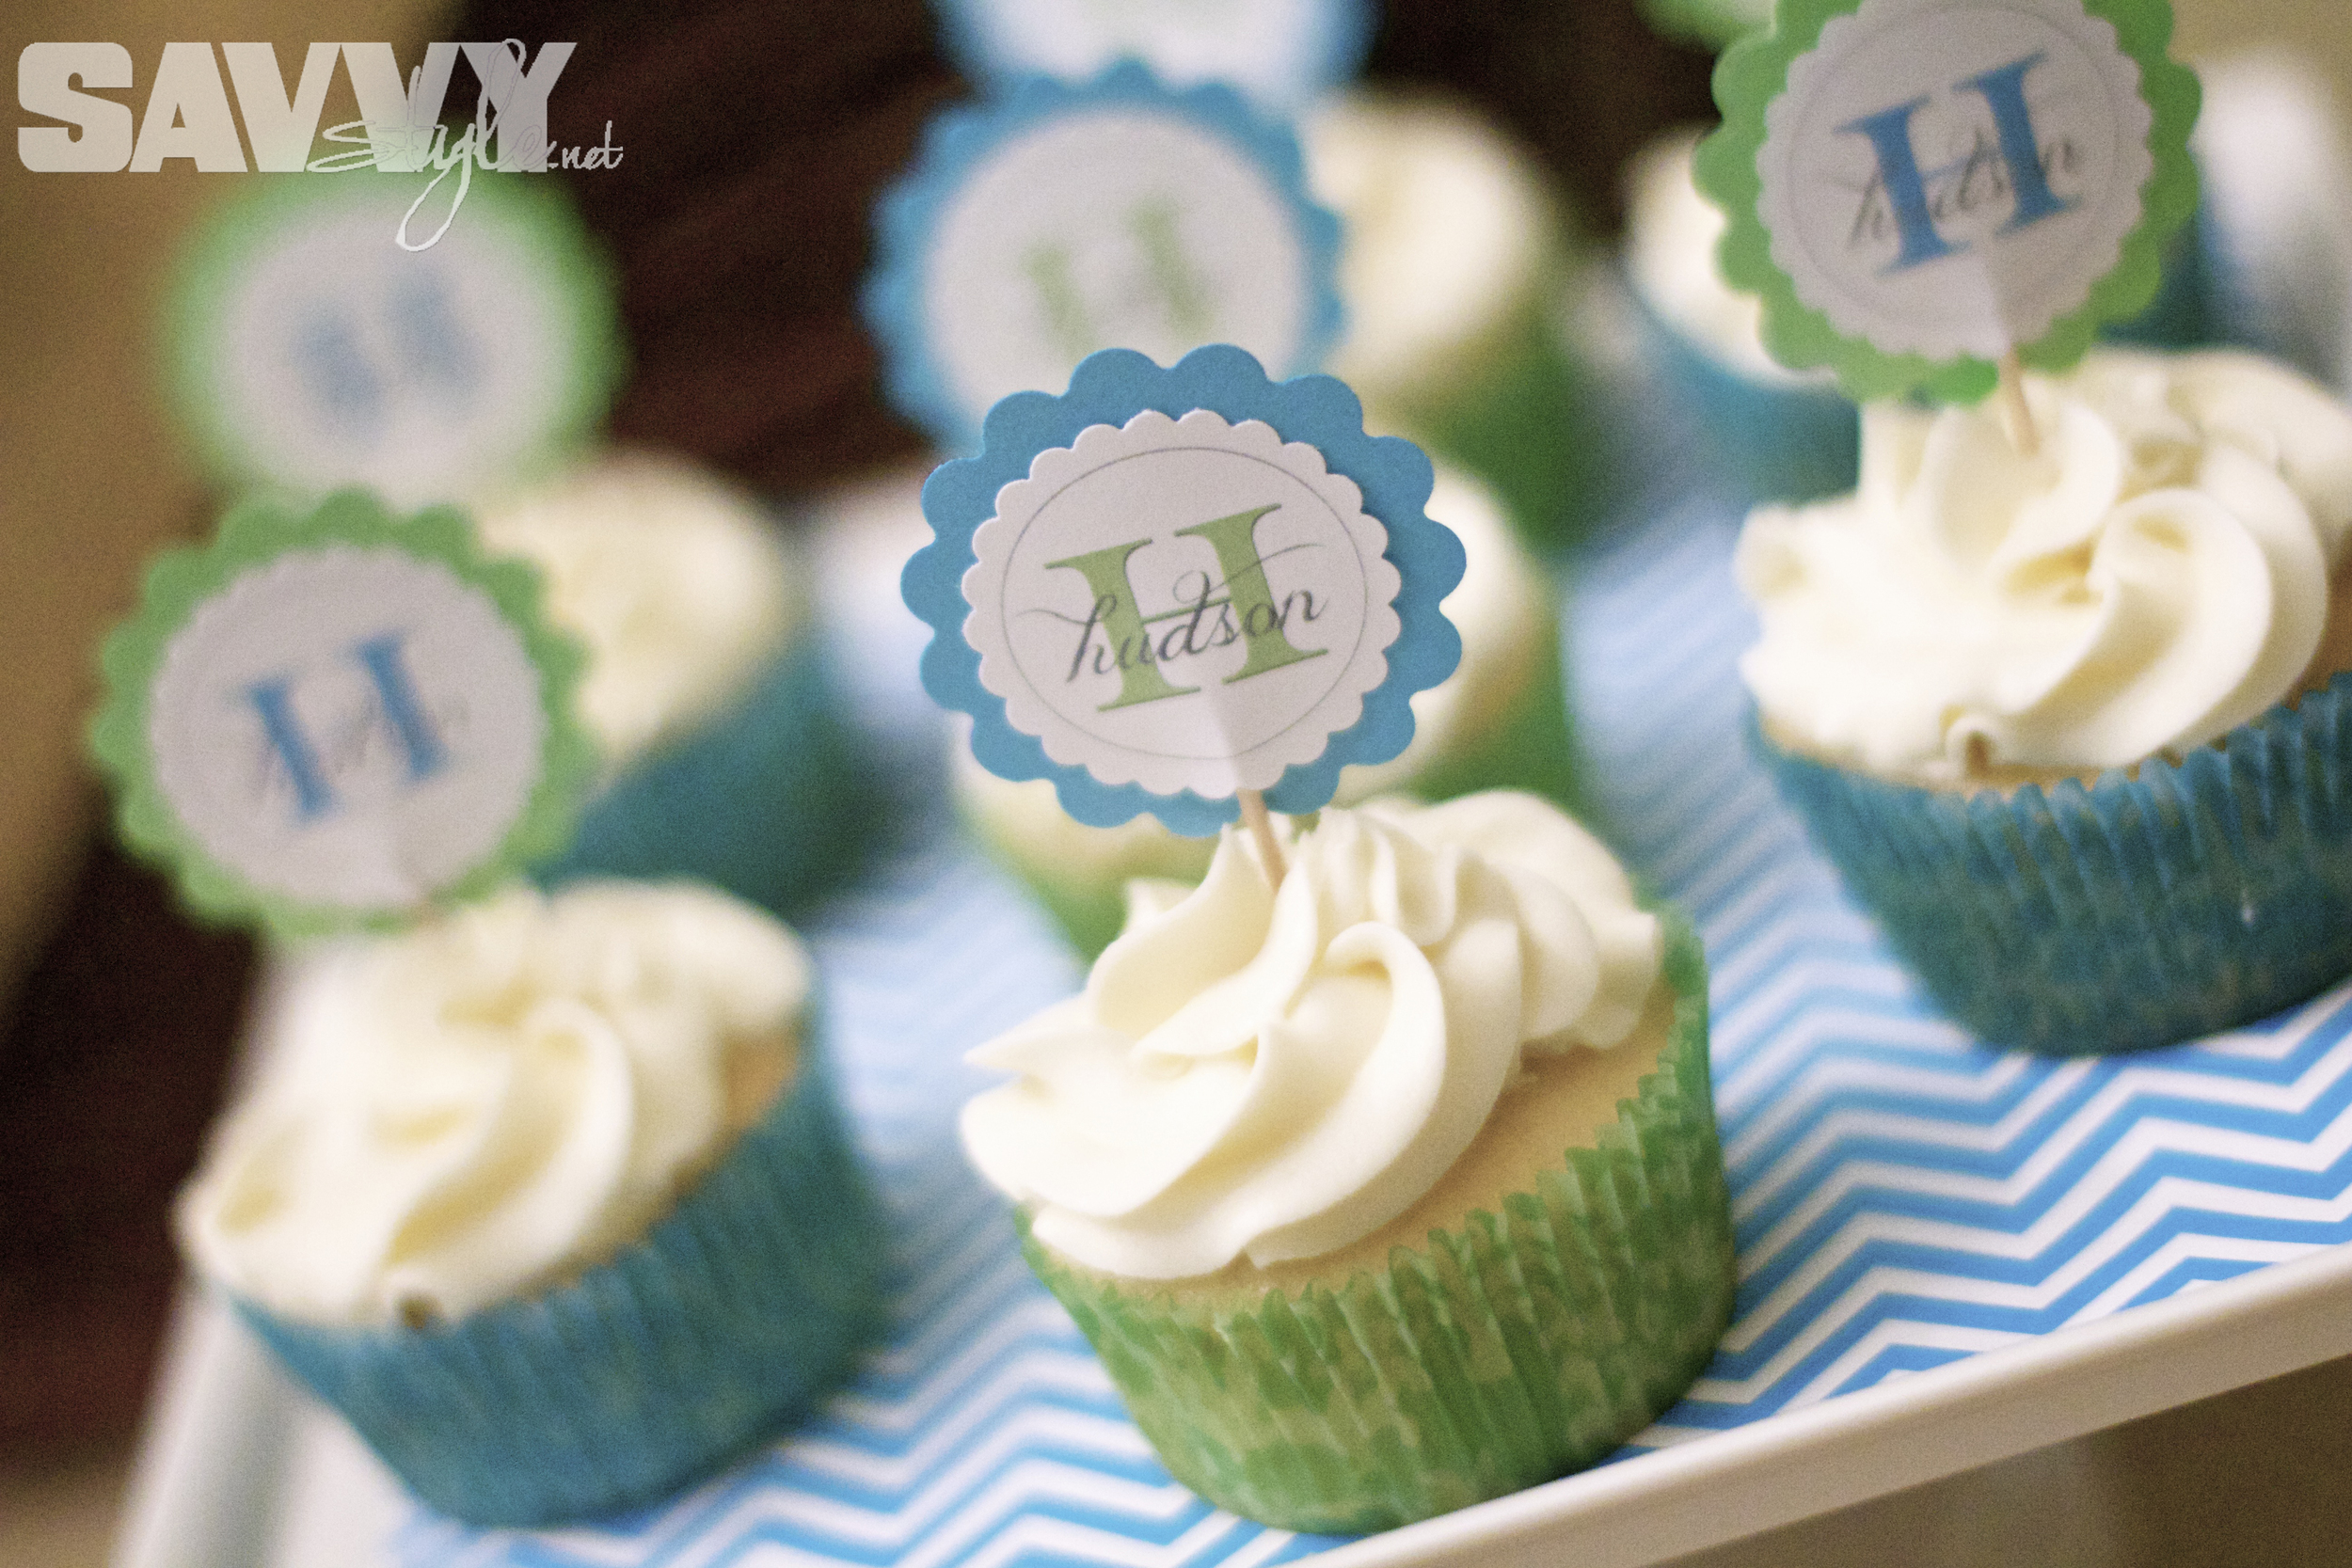
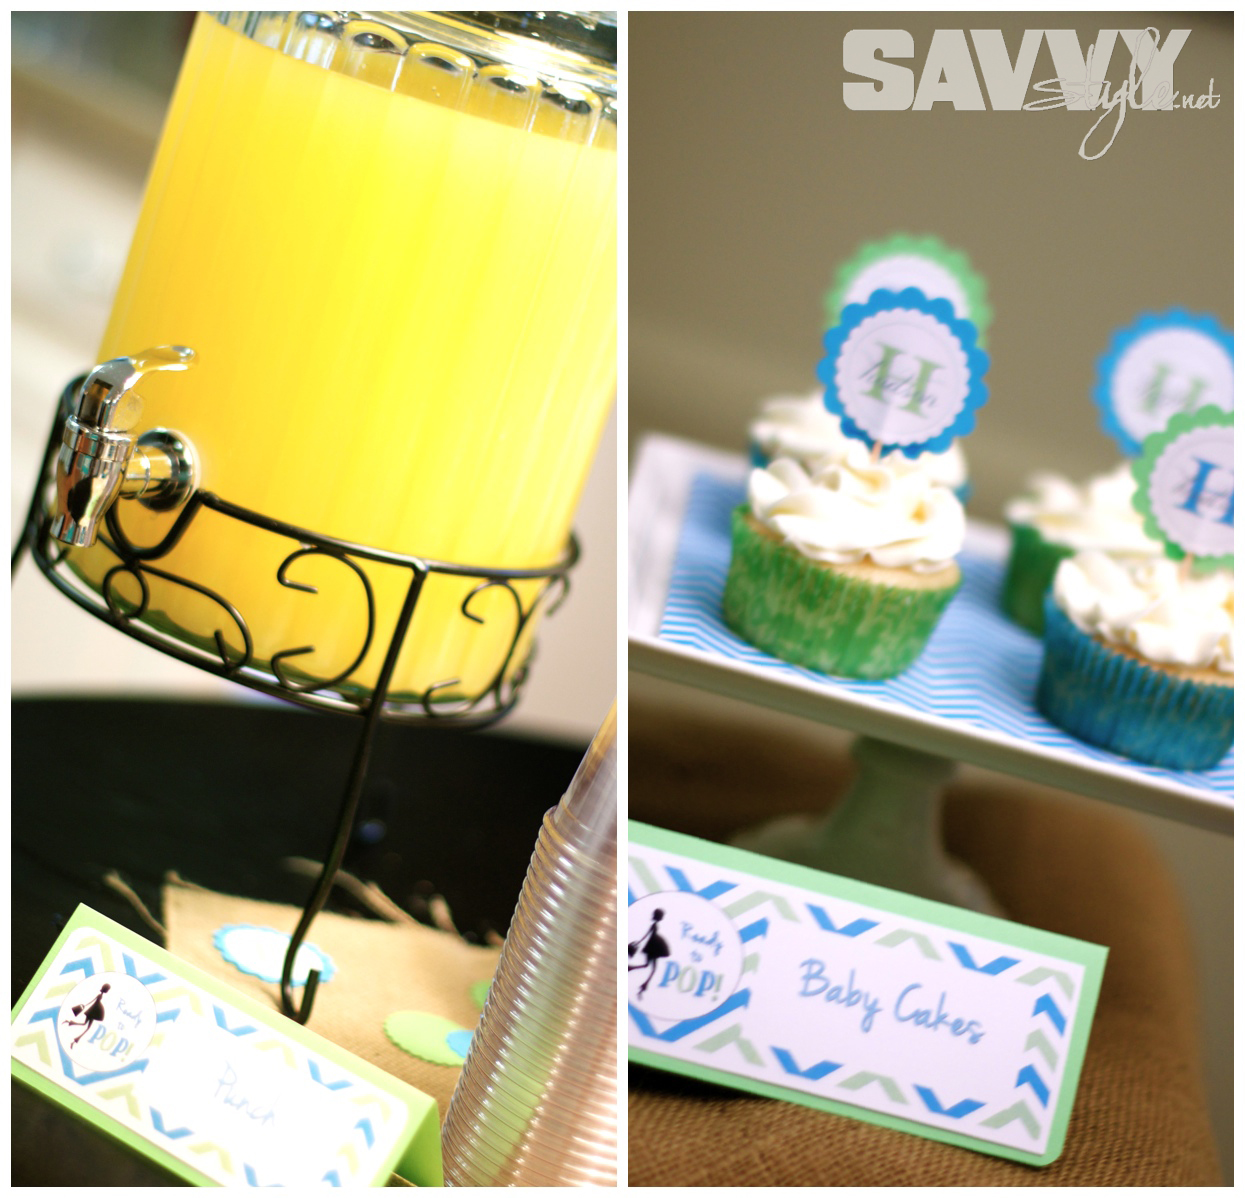
They're finally here...FREE printables for your next baby shower!
We had such a huge response from my previous POST about the "Ready to POP" baby shower I threw for my bestie, that I put together two different sets of FREE printables for you...so now you can have them for a boy or a girl shower!
Here's a glimpse at what they looked like at the shower I hosted:


And now you can download your own in either Blue and Green or Pink and Brown! Here's what the download package includes:
Water Bottle Labels
Food labels (with blanks for extra items)
Ready to "Pop" round cutouts (for cake pops, labels, favors and more!)
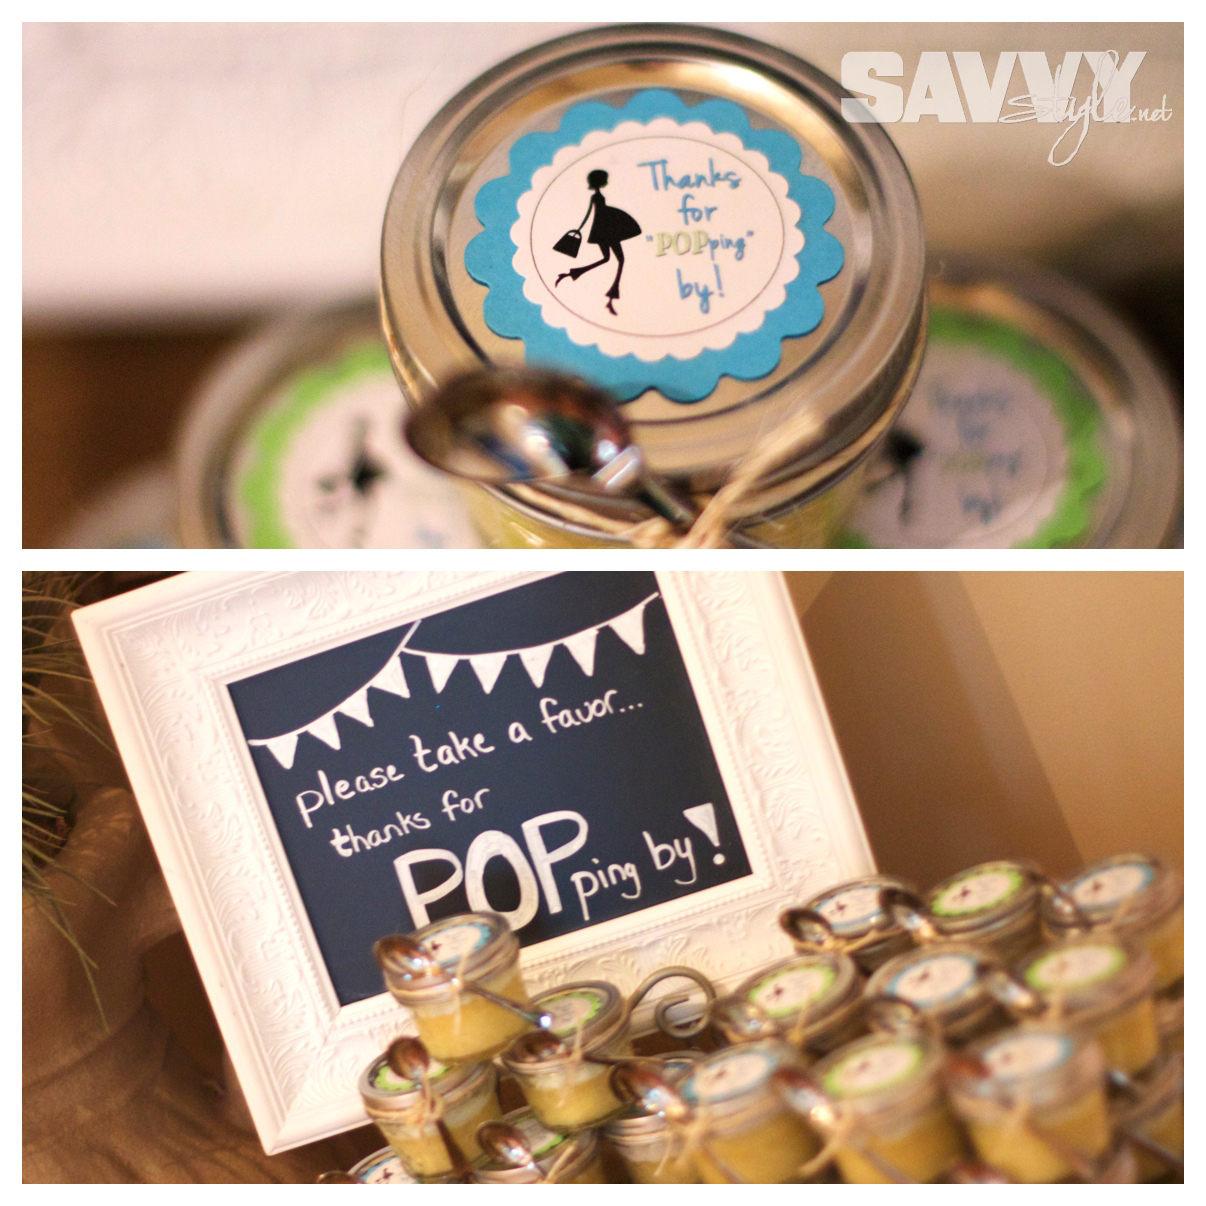
Thanks for "Popping" By round cutouts
Baby Stats game instructions and cards
Baby "Pop" Quiz Game & Answer Key
Simply choose your color palette below and click on the link to open and print!
PLEASE NOTE: This printable is for your personal use ONLY. Files may not be sold, printed products may not be sold, and the designs may not be placed on items that are sold. If they are reproduced, redistributed or sold under any of these conditions, legal action will be taken.
Enjoy!
It's wedding week! All things bridal, all week long...swoon!
That's right, spring is in the air, all things lovely are in bloom...and wedding season is in full swing!
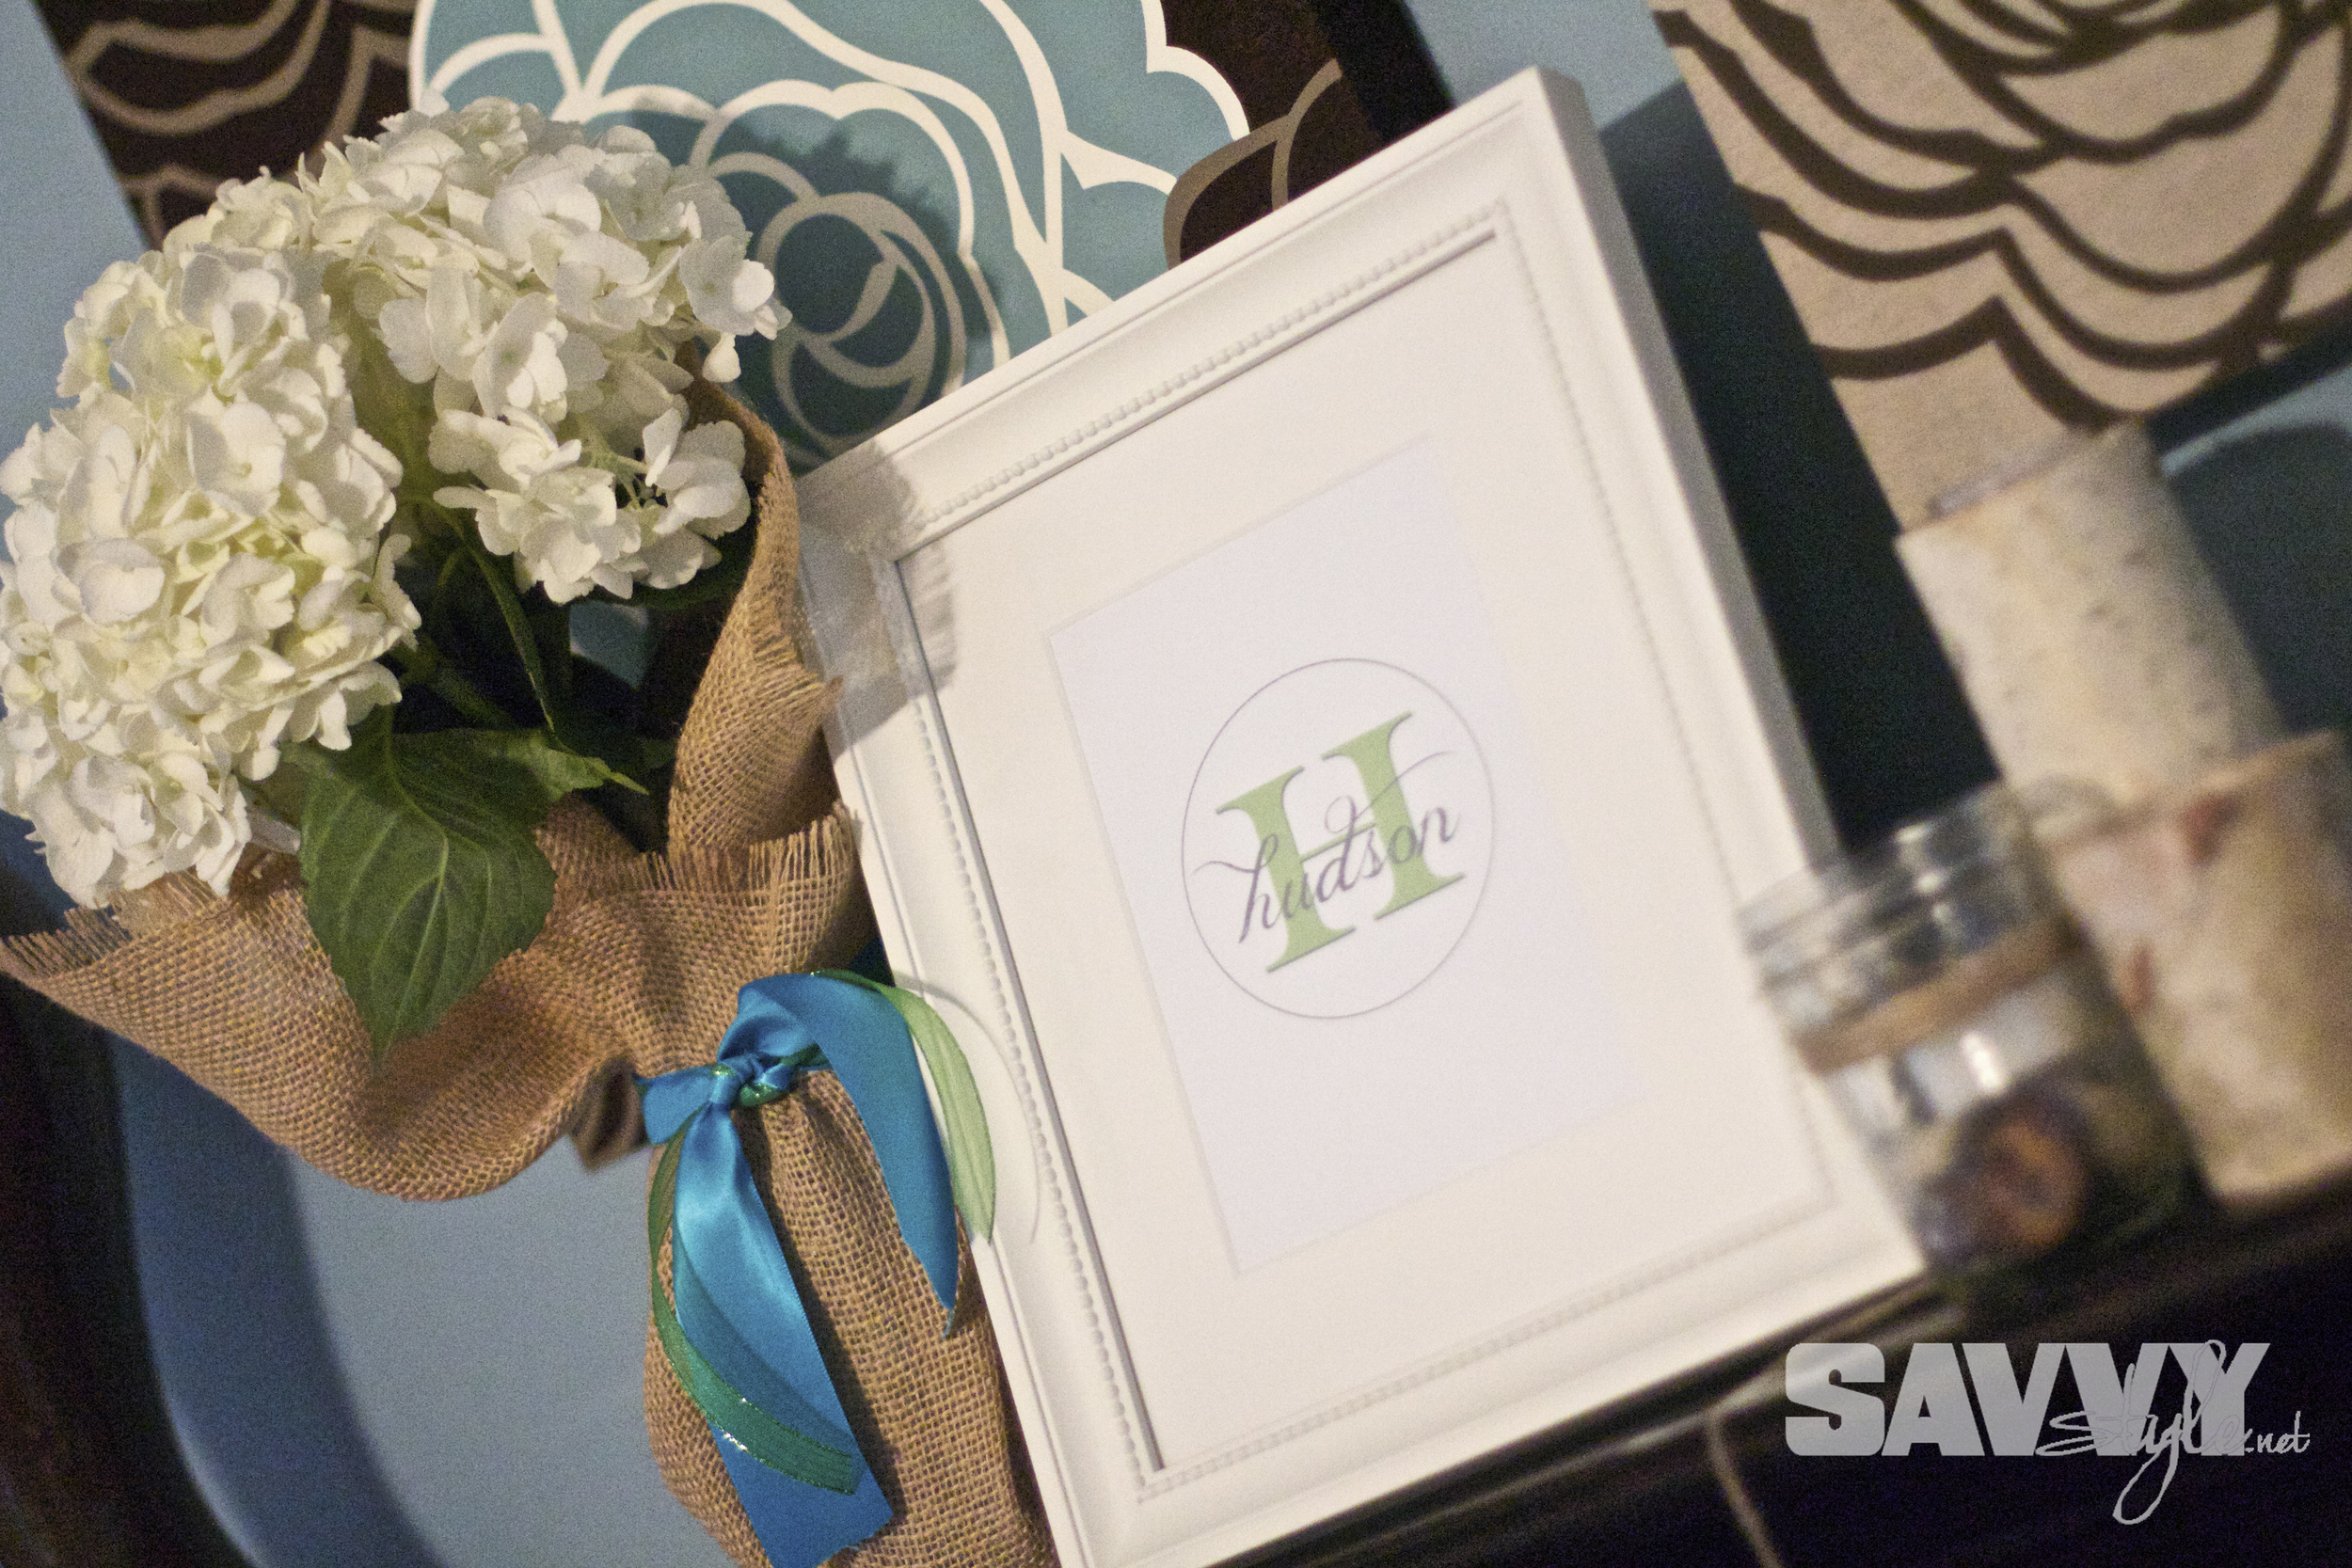
April showers always bring May flowers, they say. And while it may be raining here in Atlanta today, the only showers we're going to talk about are BRIDAL showers! Today we'll feature a bridal shower as well as a "Love is Sweet" Couples shower, both were thrown for my sweet sister-in-law. Emily's wedding colors were purple and hot pink, so we had lots of fun making this a brightly colored soiree!

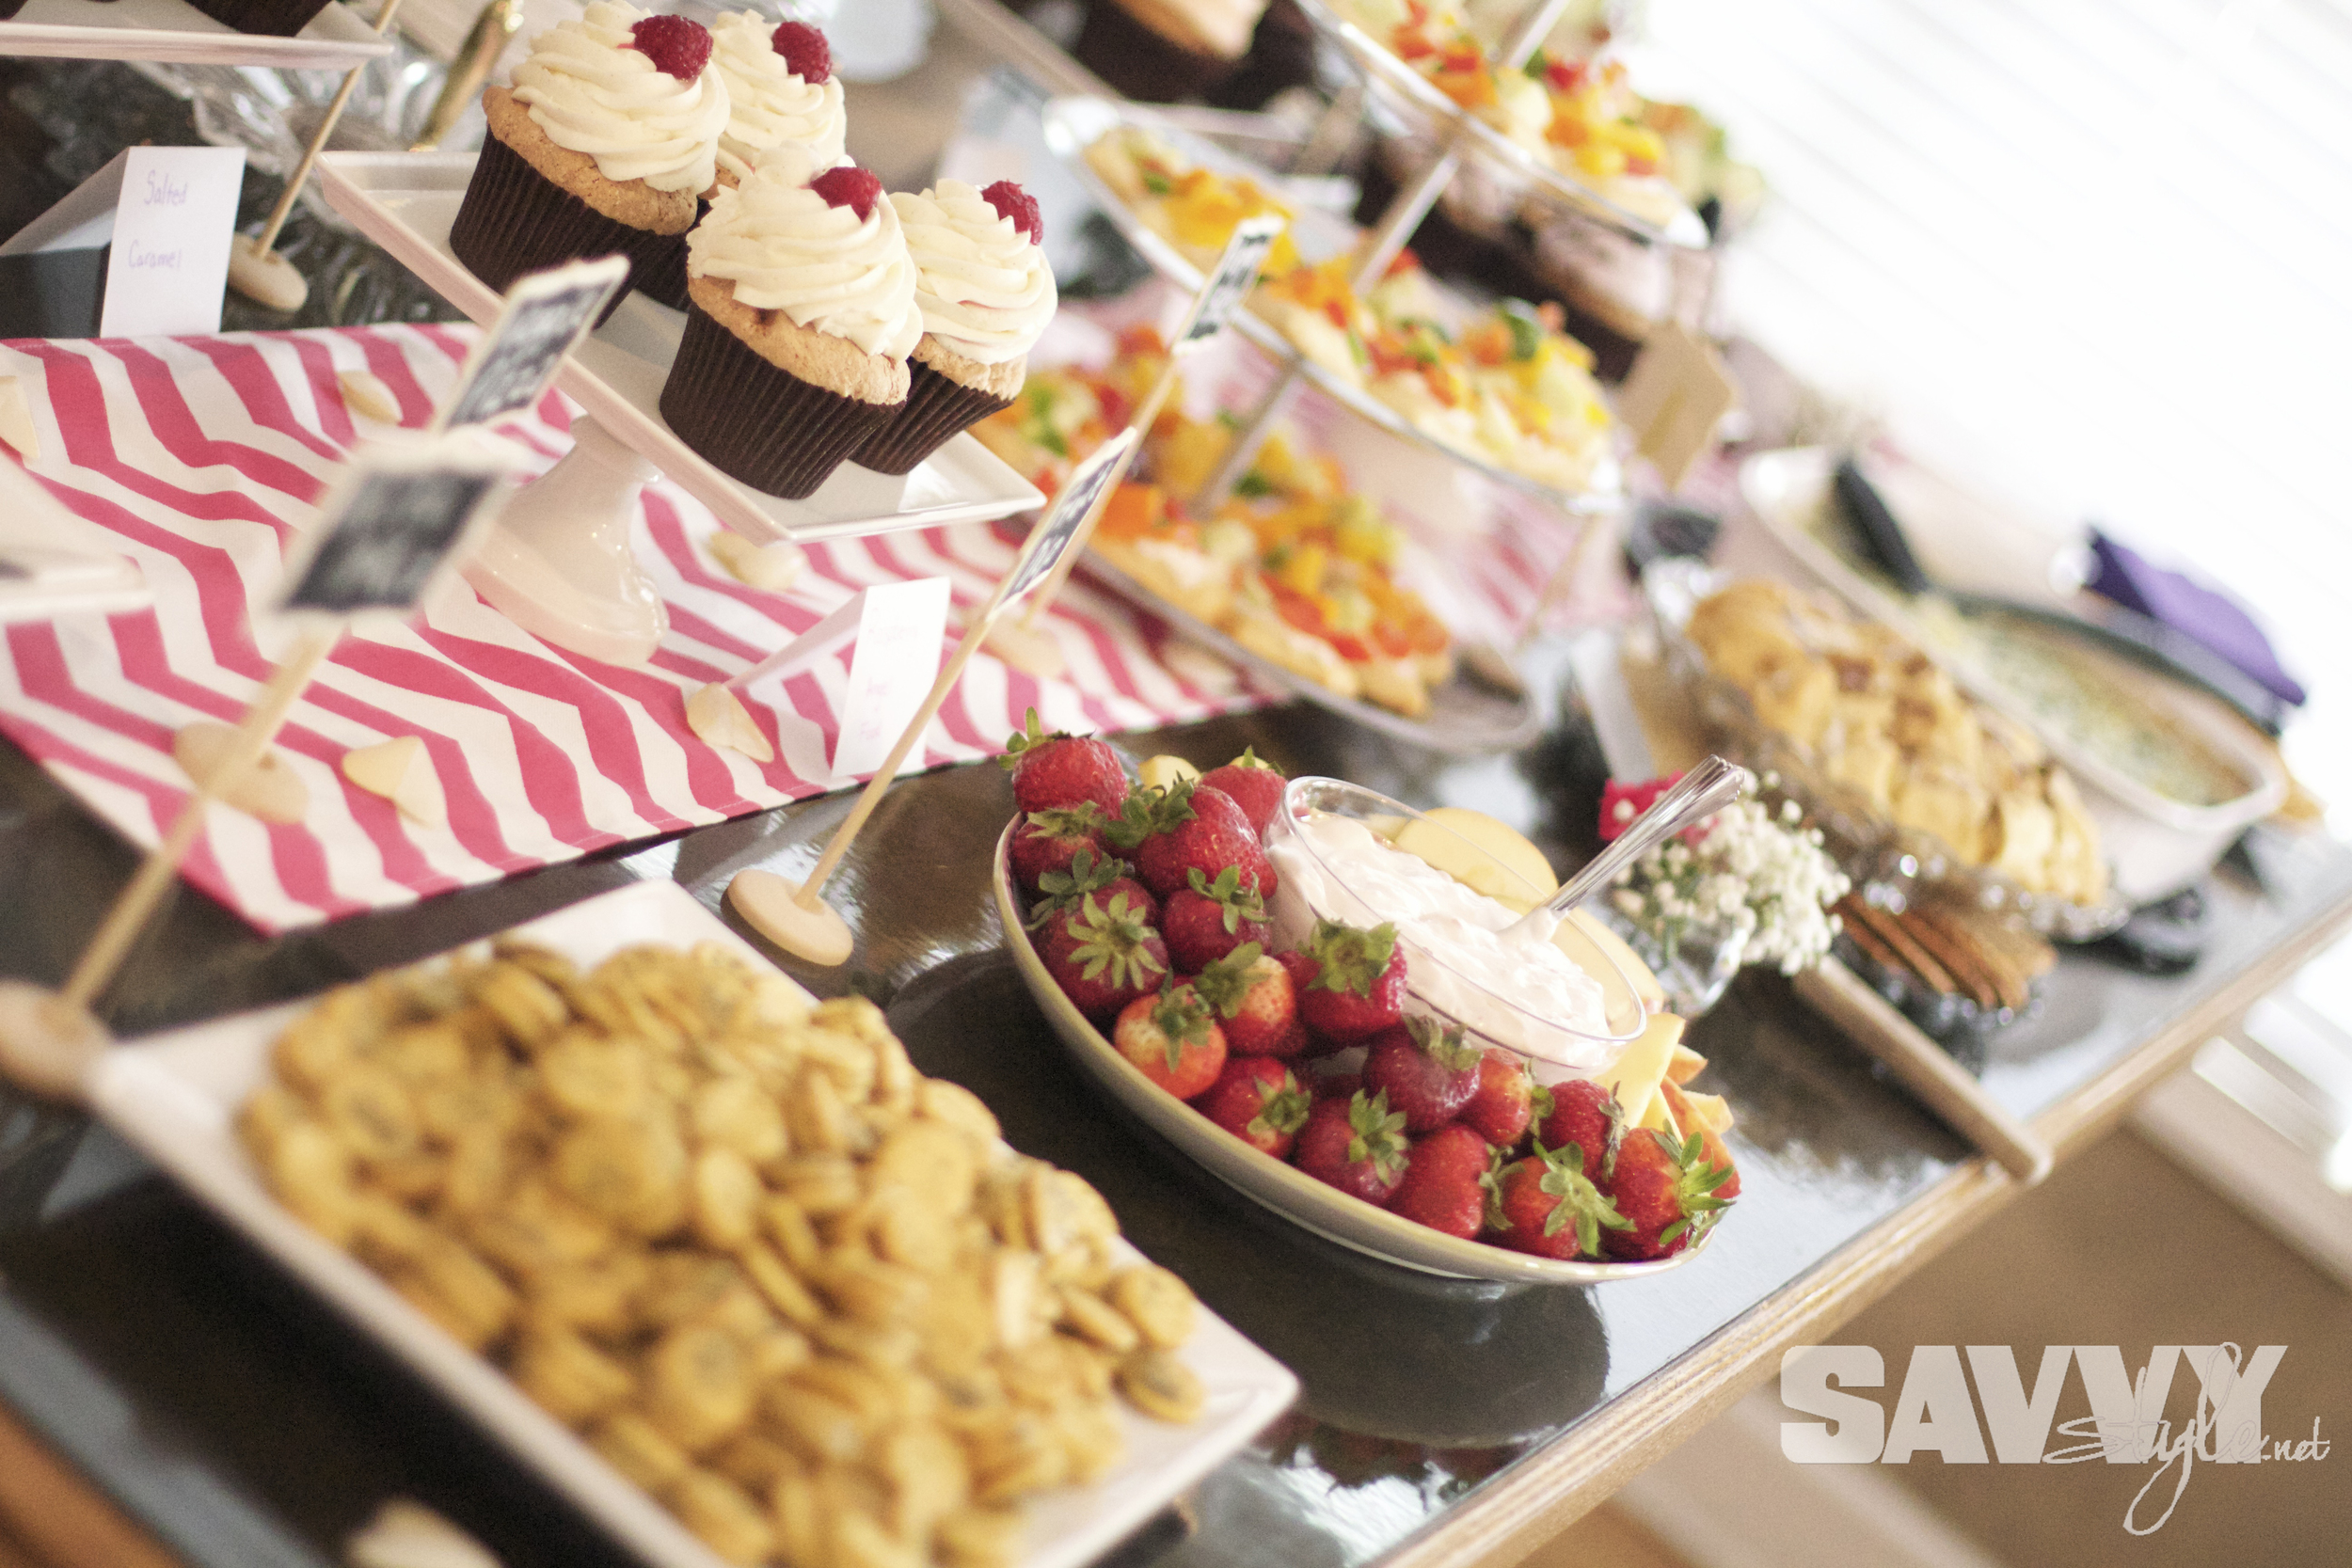
Both the chevron table runner and chalkboard food signs came from Jane.com. If you haven't signed up for their daily email list yet, do yourself a favor and sign up now...amazing deals daily!


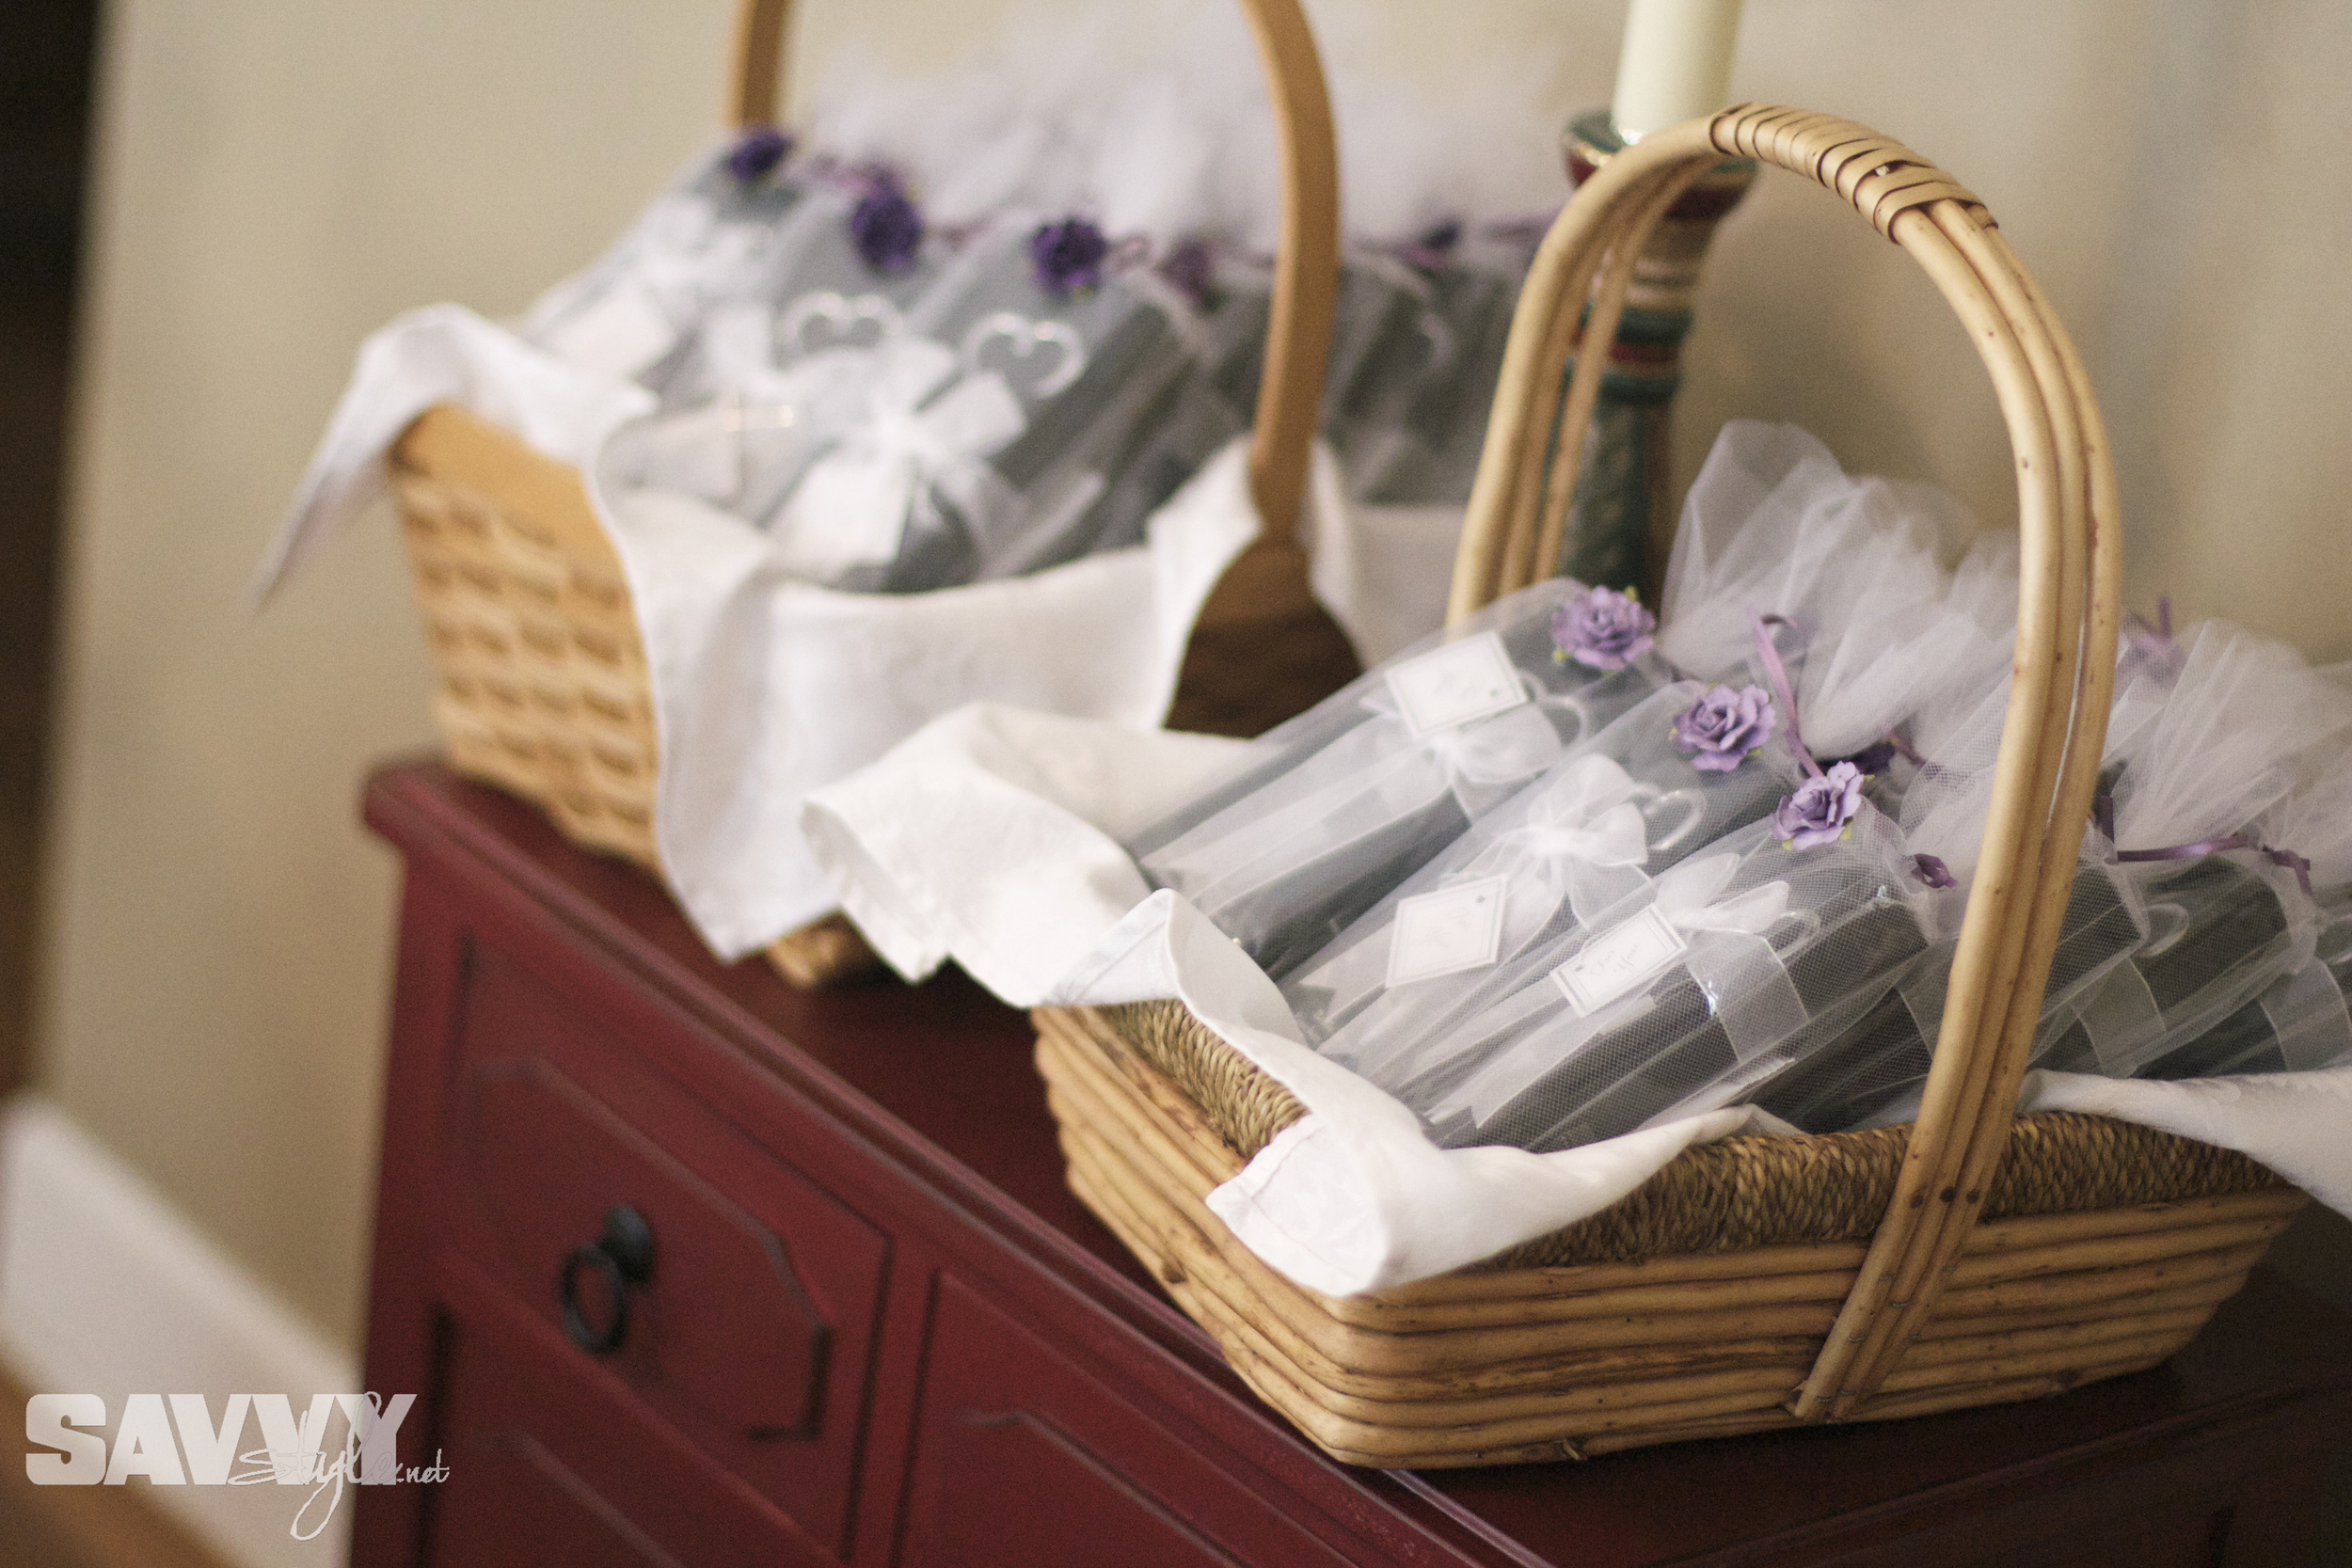
Adorable wine stopper favors were wrapped up beautifully by one of the bridesmaids.
And here's a glimpse at the "Love is Sweet" Couples shower. Of course, if you're going to lure men to a shower...you have to provide entertainment. What's better than a good game of corn hole?


To wrap up the evening, we finished with a hilarious game of "He Said/She Said." We place the couple back to back and they swap a shoe, so that each of them has one of their own shoes in one hand and their fiancé's shoe in the other. We asked questions such as "who is the better cook" and let them both answer (without seeing each other's response). The outcome was hysterical, as you can tell from my sister-in-laws expression below.

Stay tuned with us this week as we cover more weddings, flowers and decor to your heart's content! It's bound to be a week of wedded bliss!


This cake looks almost good enough to eat!
(but I wouldn't recommend it)
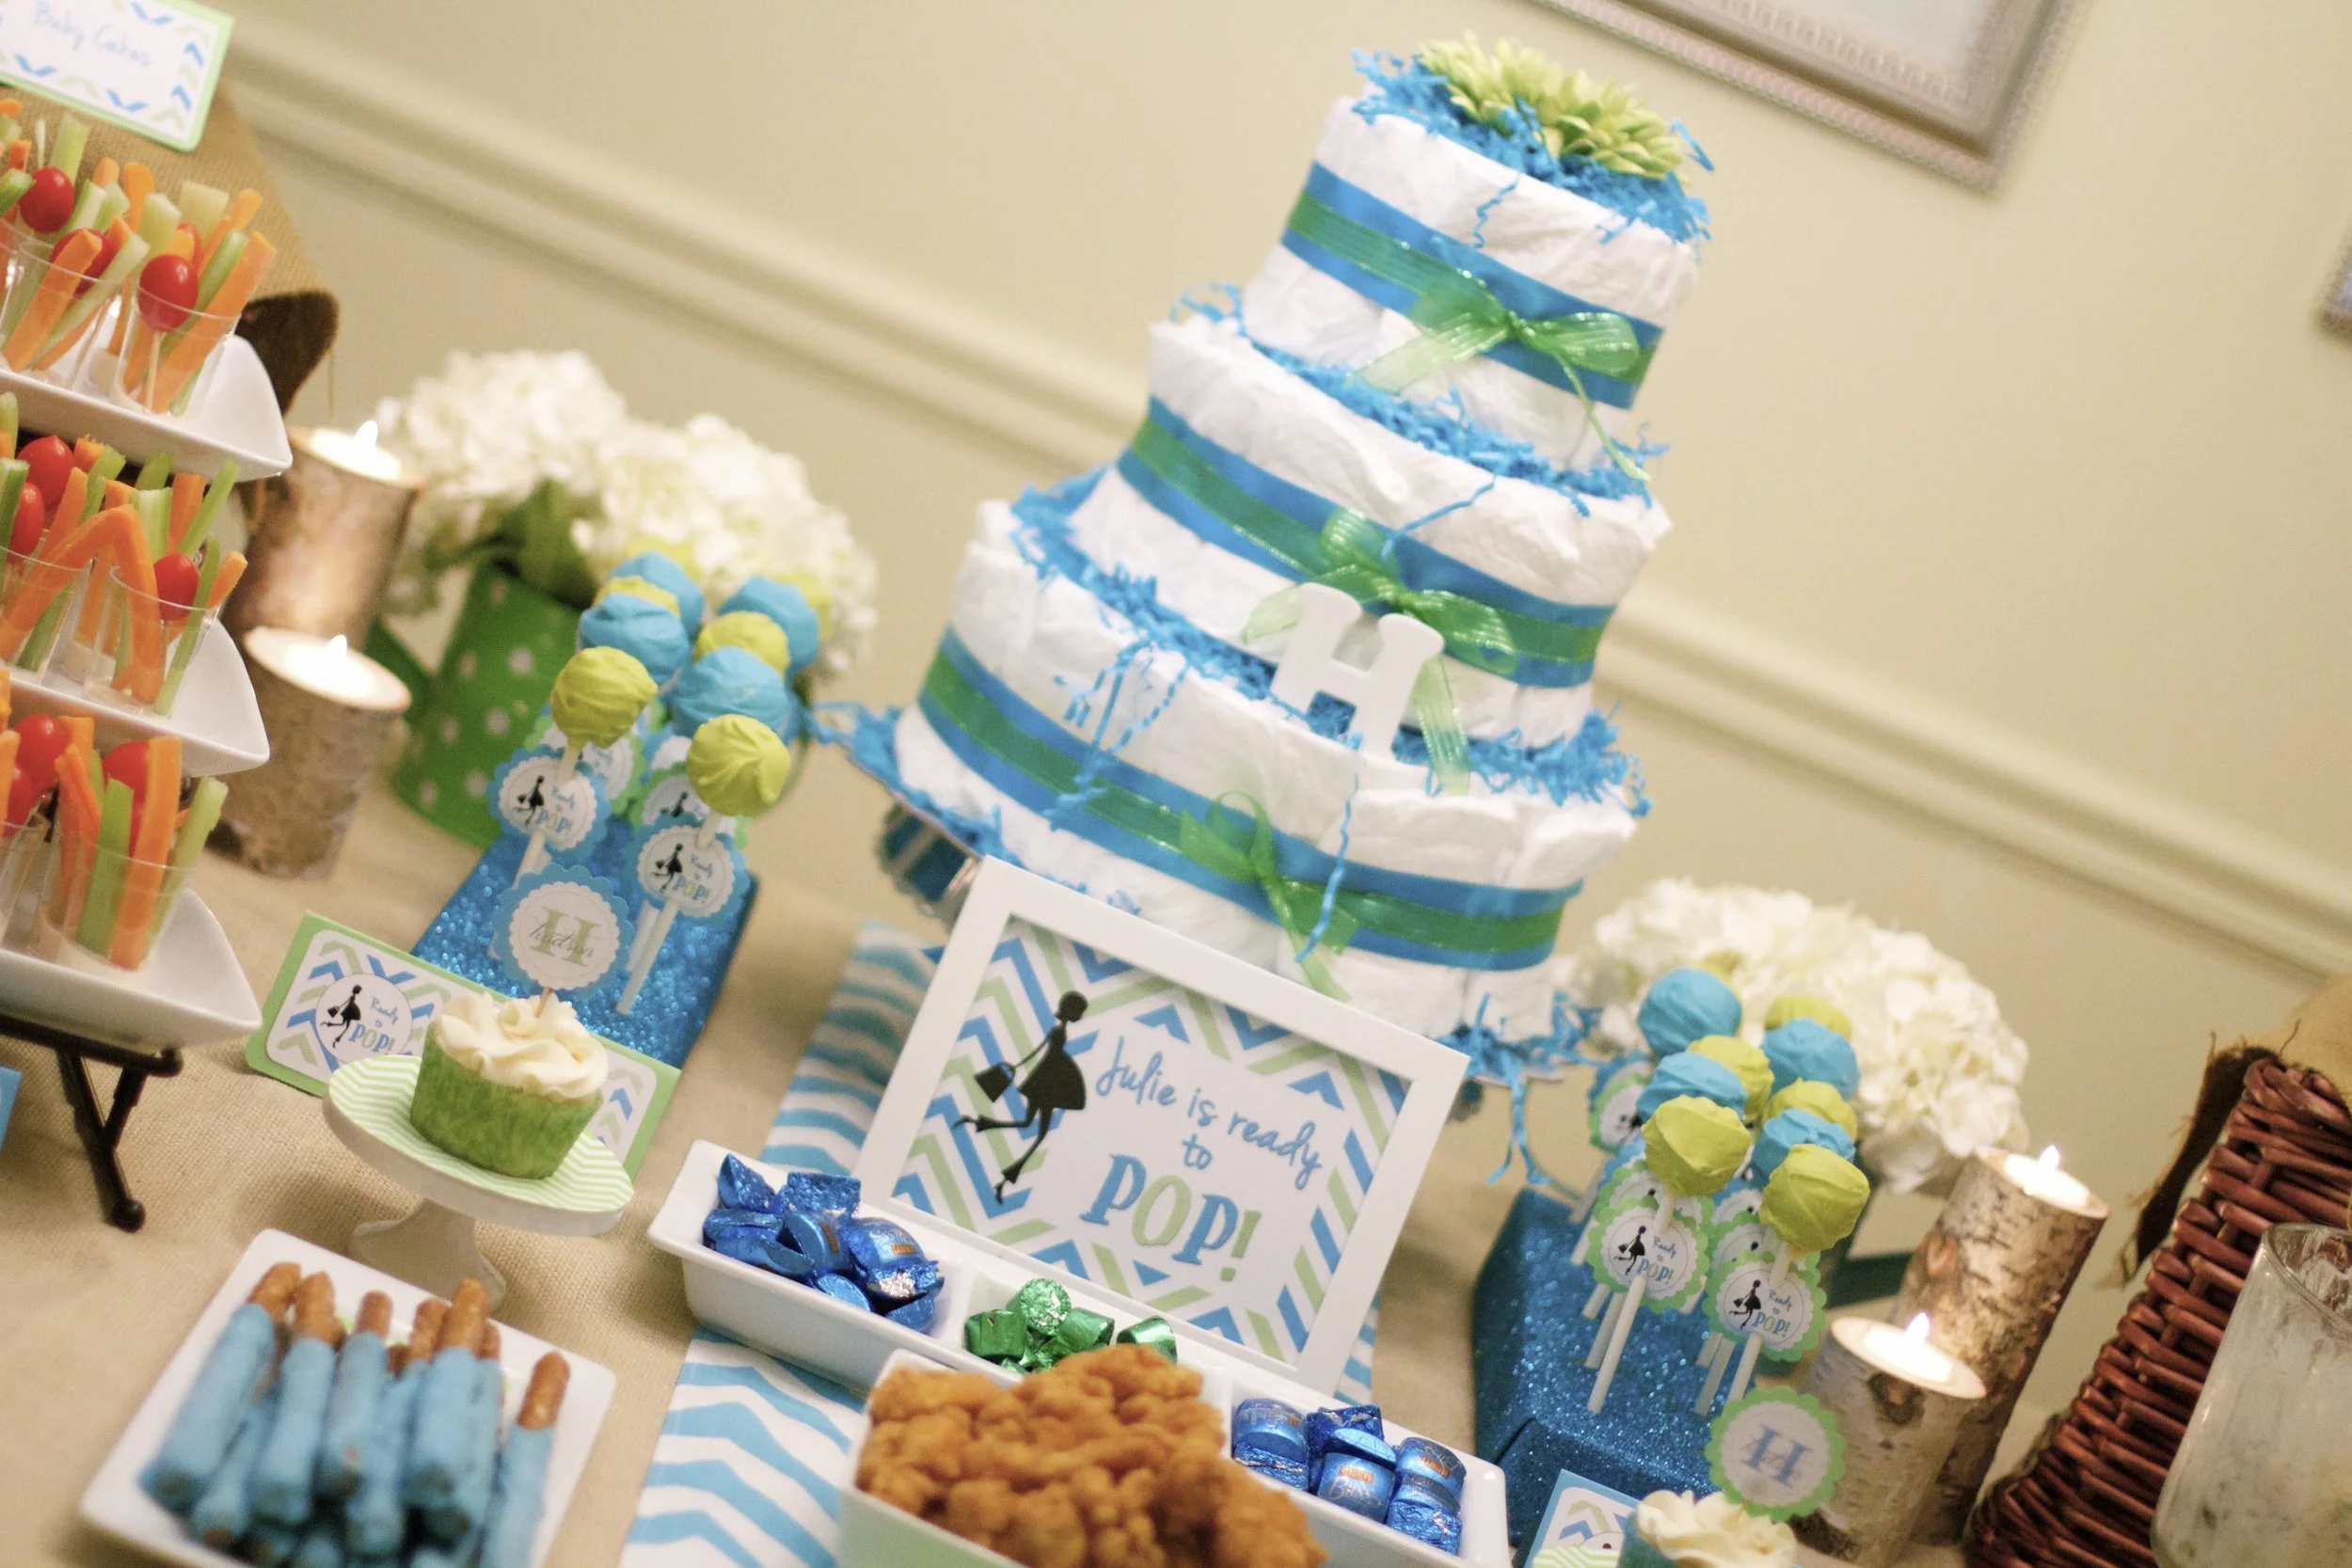
Earlier this week I showed you our fabulous "Ready to Pop" themed baby shower (click HERE to download our FREE Ready to Pop party printables!), now I'll show you a simple tutorial on how to make the beautiful diaper cake we used as the centerpiece for our food display. Diaper cakes are a great way to dress up a practical gift, and if you decorate in the colors of the party, they can also become a beautiful focal point of the shower decor.
Some might say they pull double doody....er, I mean duty. Ahem.

Let's start out with the supplies you'll need:I made this whole diaper cake for less than $30, simply by shopping smart and utilizing some supplies that I had around the house. When you know you're going to be making one of these in the near future, start collecting empty toilet paper rolls (these can be used for other fun crafts as well) and an empty wrapping paper roll. I use the empty wrapping paper roll as the "base" of the cake, to help hold everything securely in place. It helps the cake transport easily without falling apart and keeps everything centered.
With the exception of the diapers, I found all of my supplies (cake plate, ribbons, flower, crinkle paper) all at Michael's...so it really was a one-stop-shop kind of project. PLUS I used my Michael's iPhone app for a coupon and saved some money!

STEP 1: Cut down your wrapping paper roll and glue it to the center of the 12" cake plate.To cut down the wrapping paper roll to the right size I took the three toilet paper rolls and laid them on the floor one on top of the other (to form a tower), then laid the wrapping paper roll beside it and marked it about 1/2 inch shorter than the length of the three rolls (so that it wouldn't stick out the top).


NOTE: You might ask why I didn't just use a paper tower roll since they're similar in height - the problem with paper towel rolls is that they are generally the same diameter as toilet paper rolls, making it hard to slide one onto the other. I have found that wrapping paper rolls are generally smaller in diameter and work perfectly. And bonus...they're long enough that you can cut it and get TWO cakes out of one roll!Jackpot! While the glue on the base is drying, you're ready to start assembling your layers. This is where you bust out the diapers and take a good whiff because they smell incredibly of fresh clean baby. (ahhh). I used Pampers Size 2 Swaddlers that I got from Buy Buy Baby at 2 packs (72 diapers) for around $22...not bad! I've found that this size diaper is the perfect size for the cake, and it allows the mommy to enjoy the cake on display in the nursery for a little bit after the little one arrives (if she chooses) without having to take it apart in the first week for the newborn size diapers she'll need.
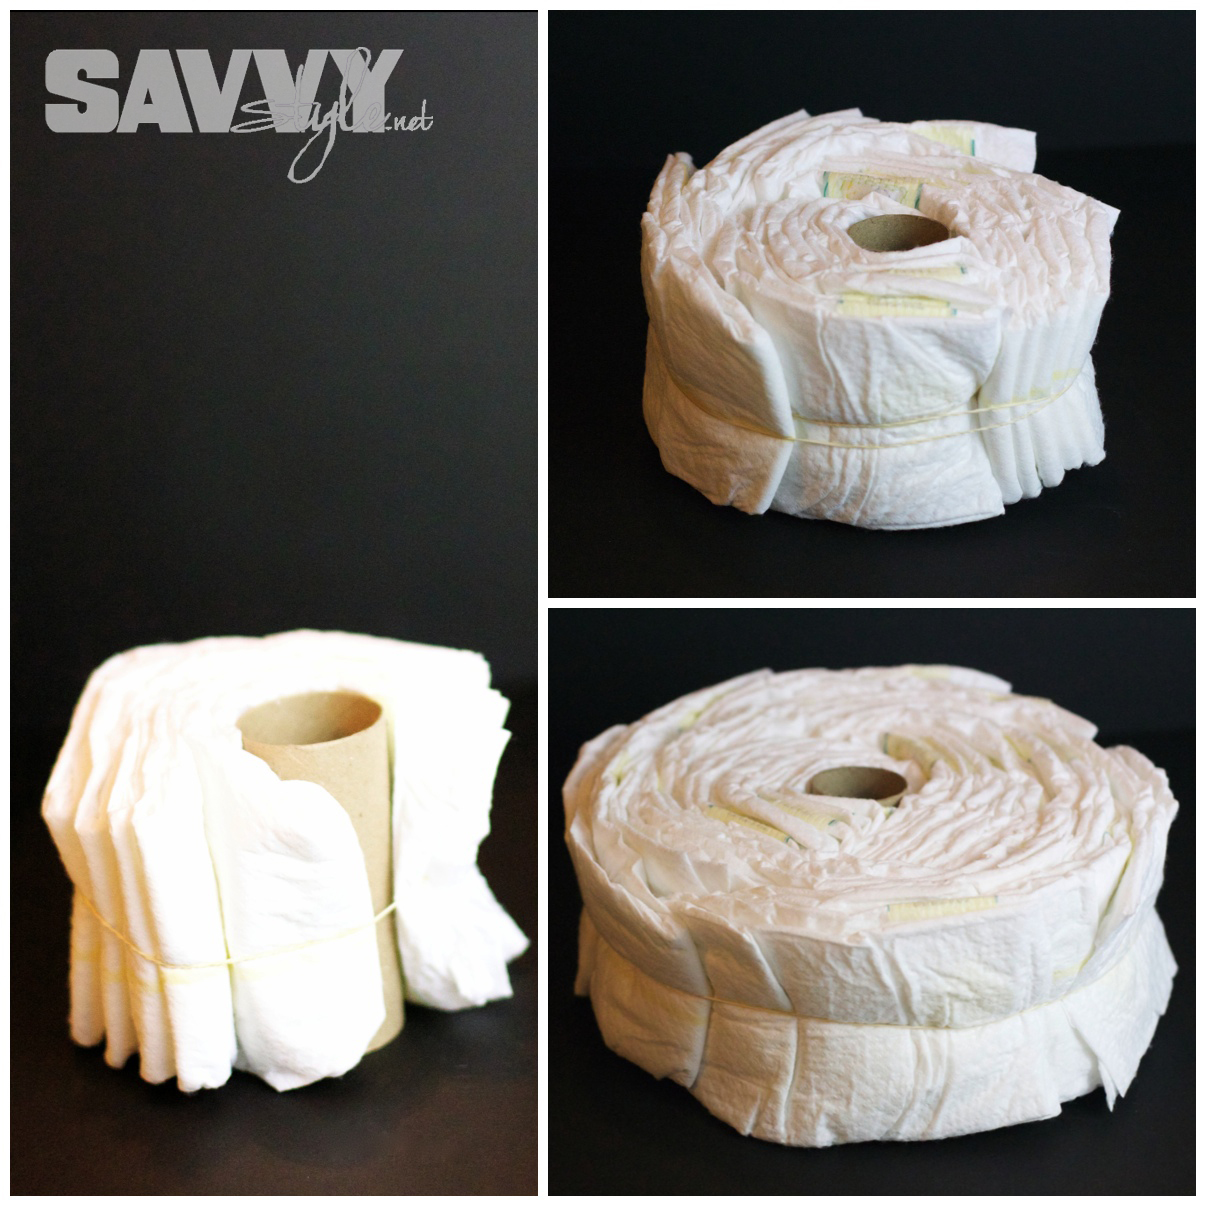
STEP 2: Attach diapers to the toilet paper roll with rubber bands.Make sure you turn all of the diapers with the patterned side facing inwards (so they all look solid like a vanilla frosted cake), and begin to wrap and rubber band them in stacks of five. As you add more and more diapers, you can begin to fan them out (instead of one thick stack) so that the outer rim looks smooth and symmetrical.
You might need an extra set of hands to do this for the base if you haven't done it before...but if you don't have help, just be patient, it may take you a couple of tries to get the diapers in the right place and rubber banded before they fall over! I promise you can do it - I did this one solo!
Repeat this step for the middle and top layers.
Here's the breakdown of the number of diapers I used for each layer:
BASE: 30-35 Diapers
MIDDLE: 20-25 Diapers
TOP: 10-15 Diapers
The best way to do this is just eyeball it. Start with your base, and as you make the next layer measure it on top of the layer below it to make sure it is slightly smaller in size. Once you get your three layers rubber banded, you're ready to assemble.

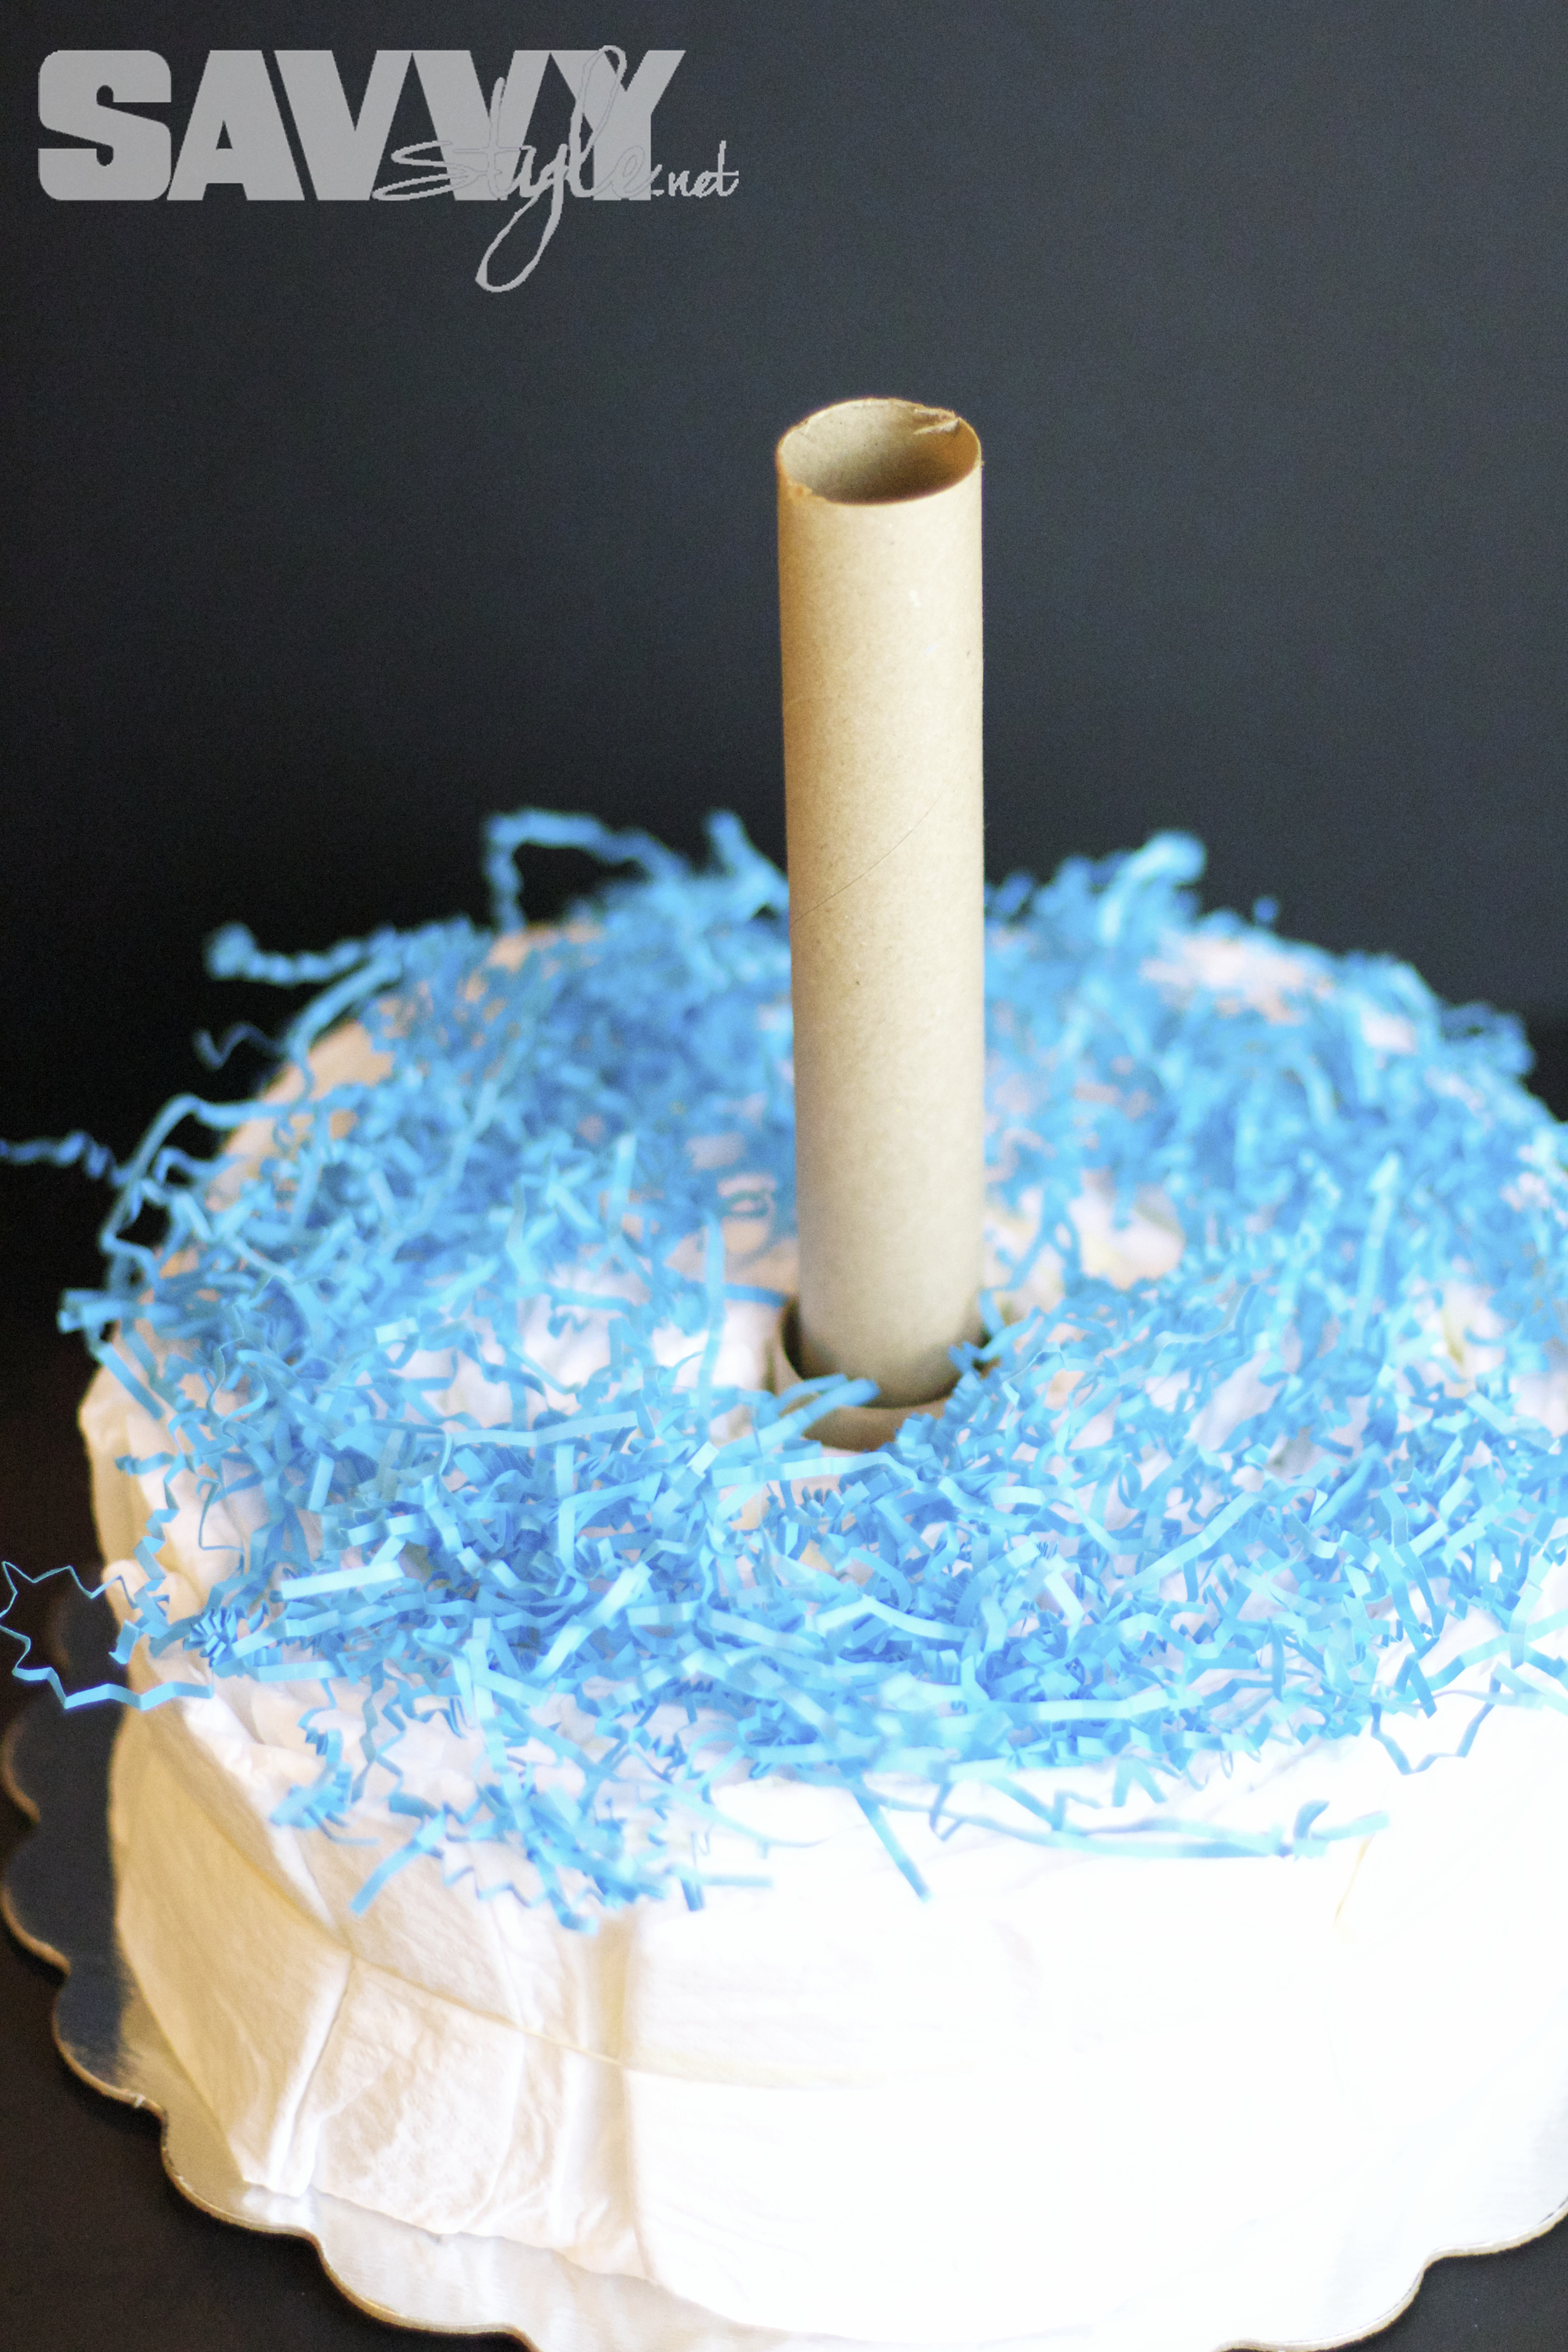
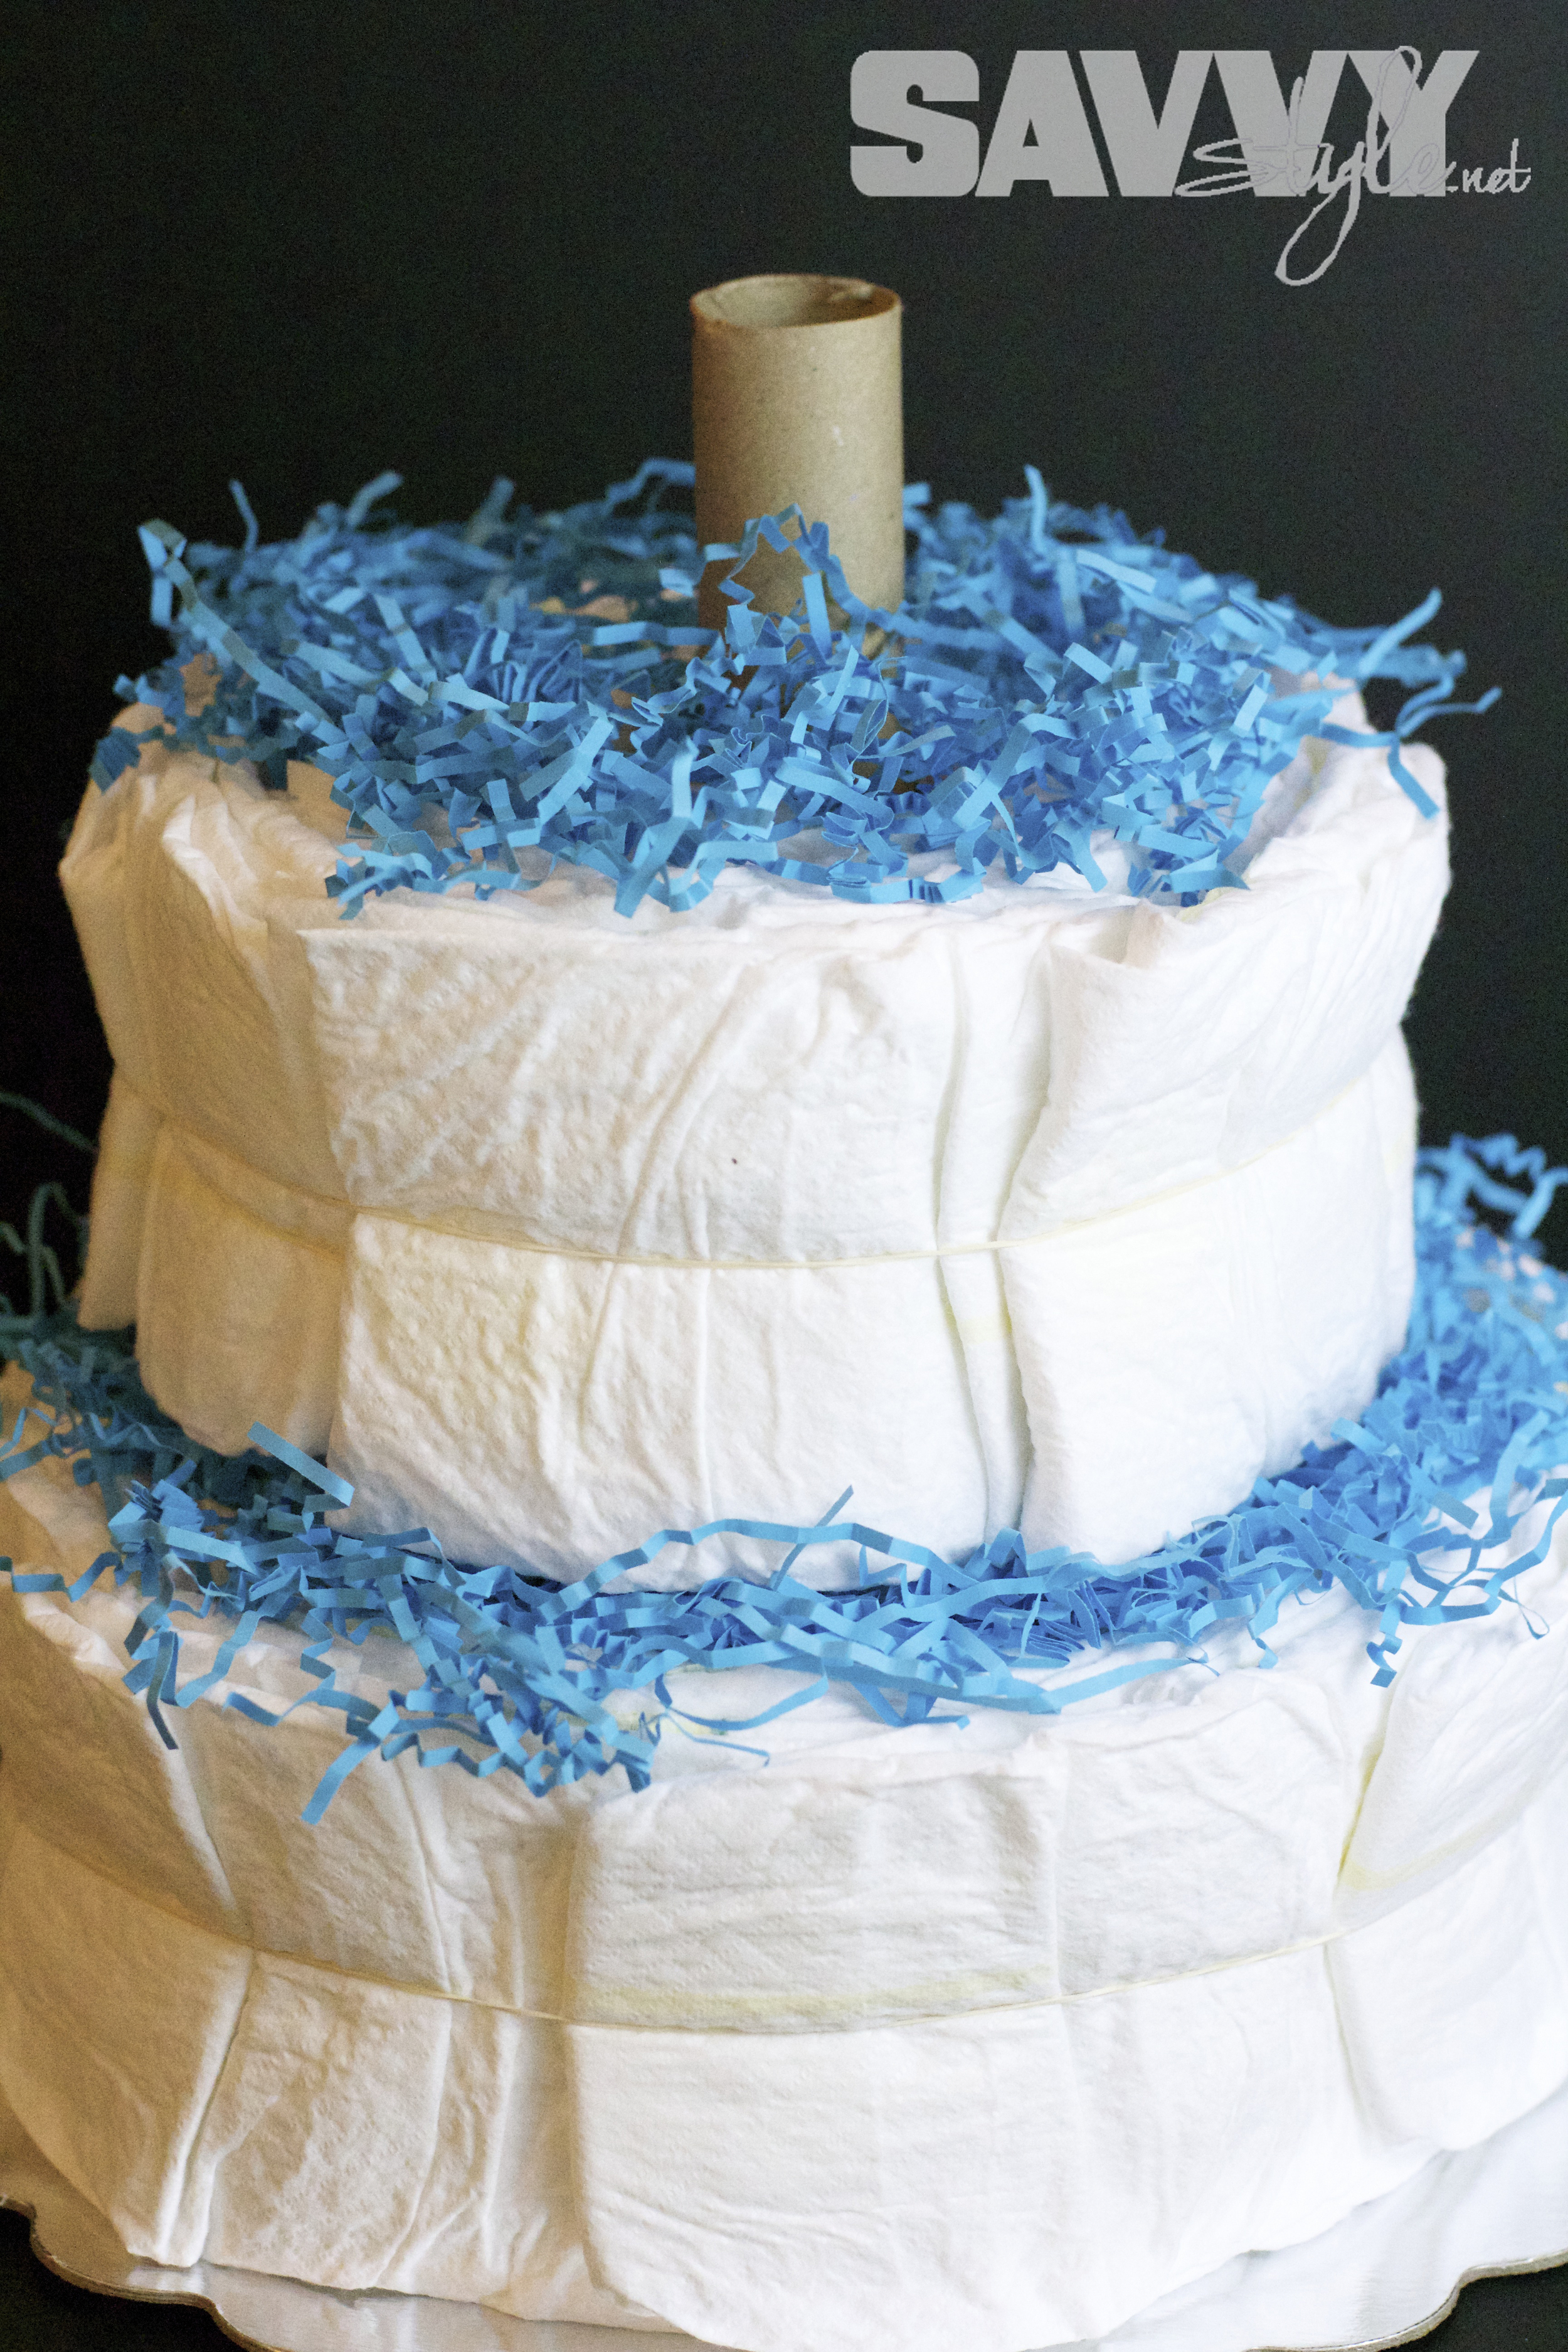
STEP 3: Slide layers onto base, placing crinkle paper in between each layer.Adding the crinkle paper isn't absolutely necessary, but I think it gives it a fun pop of color and distinguishes between the layers. (and it looks like frosting to me...we all know I LOVE frosting...just saying.) Note: I originally didn't put crinkle paper on the very bottom (between the base and the cake plate) but I went back later and added it in to give it a consistent look across the layers - you'll see it in the finished product at the bottom of this post)
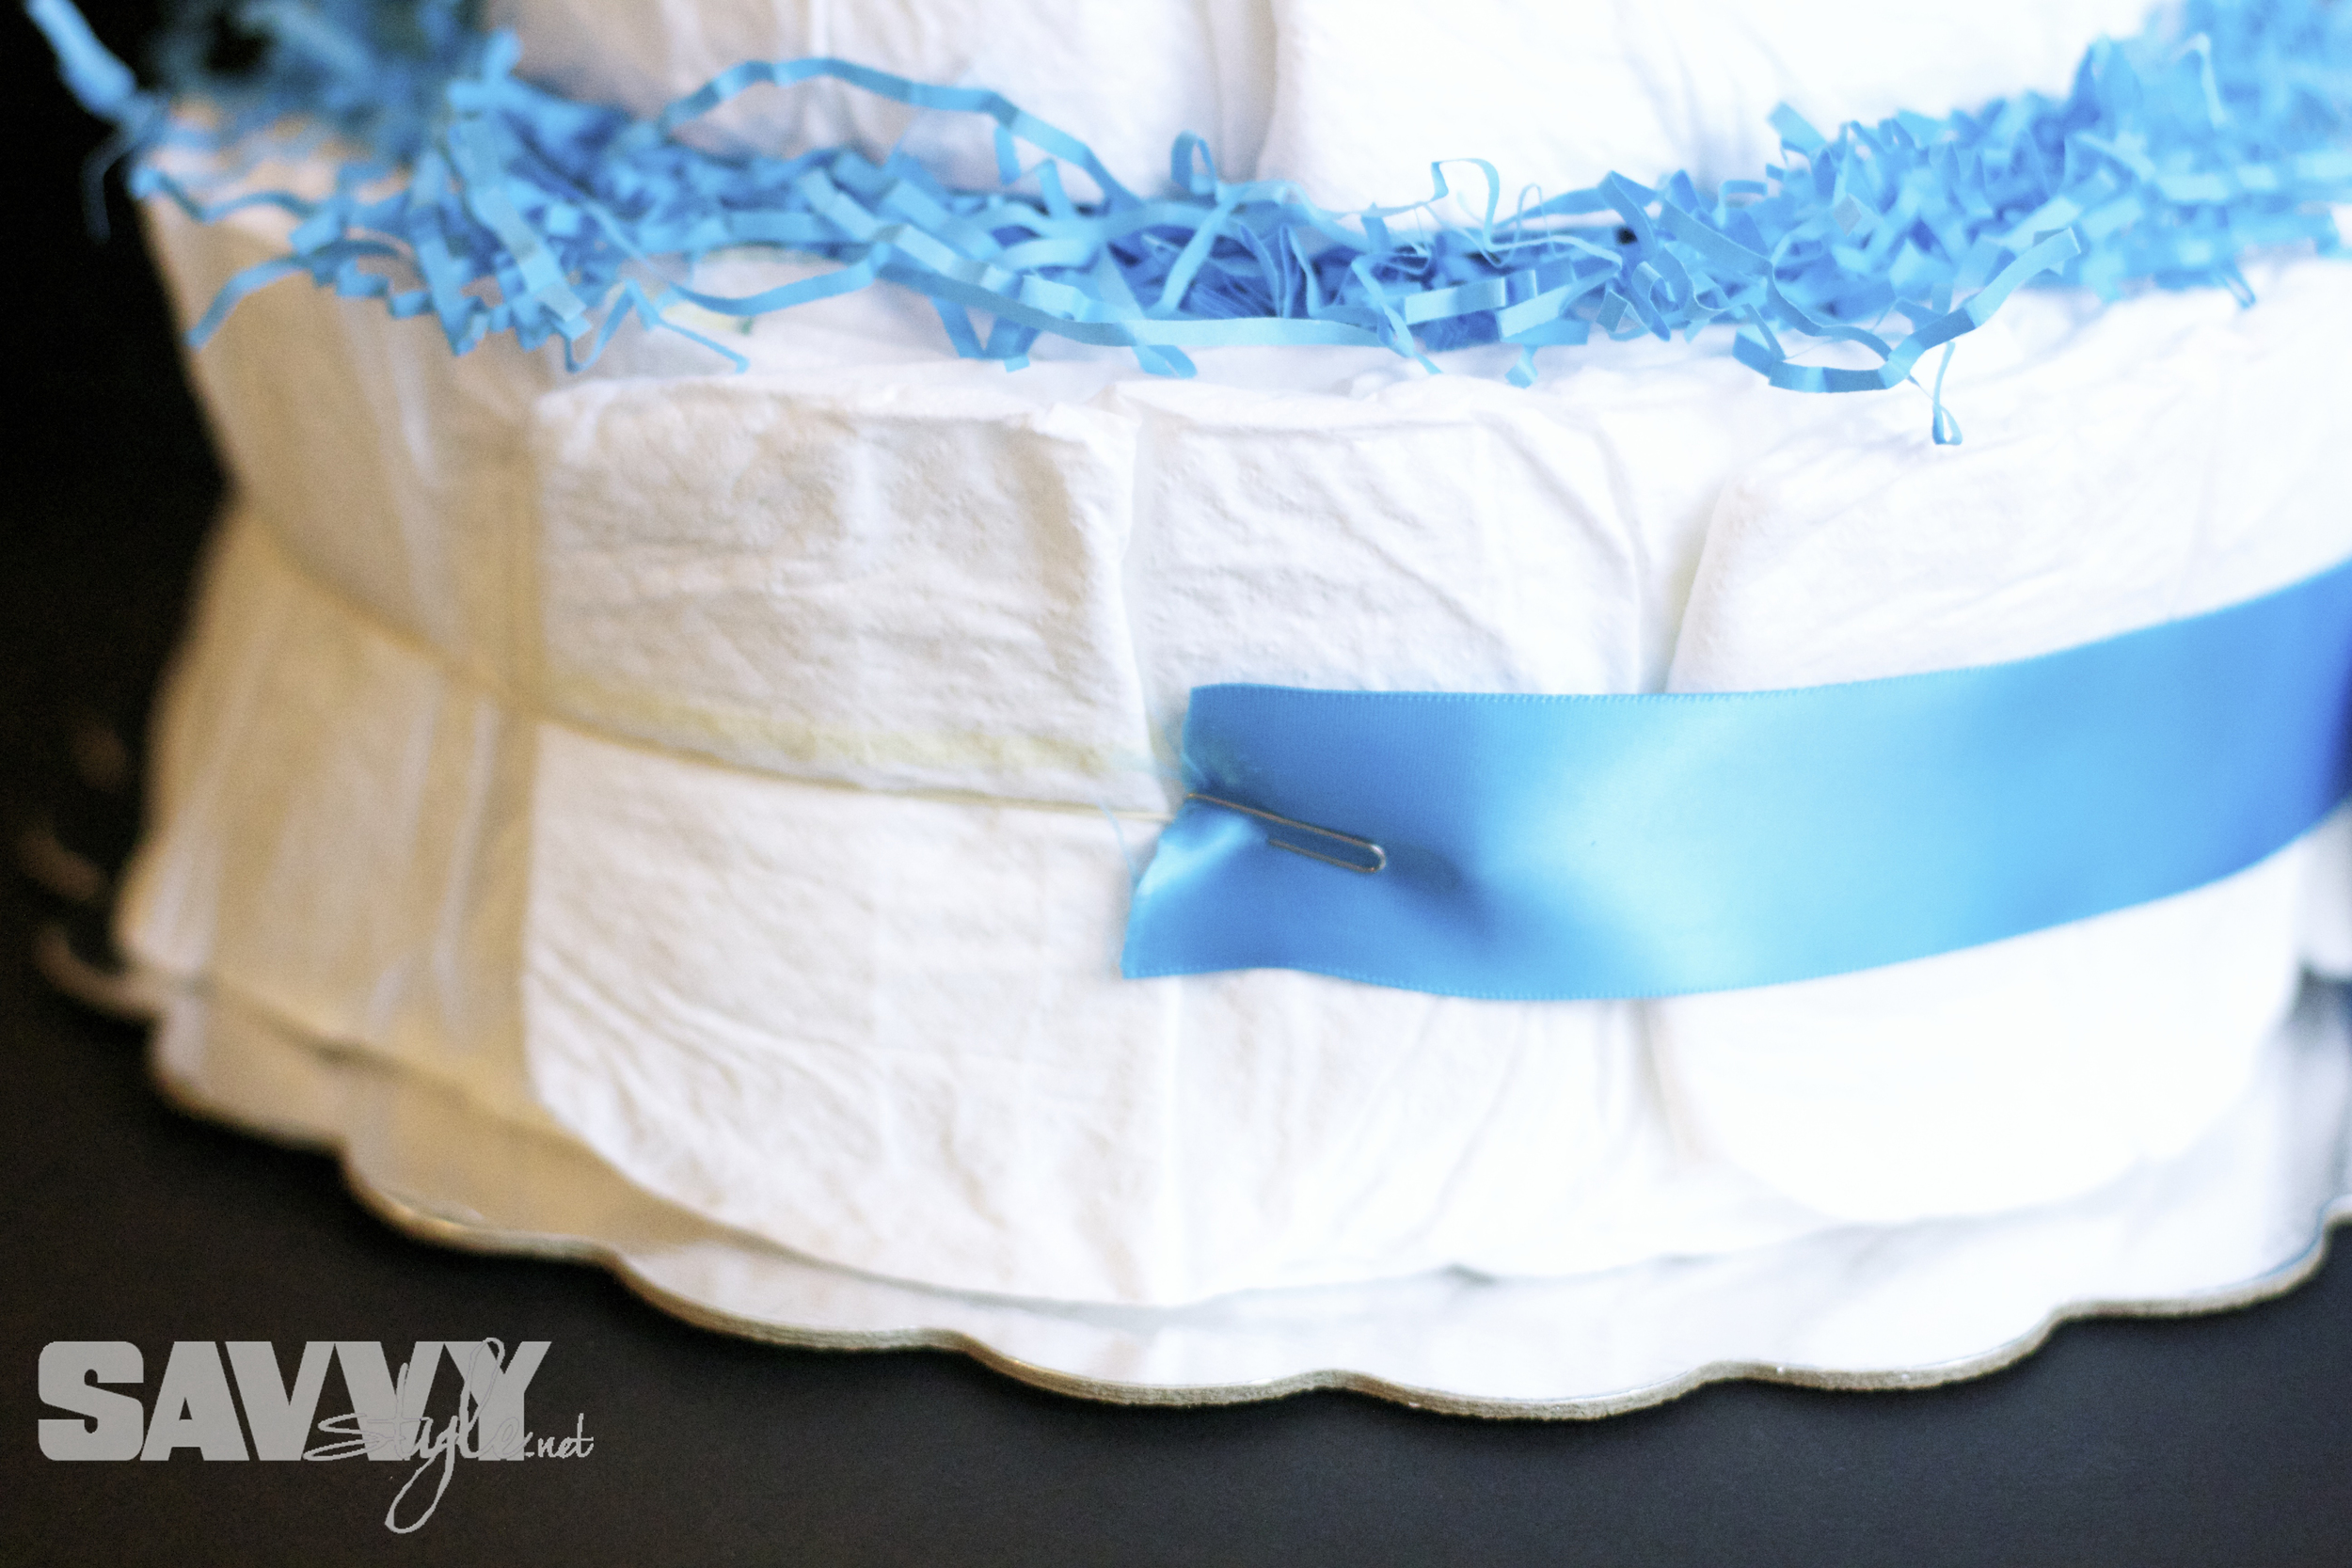
STEP 4: Attach your ribbon with paper clips and glue.You don't want to glue your ribbon directly to the diaper because it will ruin it for actual use, so what I did was use a paper clip to attach one side of the ribbon at the back. I then wrapped the ribbon all the way around, cut it just slightly longer (so it overlaps) and then used a little bit of hot glue to attach the ribbon to itself.
NOTE: Be sure to put something in between the diaper and the ribbon as you glue the ribbon together so that the glue doesn't seep through to the diaper.
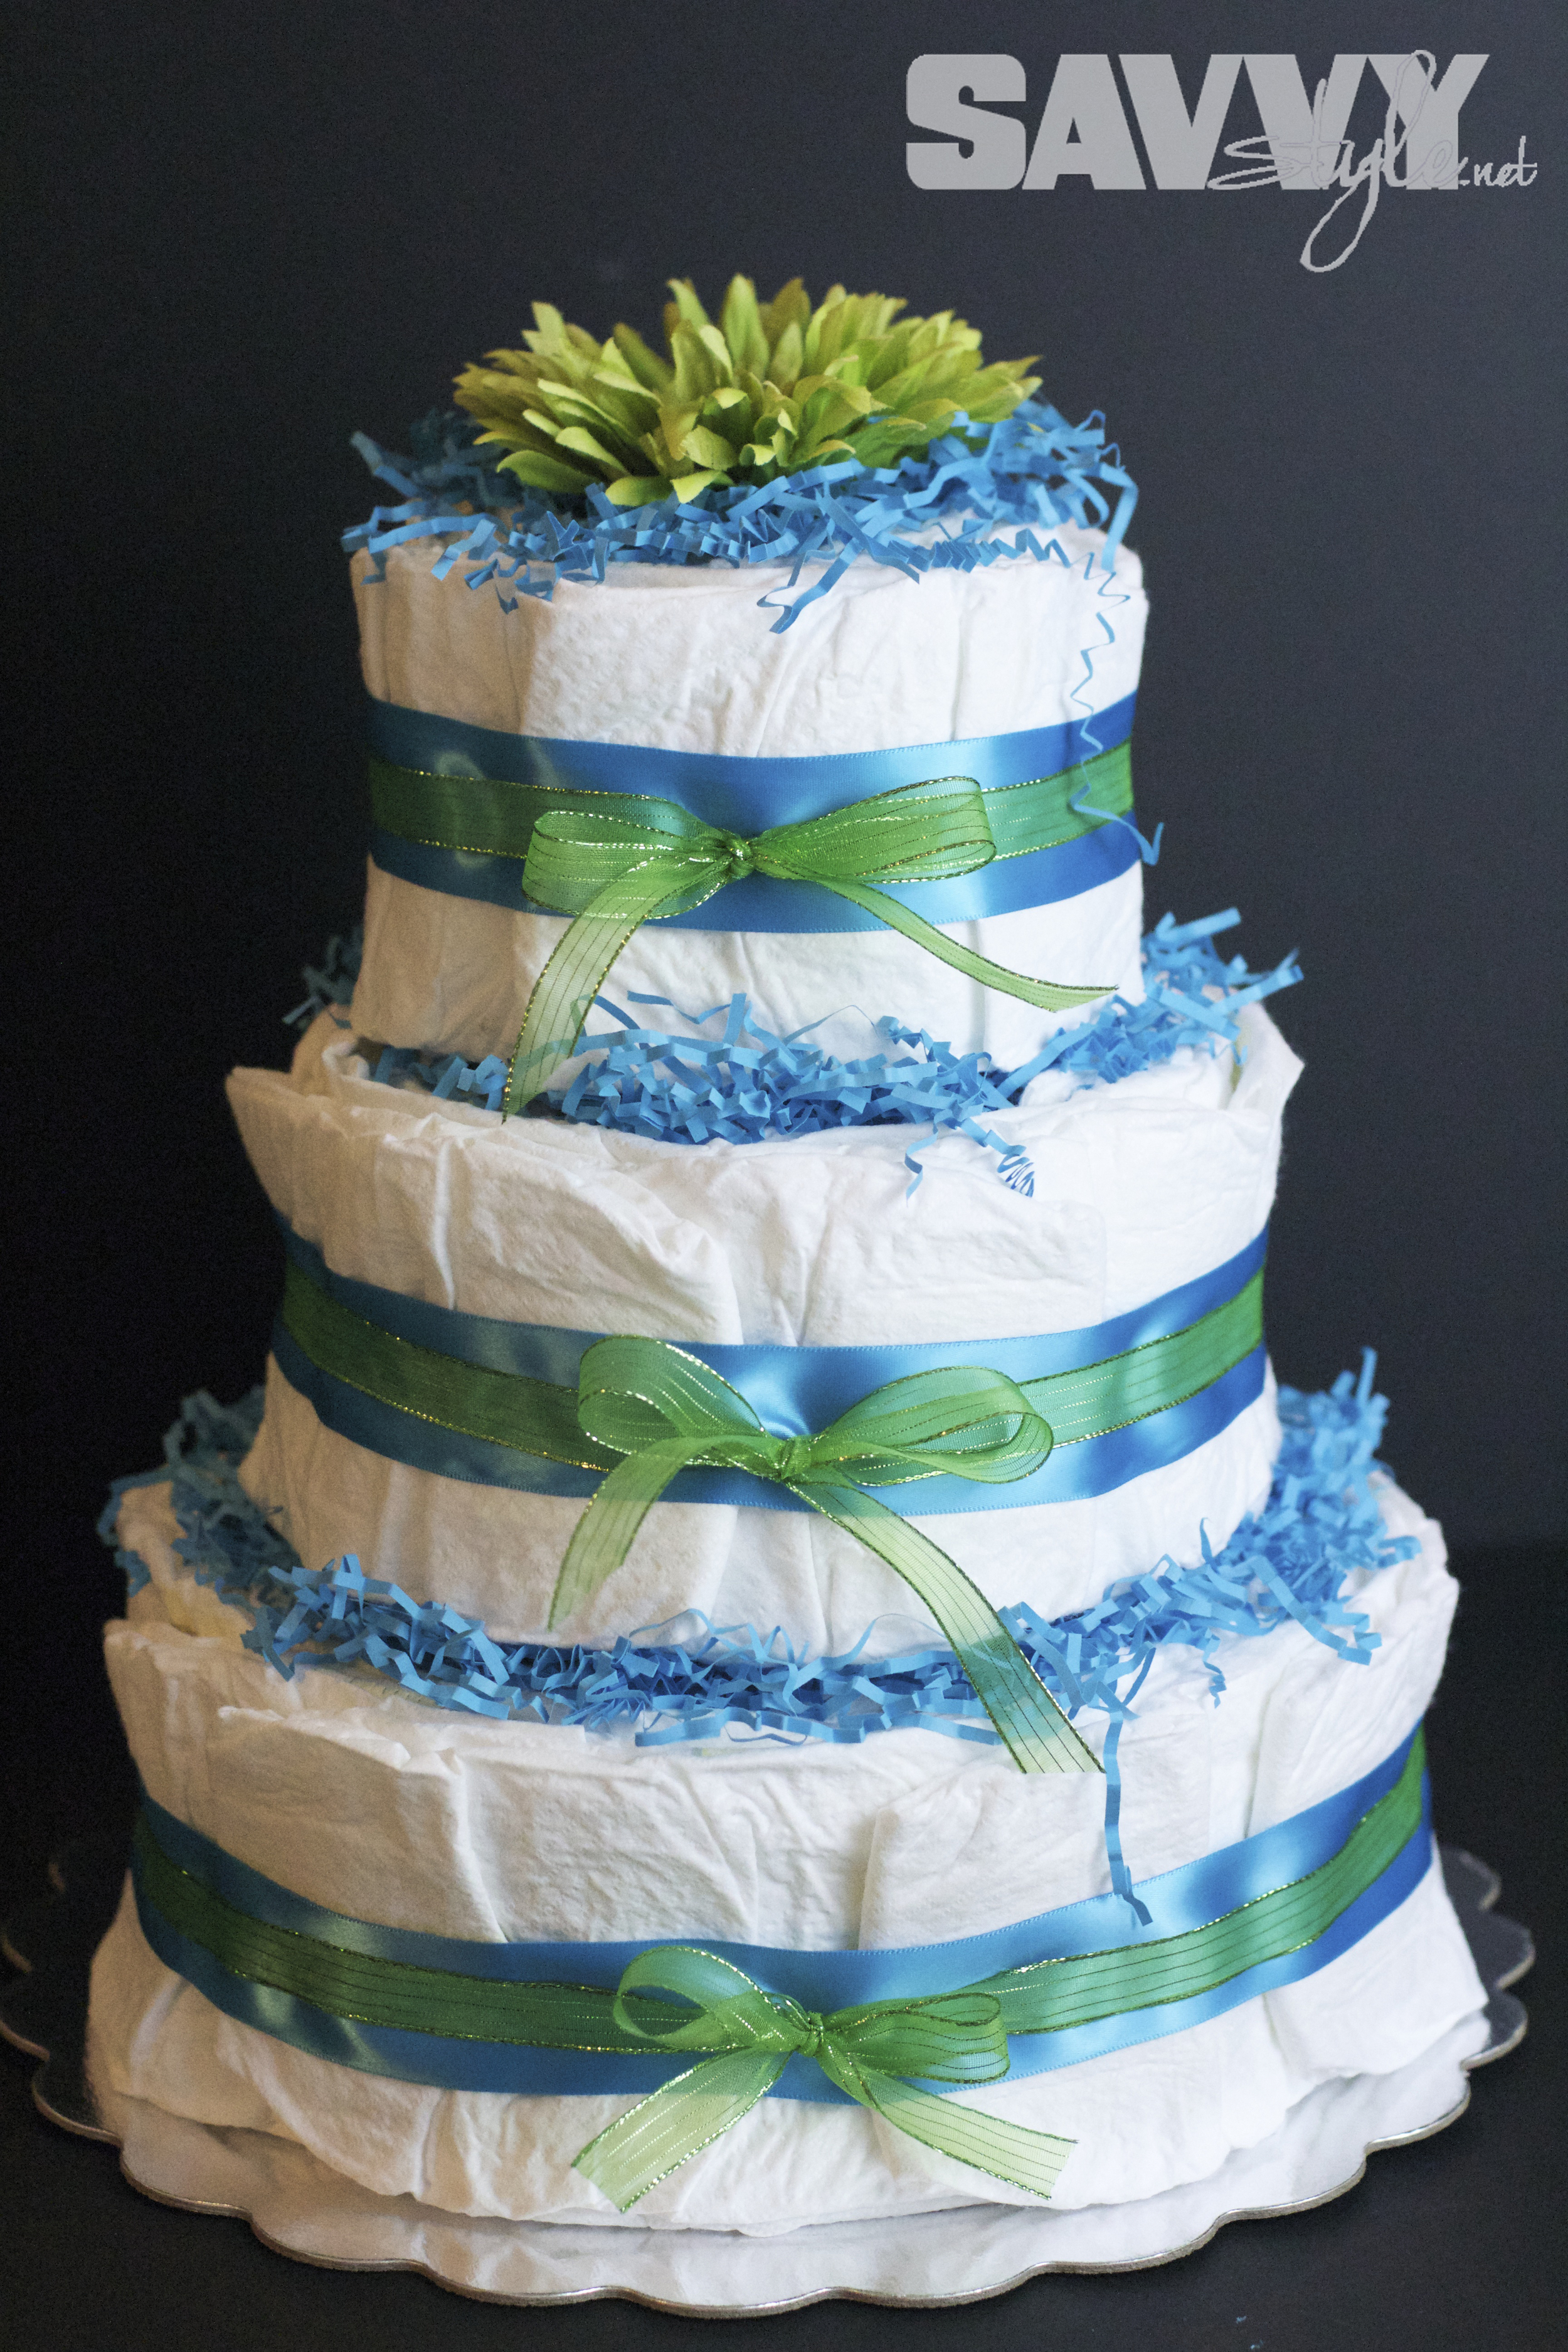
Repeat this for all three layers, making sure your seams are all in the same place at the back of the cake. Next, take your 1/2 inch ribbon and wrap it around to the front of the cake, tying a bow in the center of each layer.
STEP 5: Trim your decorative flower and place on top.The great thing about this is that I literally just had to cut the stem down to the height of the cake, and then it slid right down into the wrapping paper tube...no glue, no muss, no fuss. Easiest cake topper ever. (I used a silk gerber daisy from Michael's)
And voila...you have a beautiful gift and a beautiful centerpiece for your baby shower!

Who has two thumbs and loves a good theme party?
This girl. [points to self]

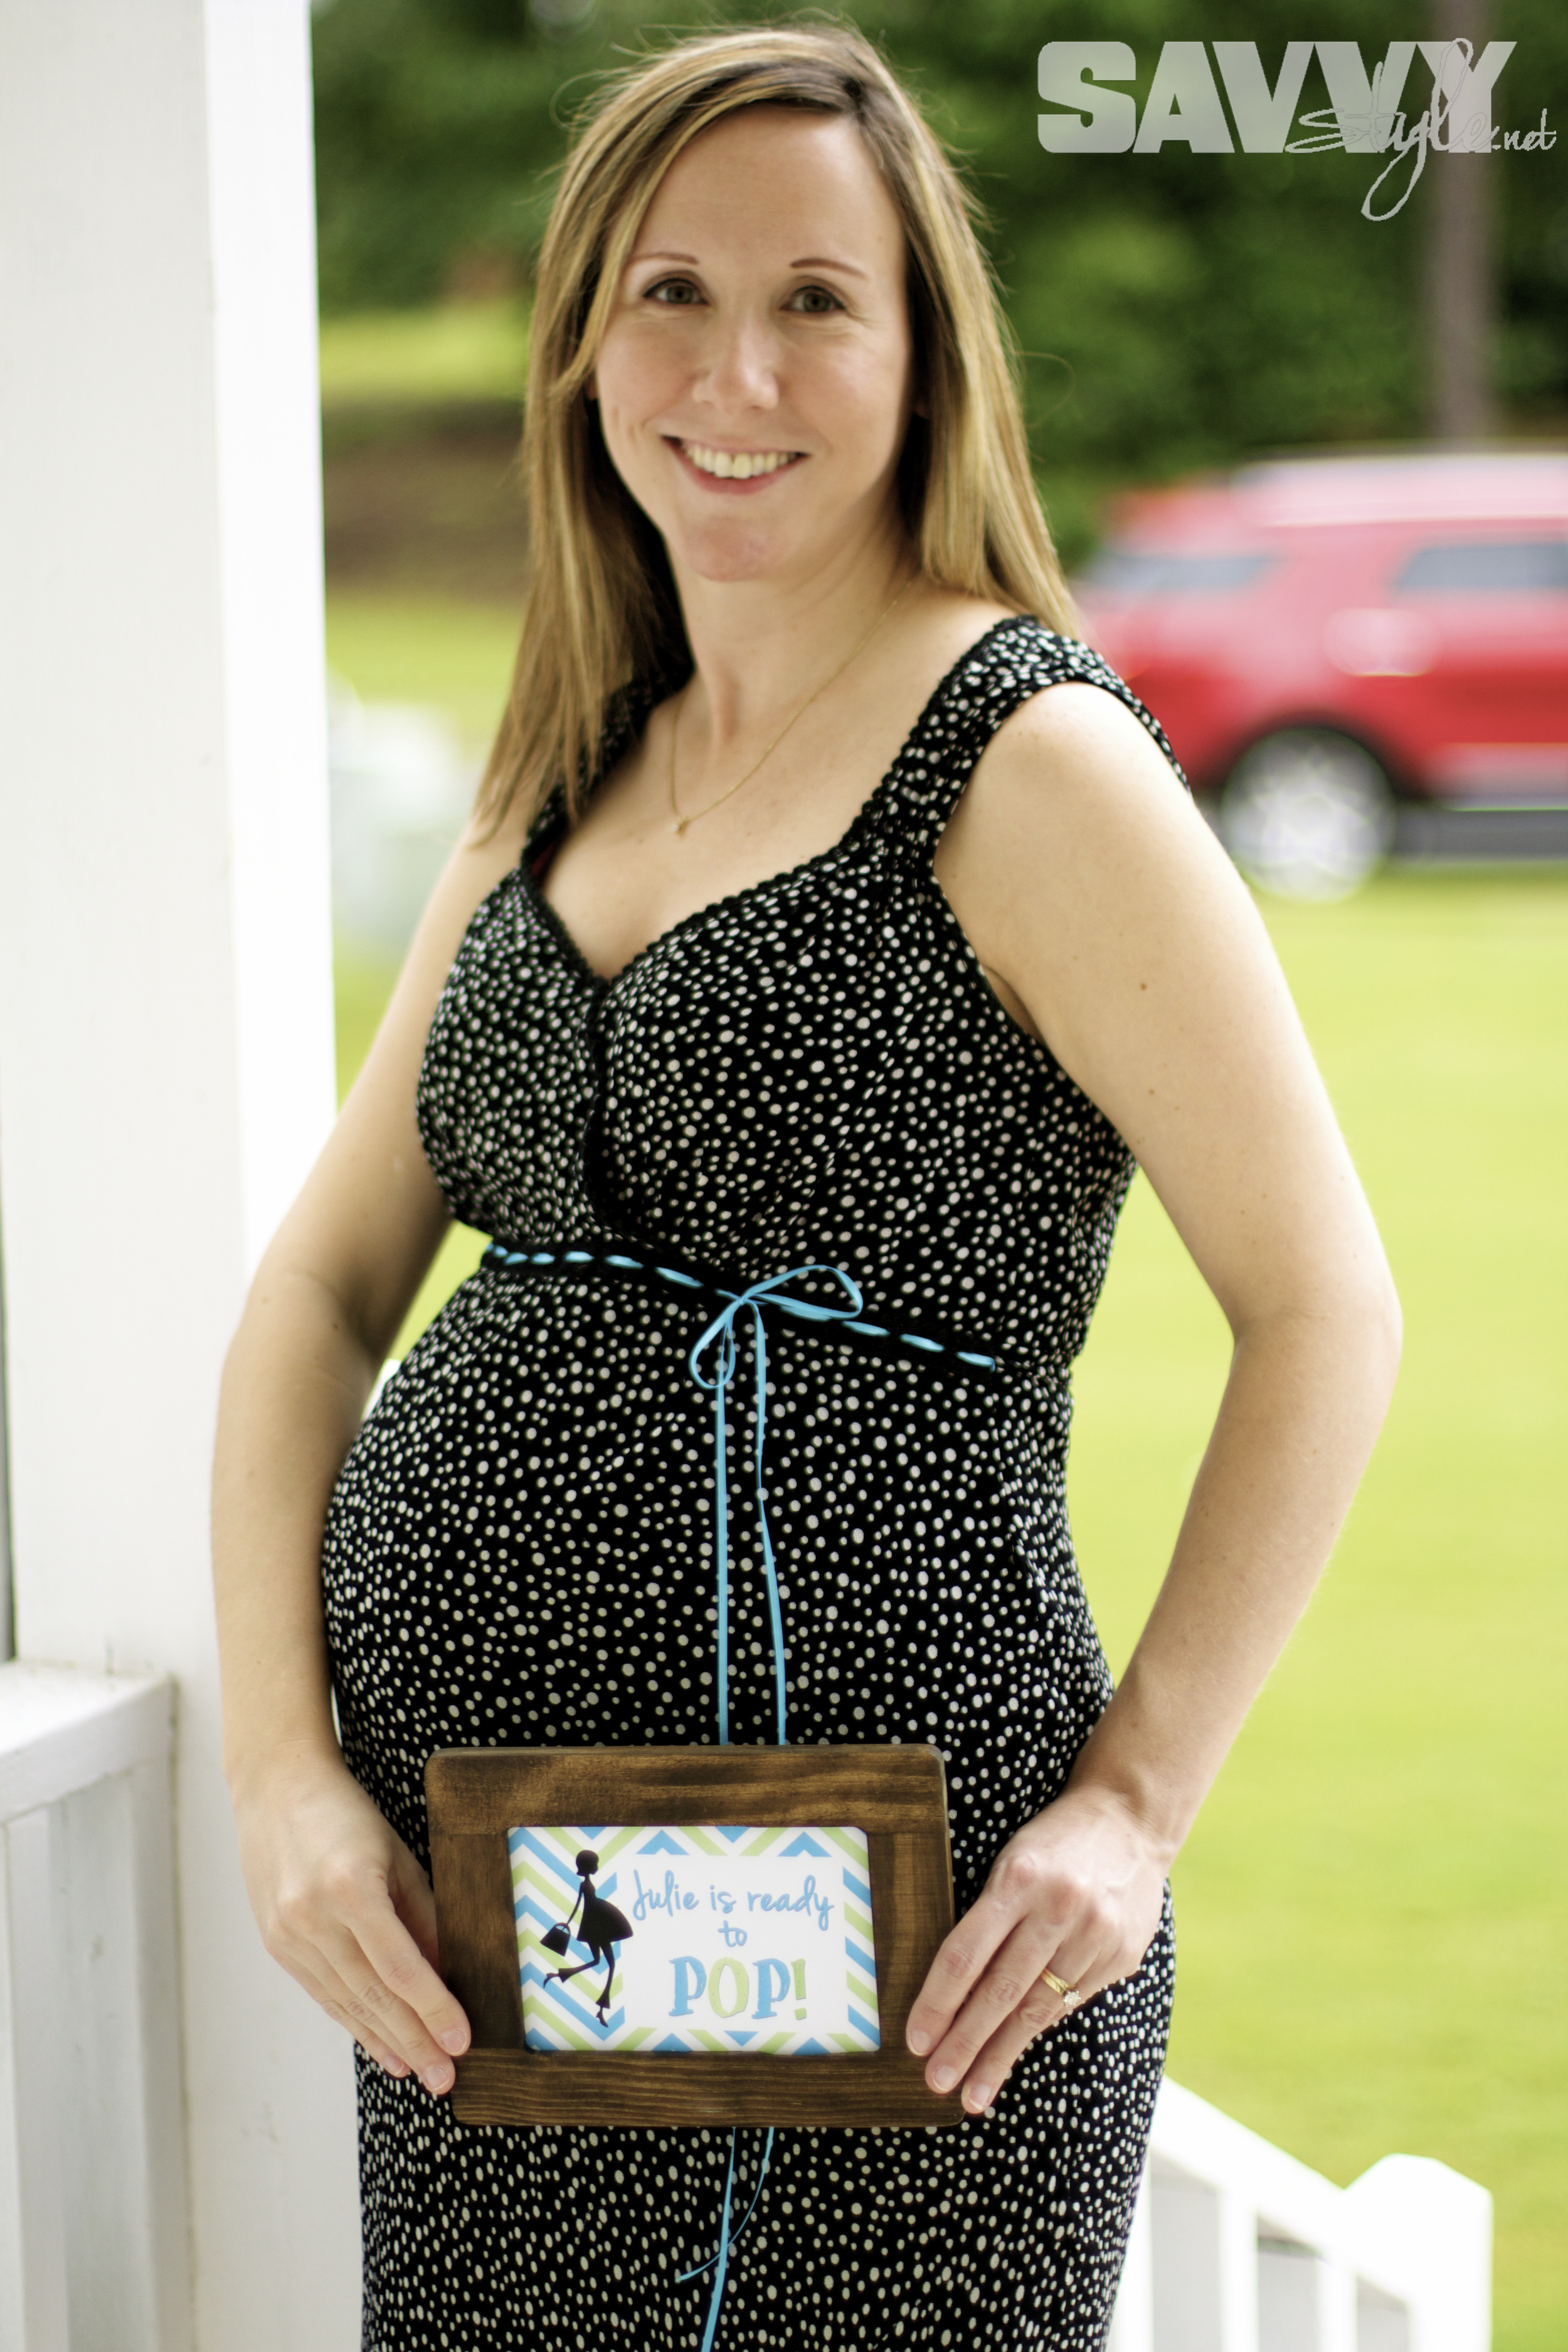
So of course I jumped at the chance to do a fun "Ready to Pop" themed baby shower for my bestie, who is almost ready to pop...literally! She's just weeks away from meeting her sweet baby boy. Here's a glimpse into our fabulous DIY baby shower...with tutorials on some of the fun details to come later this week! From the Caramel Butter POPcorn to Cake POPs to POPcorn chicken and the favors, I had a blast dreaming up ways to incorporate the theme.

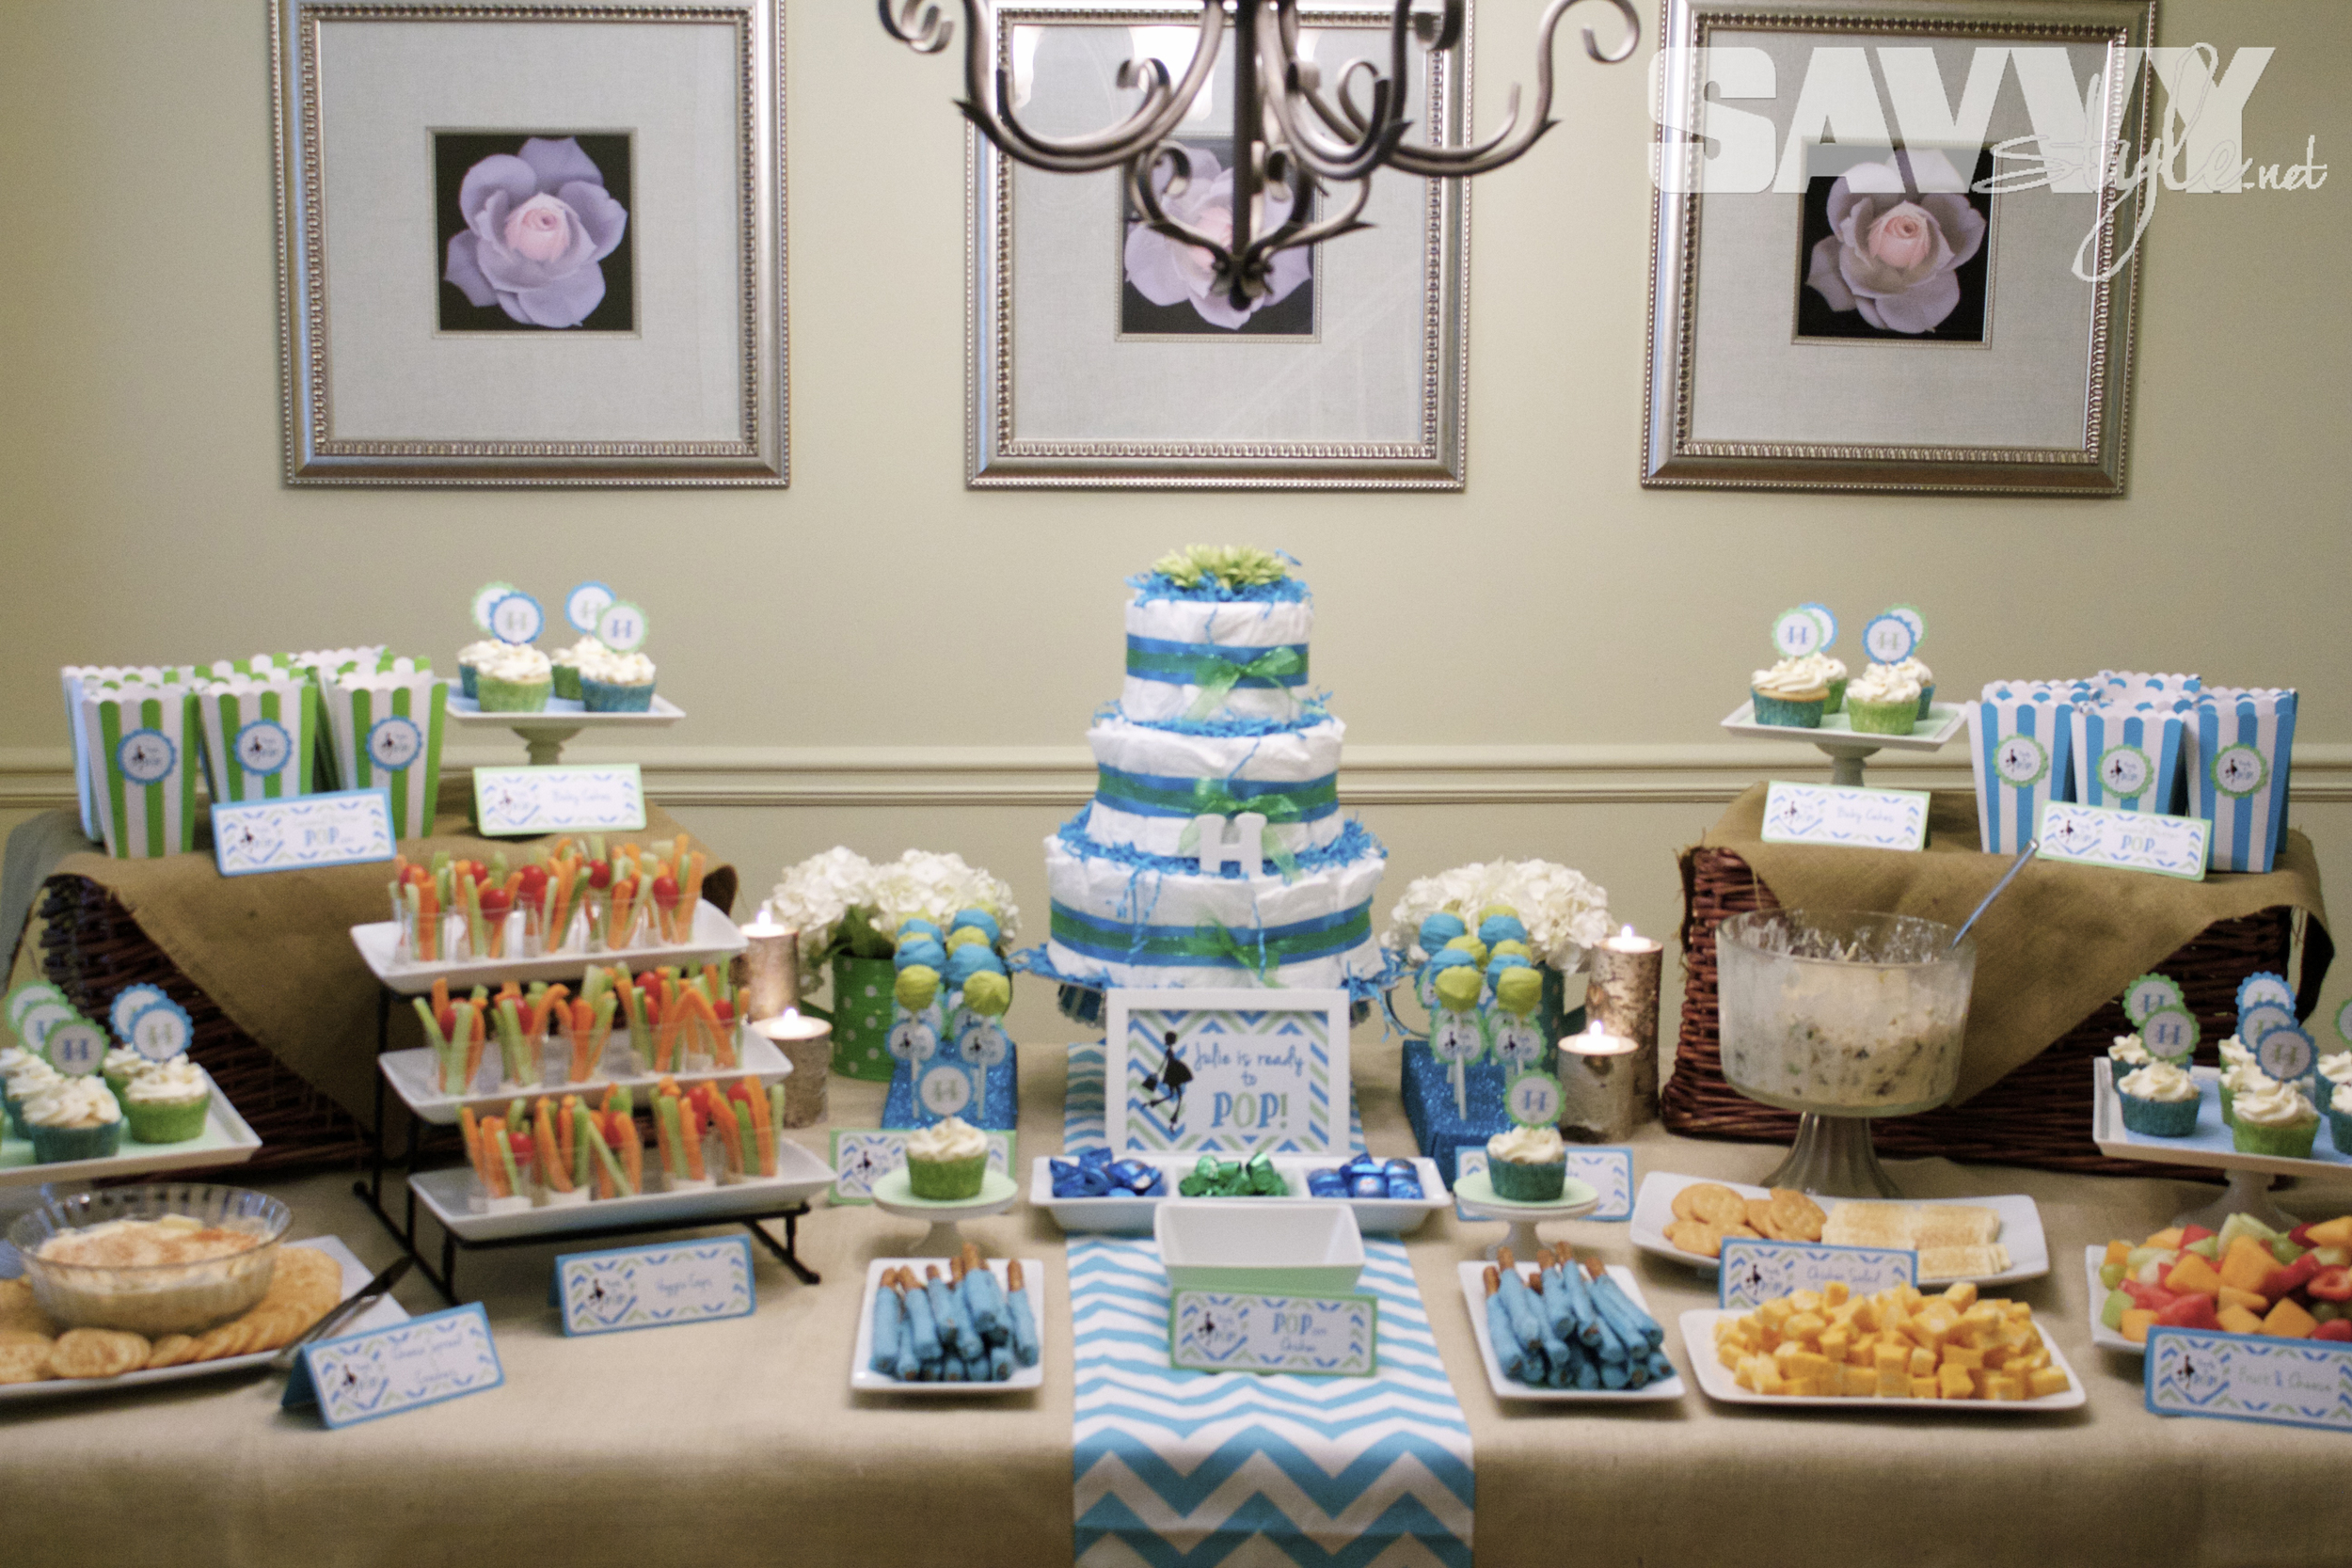

This super simple diaper cake makes a great gift (and centerpiece)...tutorial located HERE! Want an easy and inexpensive way to display your cake pops and add a little bling to your table? Simply get white, rectangle styrofoam pieces from any craft store (example HERE) for a few bucks and cover them in fancy wrapping paper! So simple...yet it makes your cake pops, well...pop. (pun intended)


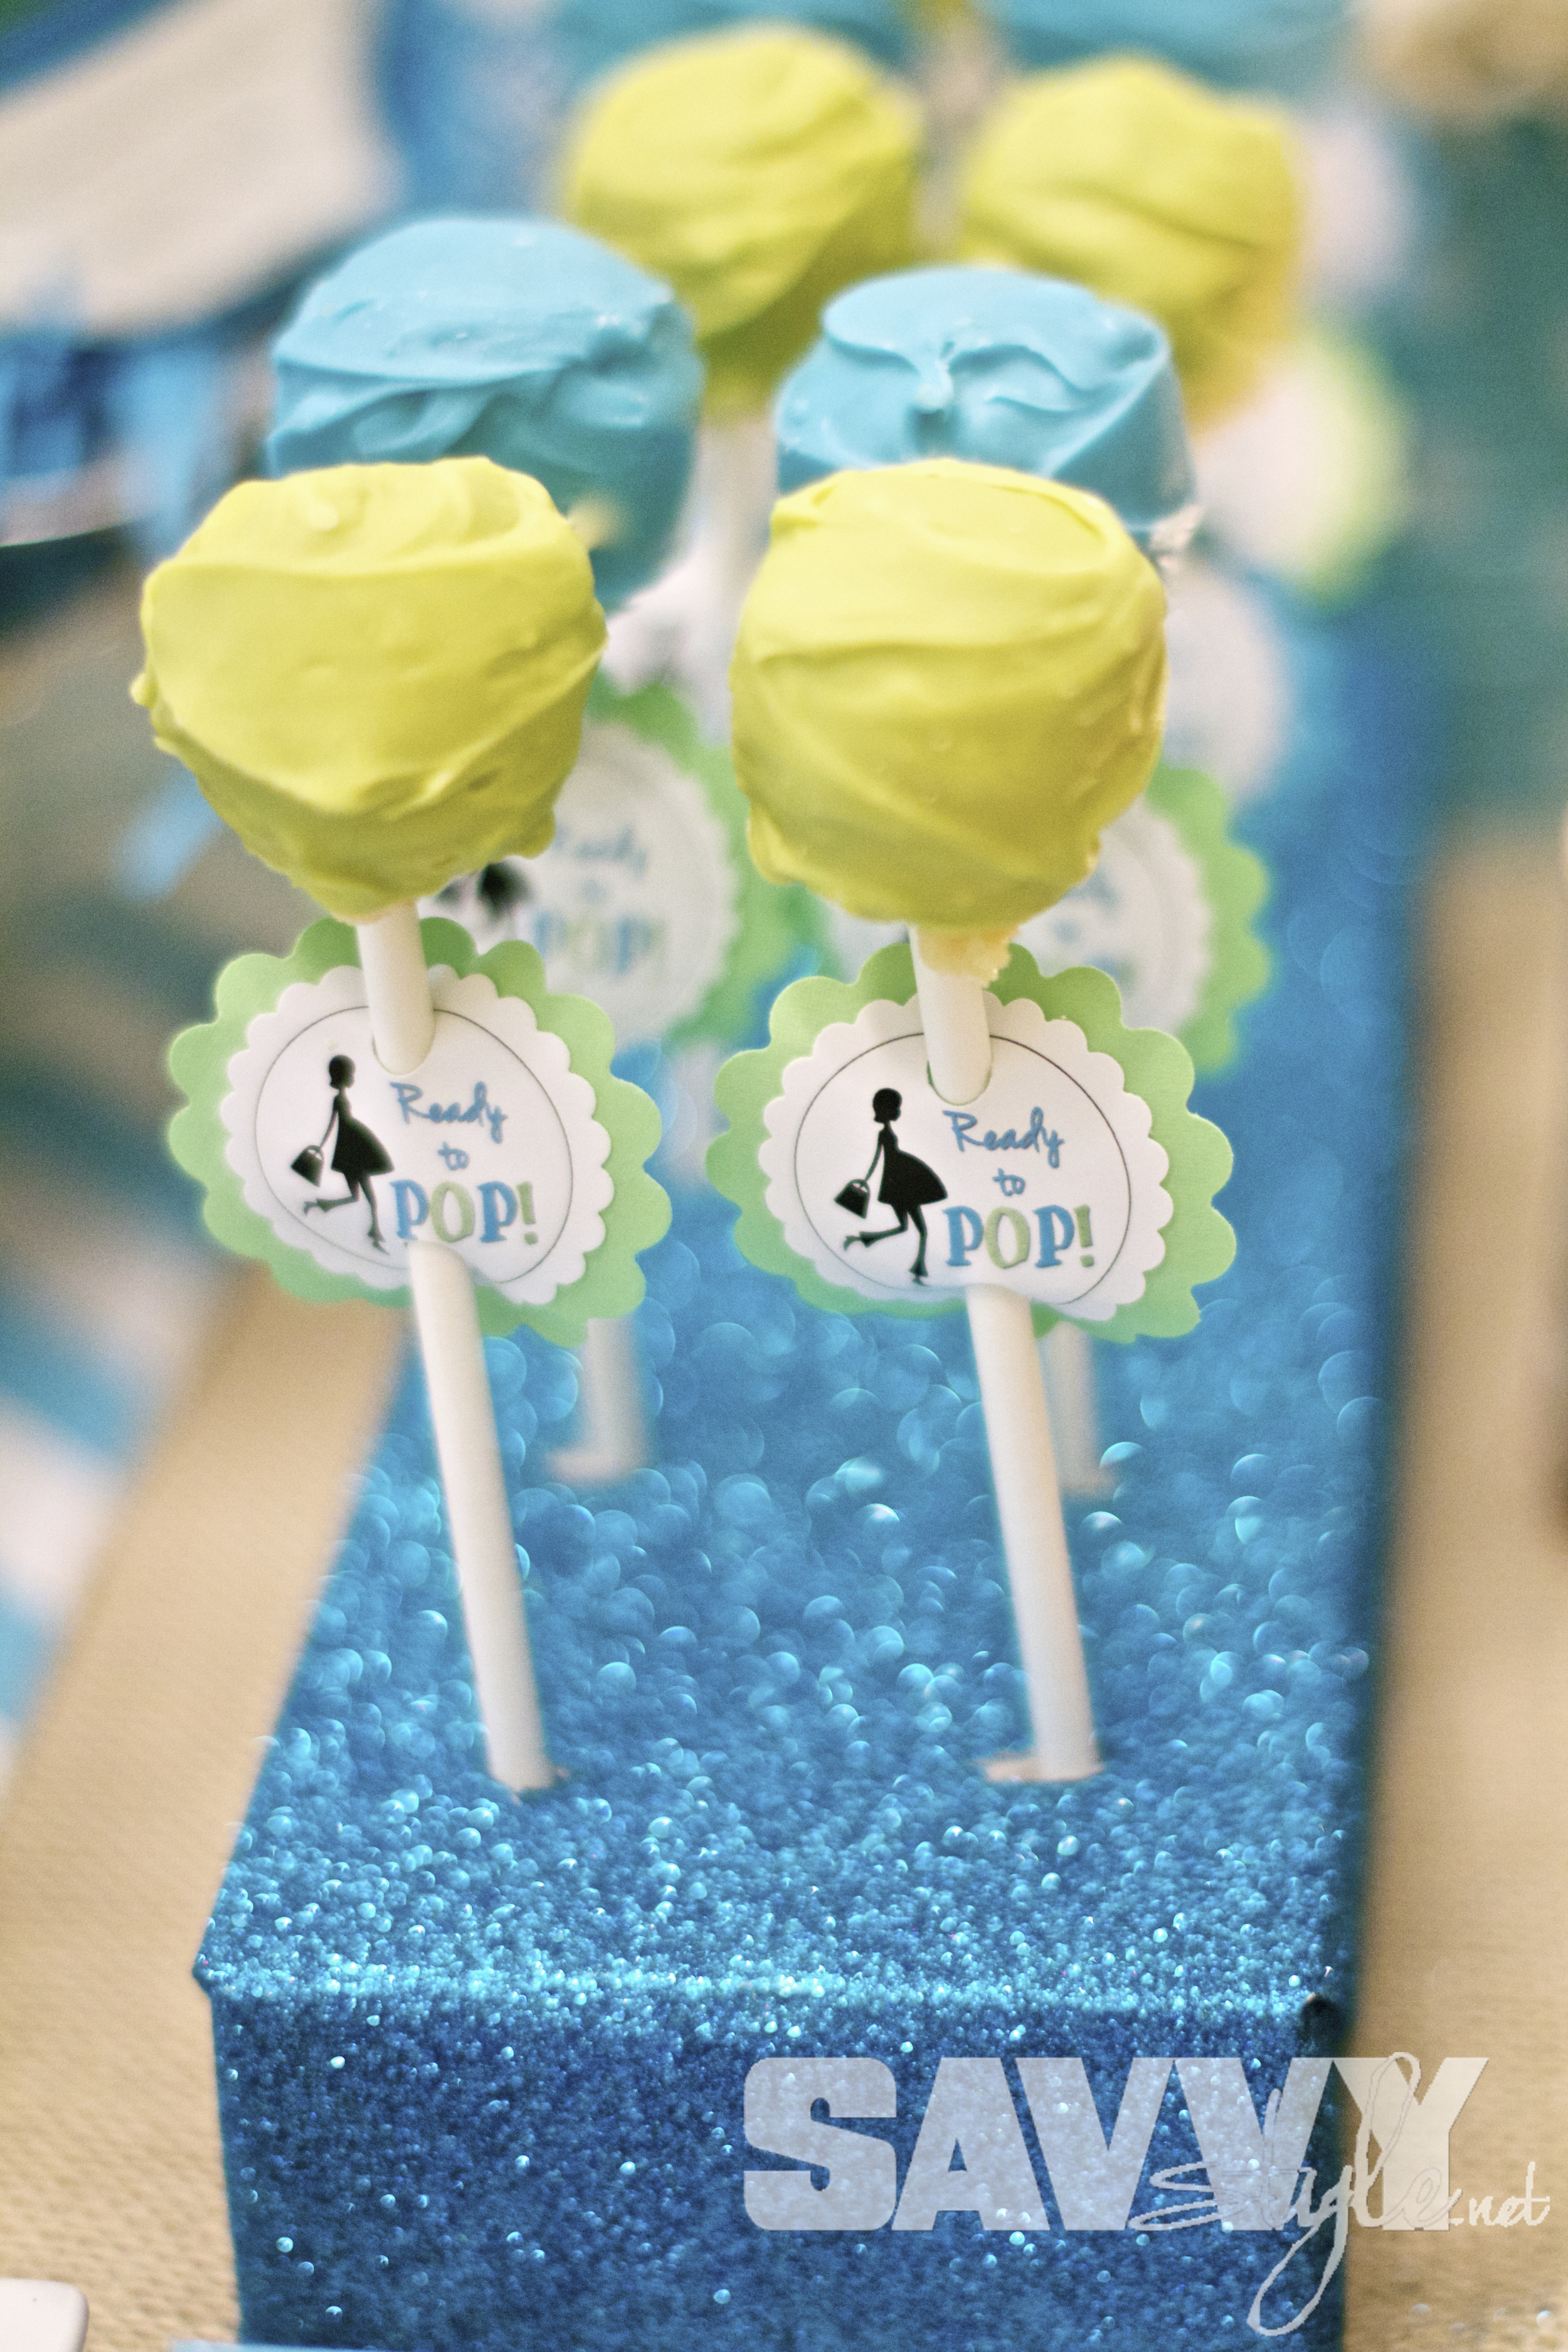


All of the "Ready to Pop" logos were easily created in photoshop...download FREE printables in blue and green OR pink and brown HERE!
I think the cupcake in a jar favors are my new favorite. I just keep finding new awesome ways to use mason jars! Hope you enjoyed this peek into our fun filled day...thanks for POPping by!
(see what I did there? I just can't help myself)

(Disclaimer: This post contains some affiliate links.)